Building a Social Media monitoring tool with NodeJs, Azure Cosmos DB and Azure Cognitive services
April 05, 2021 by Anuraj
NodeJs Azure CosmosDb cognitive Services Text Analytics
This article will discuss about implementing Social Media monitoring tool with NodeJs, Azure Cosmos DB and Azure cognitive services.
Architecture of the application
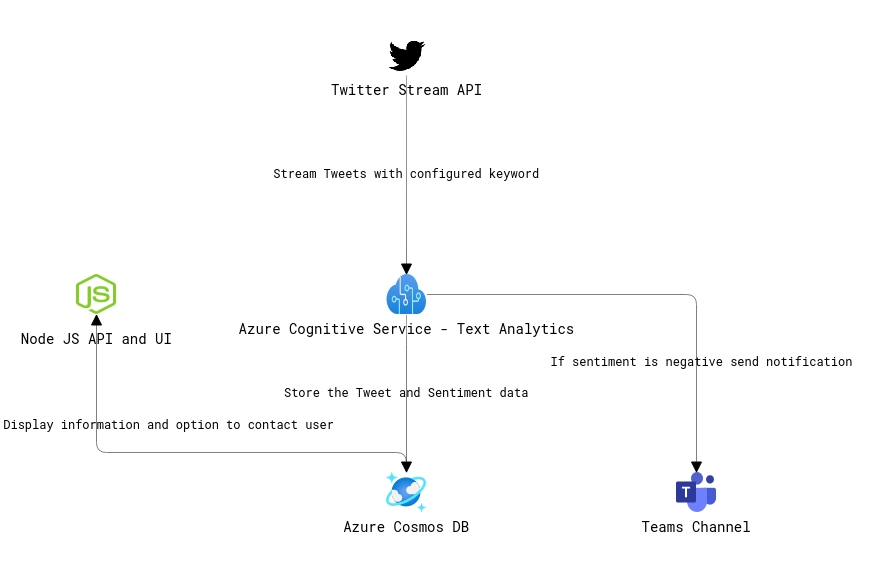
This system will monitor Twitter platform for specific keyword with the help of Twitter Stream API. Once Twitter Stream API push the data - this solution will run sentiment analysis using Azure cognitive services. Once sentiment analysis is completed without any errors - the tweet data along with sentiment information stored in Azure Cosmos DB. And if the sentiment is negative - system will send a notification to configured team channel. All these processes are running in background. There is an associated UI which built on top of Express, helps users to look into various metrics and option to favorite a tweet or send direct message if they support a user.
Here is the high level architecture of the solution.
Prerequisites - Twitter Application and Keys
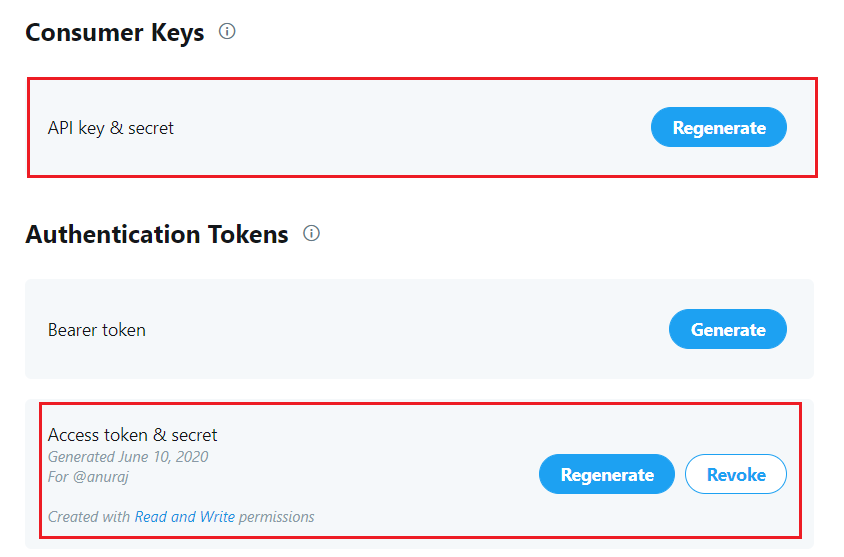
To start you need to create a twitter application, you can create it from https://developer.twitter.com. Once you create an application you need to copy following details - consumer_key,consumer_secret,access_token,access_token_secret.
In the next section, you will learn how to implement Twitter monitoring, Web App etc.
Minimal Web Application using Express
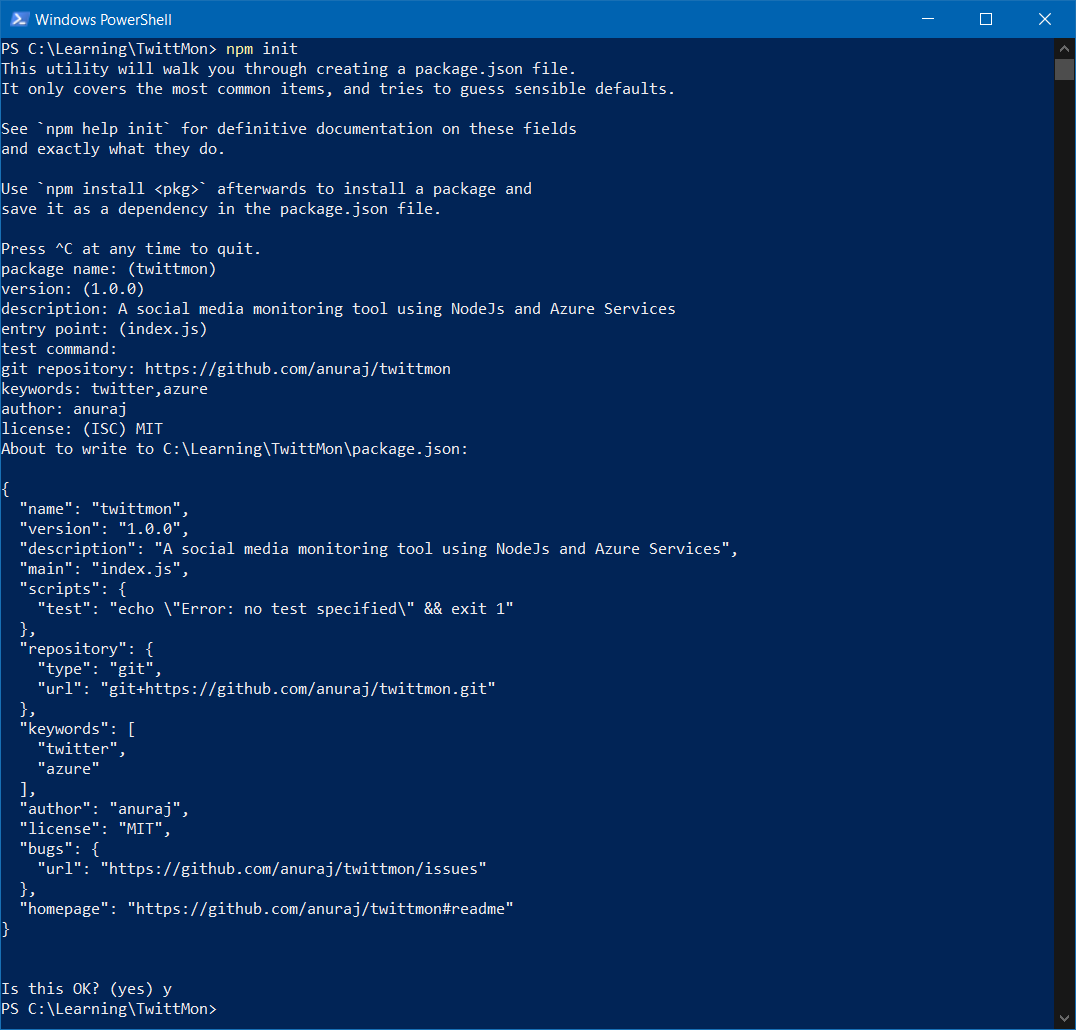
Once you create a Twitter app and got the details, let us build the node application. First you need to run the command npm init. Follow the prompt and complete it.
Next you need to install the express package which helps to expose the APIs and build the user interface. You can install express using npm install express --save command. Now you need to create the entry point file - index.js. And add the following code.
const express = require('express');
const app = express();
const server = require('http').Server(app);

app.get('/', (req, res) => {
    res.send('Hello World!')
});

const listener = server.listen(20202, function () {
    console.log('Your app is listening on port ' + listener.address().port);
});
In this code, you’re initializing a HTTP server and configure a route / and listening on port 20202. When a user tries to browse http://localhost:20202/ it will display Hello World message.
Monitor Twitter for Keywords
For monitor Twitter for specific keywords, Twitter Stream API is used. To use Stream API in the application you need to install the twit node package. You can install it using npm install twit --save. And update the index.js file with the following code.
const express = require('express');
const app = express();
const server = require('http').Server(app);
app.get('/', (req, res) => {
res.send('Hello World!')
});
const Twit = require('twit');
var T = new Twit({
consumer_key: 'YOUR_CONSUMER_KEY',
consumer_secret: 'YOUR_CONSUMER_SECRET',
access_token: 'YOUR_ACCESS_TOKEN',
access_token_secret: 'YOUR_ACCESS_TOKEN_SECRET',
timeout_ms: 60 * 1000
});
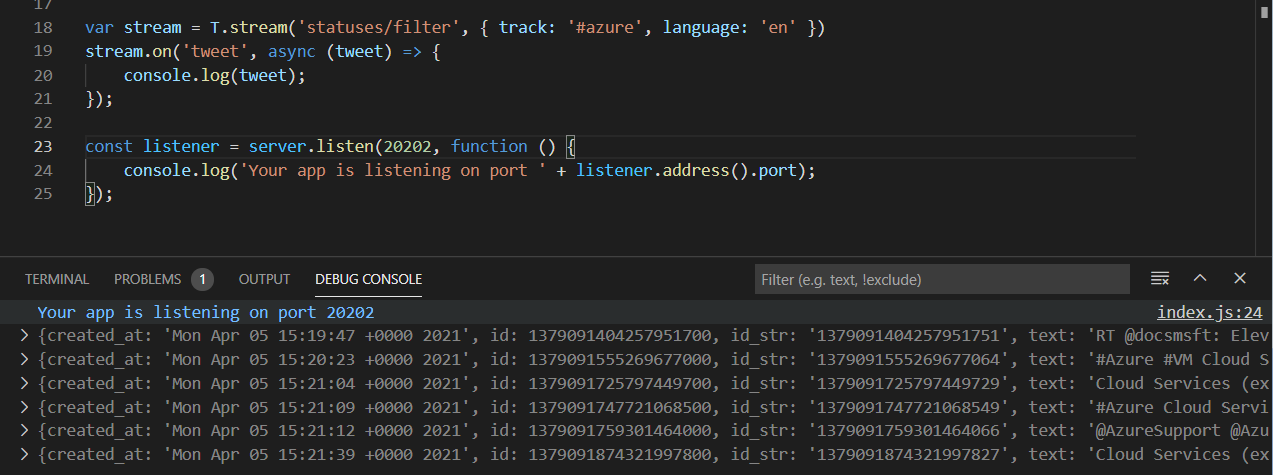
var stream = T.stream('statuses/filter', { track: '#azure', language: 'en' })
stream.on('tweet', async (tweet) => {
console.log(tweet);
});
const listener = server.listen(20202, function () {
console.log('Your app is listening on port ' + listener.address().port);
});In the code, you’re initializing an object of Twit package and looking for a Tweet event with a keyword #azure. Once the event is fired the tweet object is available and you can process it.
In the next section you will learn how to run sentiment analysis using Azure cognitive services.
Running Sentiment Analysis on Tweet Text
To identify the sentiment of the user, you can use Azure sentiment analysis. To use Sentiment Analysis, first you need to create an Azure cognitive service - Text Analytics. Once you create the Text Analytics service, you need to copy the endpoint and key to use the service.
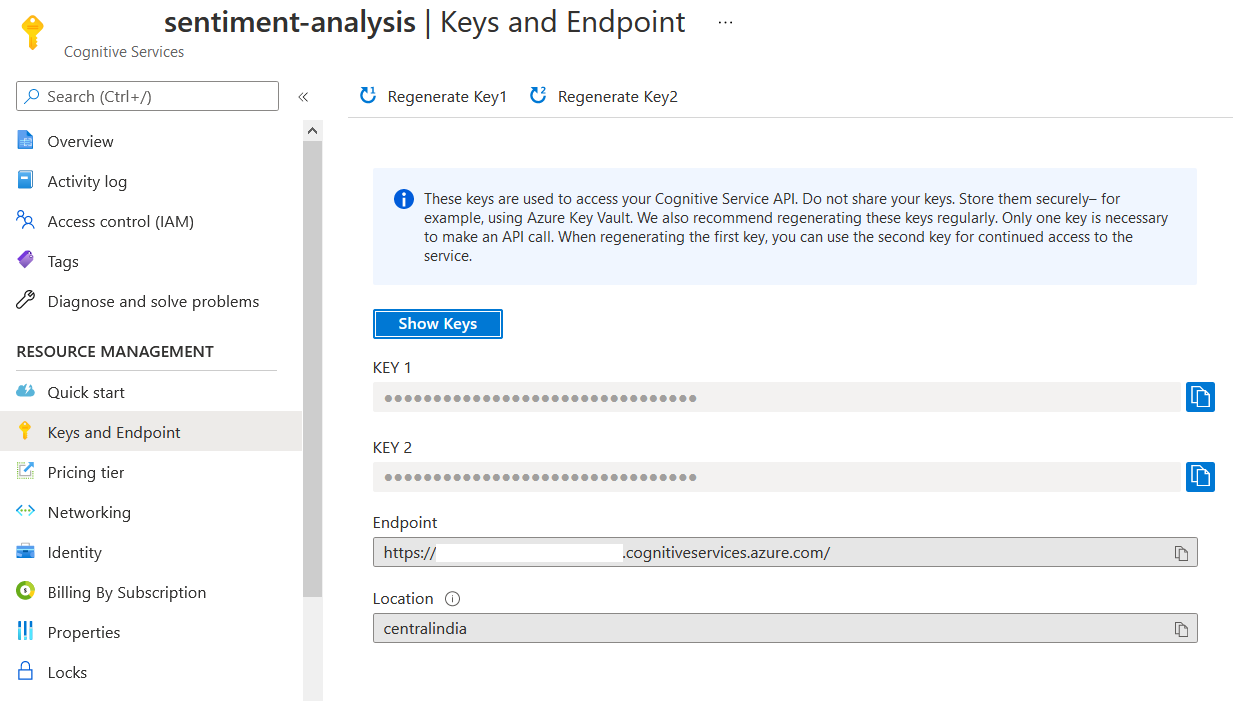
To use Text Analysis you need to install the @azure/ai-text-analytics package. You can do this with the command npm install @azure/ai-text-analytics. Then you need to initialize the TextAnalyticsClient with endpoint and key. Then analyse tweet text with analyzeSentiment method.
const stream = T.stream('statuses/filter', { track: '#azure', language: 'en' })
stream.on('tweet', async (tweet) => {
    const tweetText = tweet.text;
    const documents = [tweetText];
    const results = await textAnalyticsClient.analyzeSentiment(documents);
    console.log(results);
});

const { TextAnalyticsClient, AzureKeyCredential } = require("@azure/ai-text-analytics");
const textAnalyticsClient = new TextAnalyticsClient("YOUR_TEXT_ANALYTICS_ENDPOINT",
    new AzureKeyCredential("YOU_TEXT_ANALYTICS_KEY"));
The result is SentimentBatchResult object. Since you’re passing only one document, you need to check the sentiment property of the 0th object of results. It can be positive, negative and neutral. In the next section, you will learn how to save the tweet and sentiment information to Azure Cosmos DB.
Storing the information to Azure Cosmos DB
For inserting the Tweet and Sentiment JSON data to Azure Cosmos DB, first you need to provision an Azure Cosmos DB account, then a database and container.
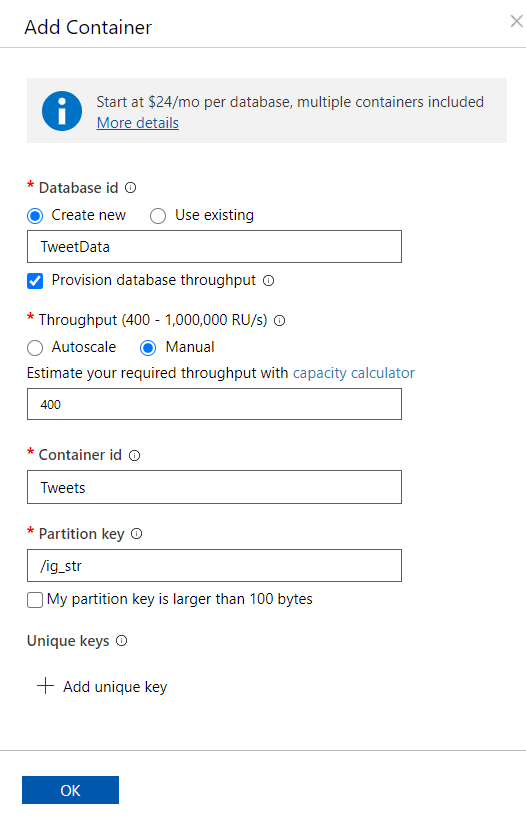
To use Cosmos DB in your code, you need to install the @azure/cosmos package. This one also you can install with npm install @azure/cosmos --save command. Then you need to initialize the CosmosClient class with Cosmos DB endpoint URL and Key. Once create the CosmosClient instance, you need to configure the database and container objects. Then you can insert the data using container.items.create API. Here is the updated code.
const stream = T.stream('statuses/filter', { track: '#azure', language: 'en' })
stream.on('tweet', async (tweet) => {
    const tweetText = tweet.text;
    const documents = [tweetText];
    const results = await textAnalyticsClient.analyzeSentiment(documents);
    const result = results[0];
    if (result.error === undefined) {
        const tweetAndSentiment = { tweet: tweet, sentiment: result };
        await container.items.create(tweetAndSentiment);
    }
});

const CosmosClient = require("@azure/cosmos").CosmosClient;
const cosmosClient = new CosmosClient({
    endpoint: "YOUR_COSMOSDB_ENDPOINT", key: "YOUR_KEY"
});
const database = cosmosClient.database("TweetData");
const container = database.container("Tweets");
If you’re using Azure Cosmos DB emulator, you need to set an environment variable process.env["NODE_TLS_REJECT_UNAUTHORIZED"] = 0; in the beginning of the code. Otherwise you will get an exception due to self signed certificate. In the next section you will learn how to send notification to Teams channel if a negative tweet is posted.
Sending Notification to Teams Channel
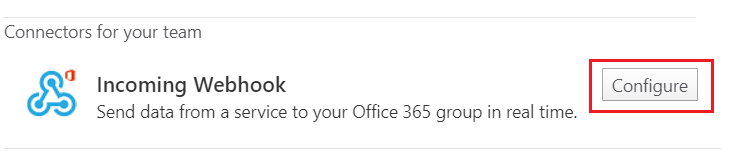
For sending the notification to Teams Channel, you need to configure Web Hook connector. Once you configure the Web Hook connector, you will get a URL. To configure Incoming Web Hook, right click on the channel and choose Connectors menu option. And from the dialog click on the configure button for Incoming WebHook.
In the configure window, provide a name for the Incoming WebHook and click on create.
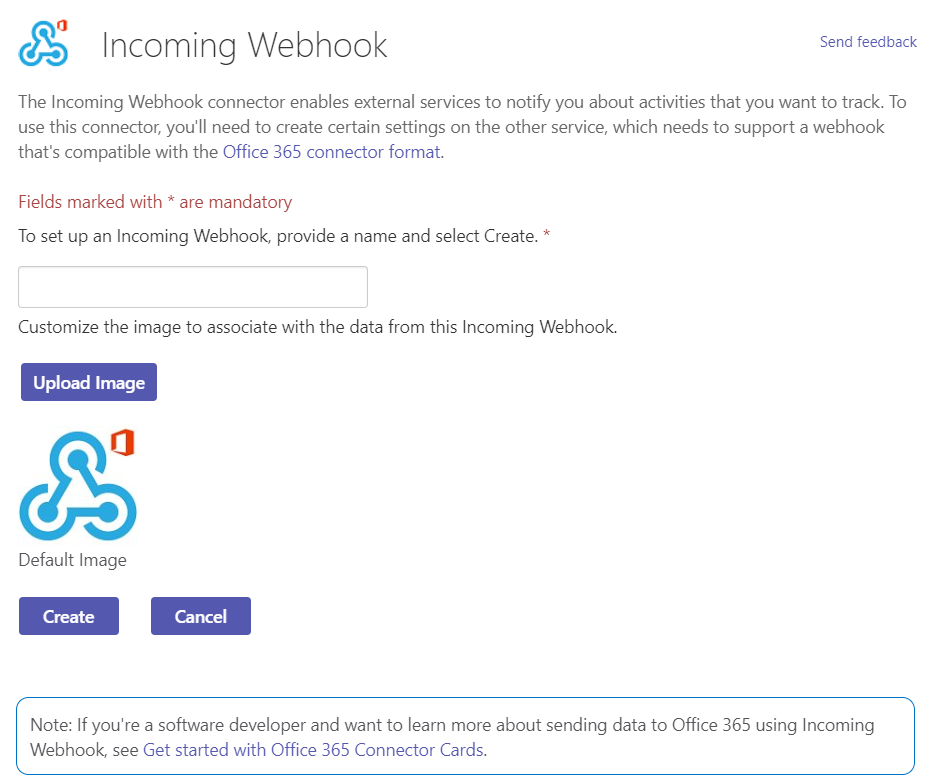
Once you create it, you will get a URL. You need this URL to send notification. To send the notification you need a package - ms-teams-webhook. Here is the code for sending notification if the result of sentiment analysis is negative.
const url = 'YOUR_WEBHOOK_URL_FROM_CONNECTOR';
const { IncomingWebhook } = require('ms-teams-webhook');
const webhook = new IncomingWebhook(url);

if (result.sentiment === "negative") {
    let username = tweet.user.screen_name;
    let tweetId = id;
    console.log('Raised an issue: ', `https://twitter.com/${username}/status/${tweetId}`);
    await webhook.send(JSON.stringify({
        "@type": "MessageCard",
        "@context": "https://schema.org/extensions",
        "summary": "Some one raised an issue.",
        "themeColor": "0078D7",
        "title": `Tweet : https://twitter.com/${username}/status/${tweetId}`,
        "sections": [
            {
                "activityTitle": username,
                "activitySubtitle": tweet.created_at,
                "text": tweet.text
            }
        ]
    }));
}
Now you have completed the backed implementation. In the next section you will learn how to build a front end dashboard and making the realtime updates with Socket.IO.
Building the Front end and Dashboard
For frontend and APIs, Express is used. In the monitoring aspects apart from the Teams Notification, a dashboard is build like this.
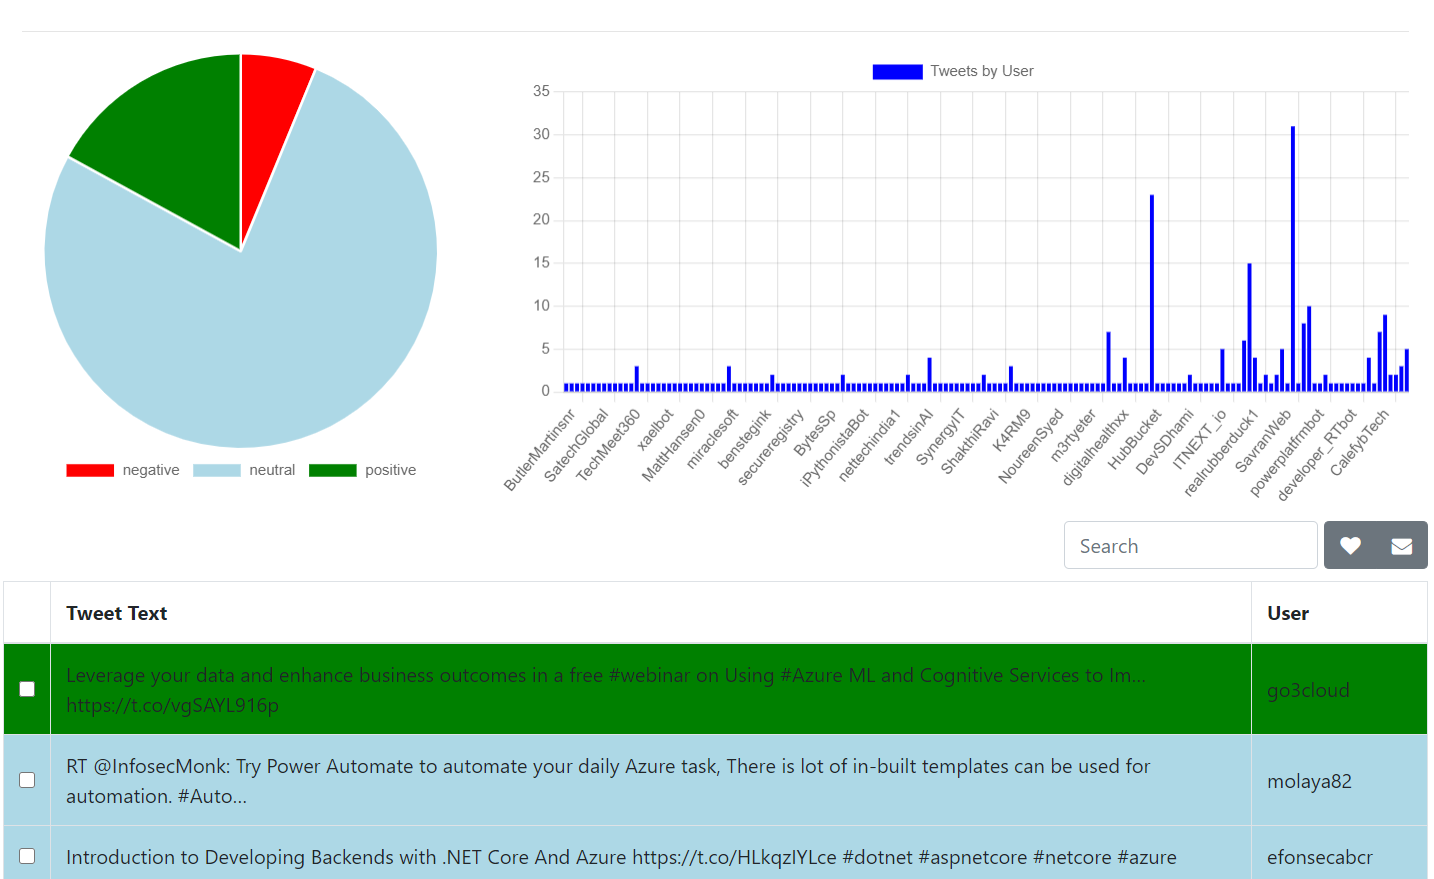
The charts are displayed using Chart.js javascript library and for the table - bootstrap table client packages are used. The Pie chart will display the sentiment of tweets. The Bar chart will display the users with number of posts. In the table, each tweet is displayed - color will be changed based on the sentiment. For making the dashboard real time, Socket.IO is used. To use Socket.IO, first you need to install the Socket.IO package. You can do this with the command -npm install socket.io --save And add the following code.
var io = require('socket.io')(server);

io.on('connection', function (socket) {
    console.log("Client connected");
});
const stream = T.stream('statuses/filter', { track: '#azure', language: 'en' })
stream.on('tweet', async (tweet) => {
    //Existing code.
    io.emit('dashboardupdate', {});
});
So when a tweet event triggered, Socket.IO will emit an event - dashboardupdate to connected clients. And in the client side, you need to write code to update the chart and tables. Here is the code.
var socket = io();
socket.on('connect', function (data) {
    console.log('connected');
});
socket.on('dashboardupdate', function (data) {
    updateBarChart();
    updatePieChart();
    var $table = $('#table');
    $table.bootstrapTable('refresh');
});
This way the frontend is updated when ever there a tweet event fired from the stream. This way you can build a social media monitoring tool using NodeJs, Azure Cosmos DB and cognitive services. Instead of building the charts and other visualizations using Javascript, you can import the data in Power BI and explore more. Facebook and LinkedIn Stream API support is not available. You can explore the Brand Page Web Hook model and integrate into the solution. You can find the full source code of the application on GitHub
Happy Programming :)
Copyright © 2024 Anuraj. Blog content licensed under the Creative Commons CC BY 2.5 | Unless otherwise stated or granted, code samples licensed under the MIT license. This is a personal blog. The opinions expressed here represent my own and not those of my employer. Powered by Jekyll. Hosted with ❤ by GitHub