Deploy a website with Azure virtual machines - Creating SSL certificates
June 23, 2023 by Anuraj
Azure IAAS Virtual Machine AspNetCore
This post is about how to deploy an ASP.NET Core web application in Azure Virtual machines. This is part of series where we will be discussing about setting up web server, configuring custom domains, creating and installing SSL certificate in web server and finally configuring CI / CD pipelines to deploy our application to Azure VM from Azure DevOps. In this blog post we will be exploring about creating SSL certificate for the web server.
We will be using Azure CLI and Powershell for the implementation. For this post I am using LetsEncrypt as the certificate authority.
First we need to install win-acme - which offers a dotnet tool. We can install it by running the command dotnet tool install win-acme --global. To create the certificate, I am using the DNS verification method - where I will be updating the DNS records of the my domain provider. This method is easy for me. There are other methods available as well. We can execute the following steps and create a free SSL certificate.
- Open terminal, execute the following command -
wacs
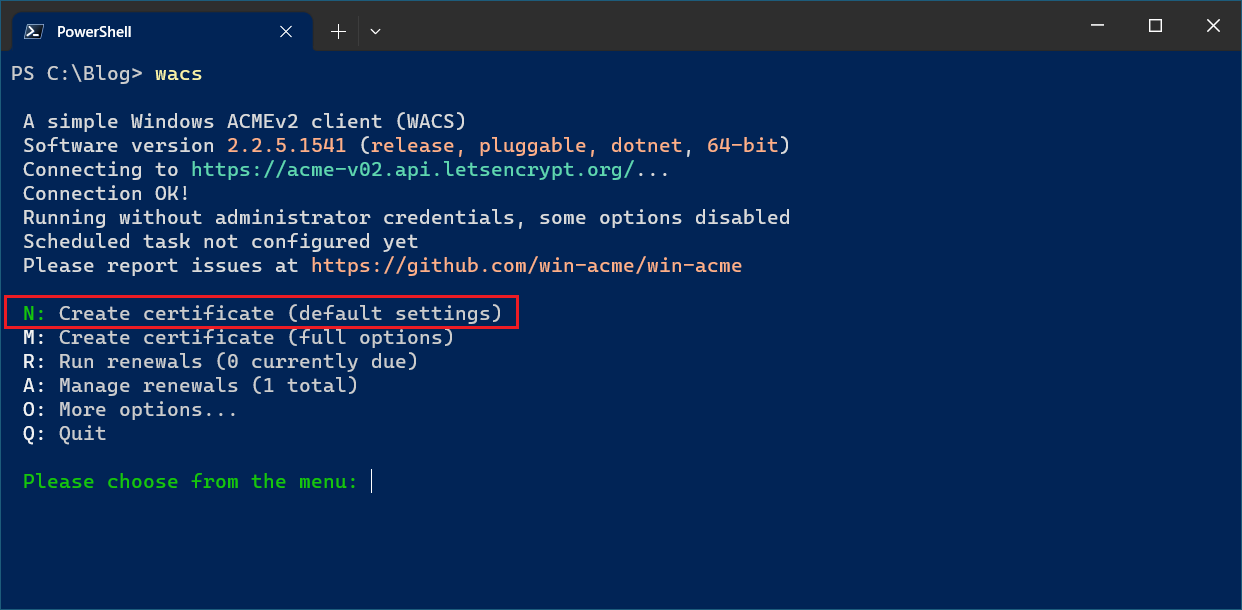
This will prompt a console wizard like this - as I am running as normal user, some of the IIS features will not be enabled for me. We need to enter the first option (N).
- In the second step, we can set the 2 option - Manual input.
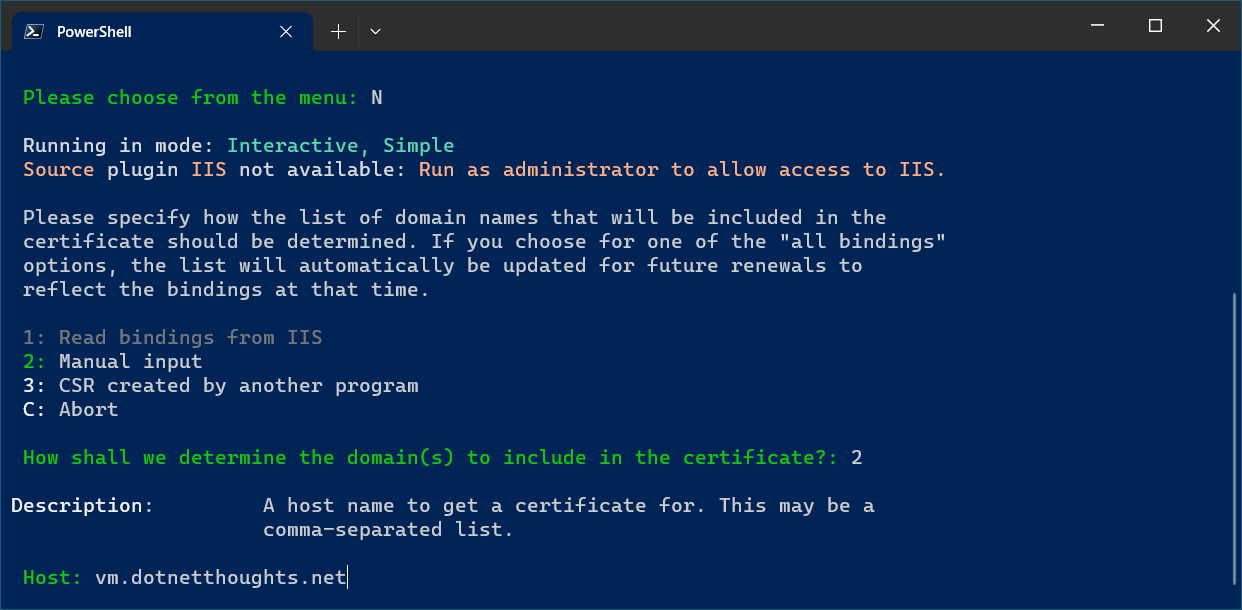
- Next step, we need to enter the domain name, we are using
vm.dotnetthoughts.net.
- In the 4th step, we need to validate the domain name authorization, as mentioned earlier I am choosing the option 6 -
Create verification records manually (auto-renew not possible).

- Next we need to select where we want to store the certificate, once it is generated, I am selecting the default PFX archive option.
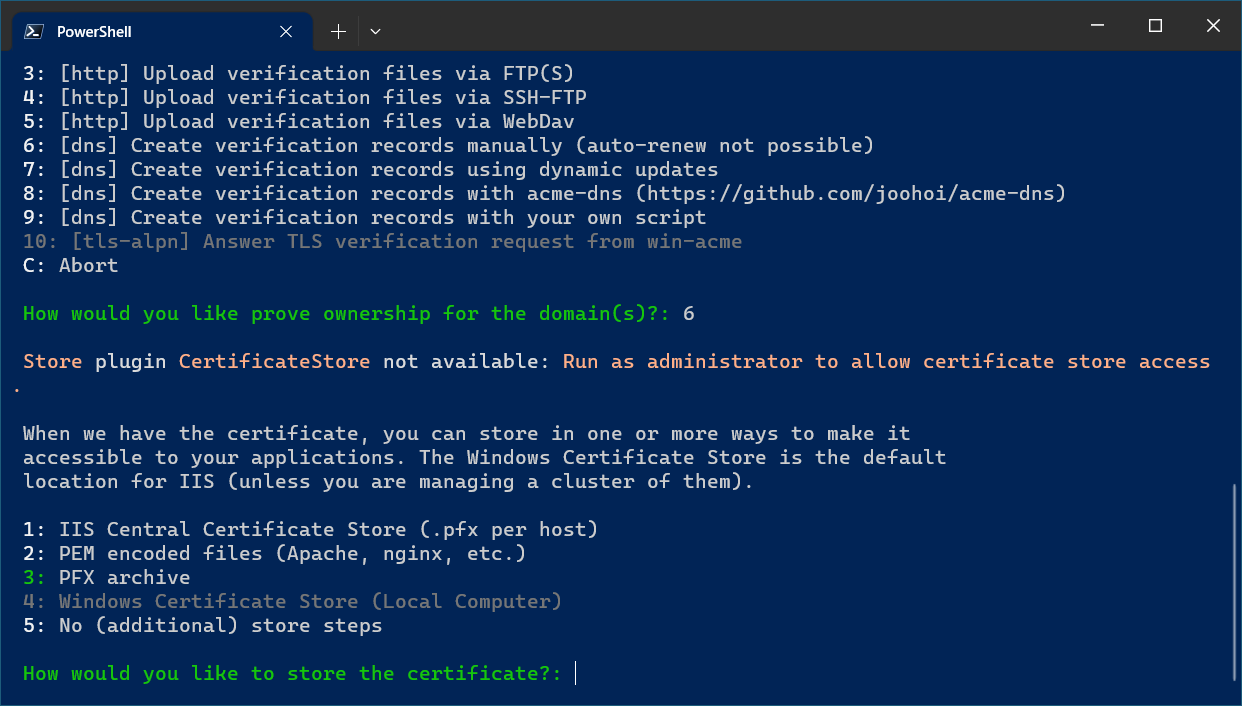
- Once we select the option, it will prompt for a location. We need to enter one location.
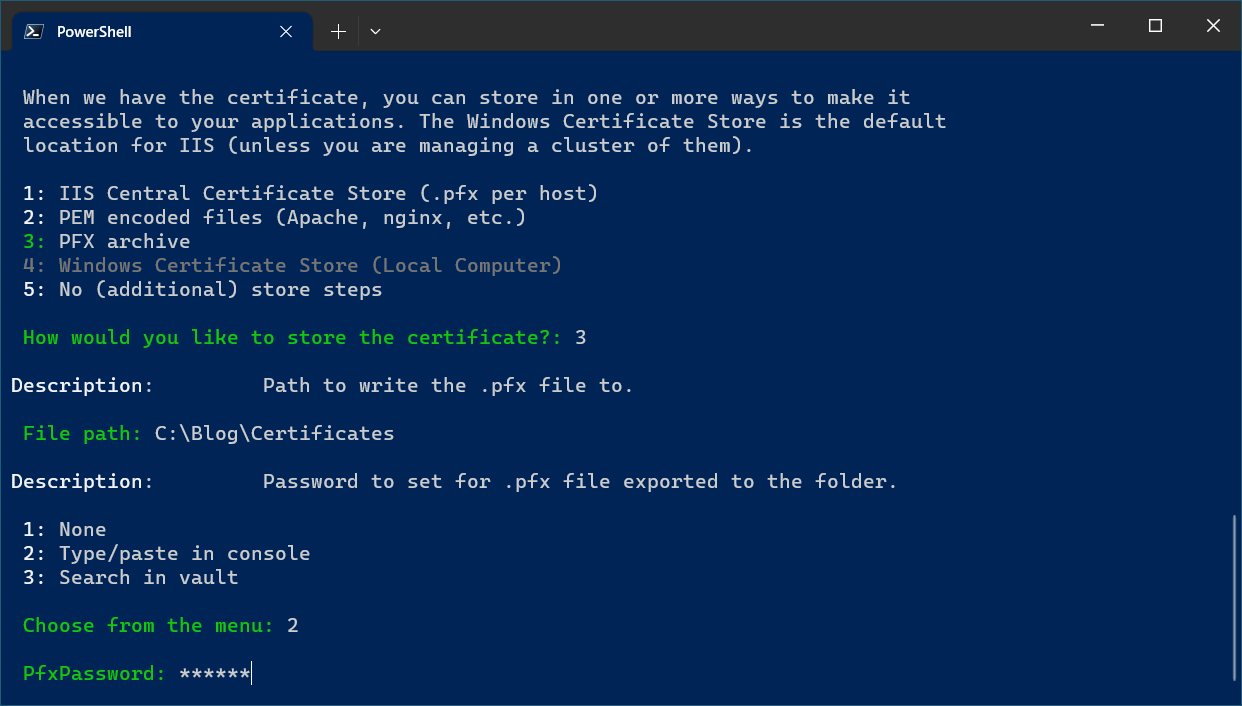
- And once the location is provided, we need to give the password for the certificate, I am entering it manually, so I am choosing the 2 option. And I am entering the PFX password.s
In the next step, it will prompt for
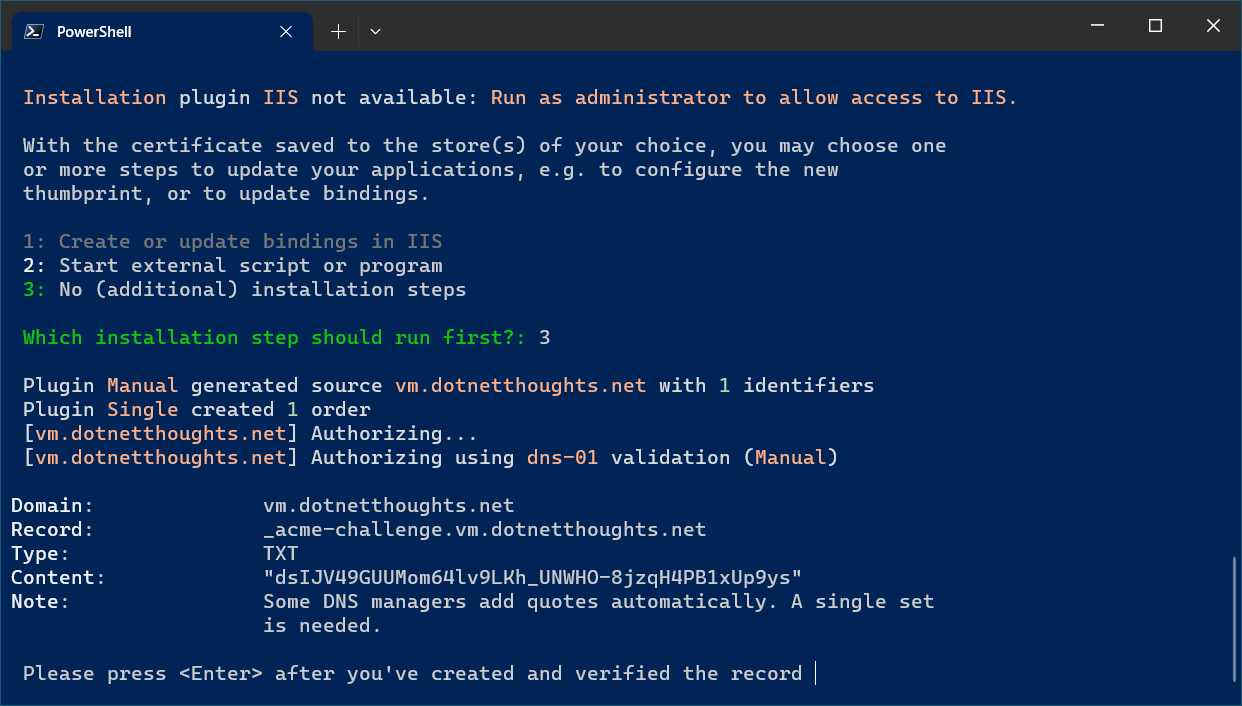
Save to vault for future reuse, I am entering No for the option. And in the next step I am selecting 3 option - No (additional) installation steps - since I am manually updating the certificate and bindings.In the next step, the tool will prompt and show the DNS settings we need to update in the domain control panel.
And once it is done, we can press enter and verify the changes.
- And in the domain control panel, add the TXT records like this.

As I am using Google Domains, it will propagate the changes very fast and we will be able to verify quickly. Once validation is successful, we can delete the DNS record. The tool will prompt to delete it and it will validate the deletion as well.
- Once it is completed, the tool will generate PFX file and display the details in the screen.
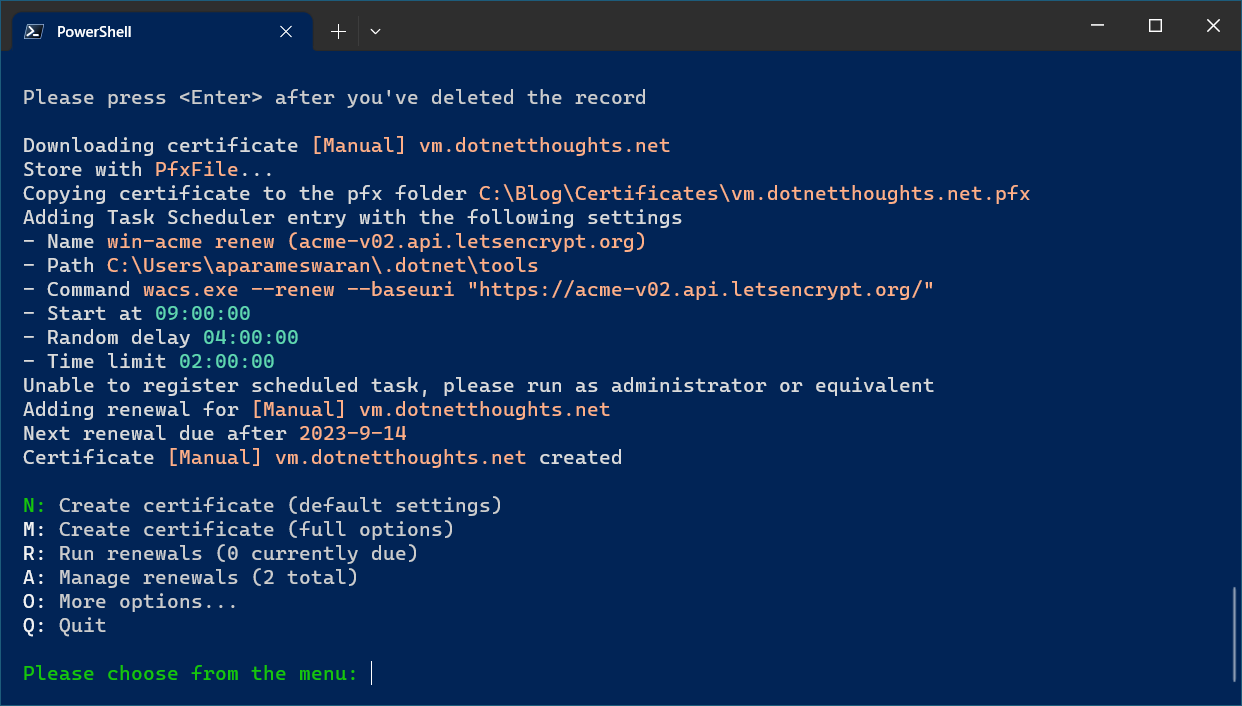
And we can quit from the tool, by entering Q as the option.
This way we can use the win-acme tool and LetsEncrypt to generate free PFX file. Please note - this certificate will not renew automatically, we need to renew it before expiry. In the next blog post, we will explore how we can install it in the Azure VM and configure IIS bindings.
Happy Programming.
Copyright © 2024 Anuraj. Blog content licensed under the Creative Commons CC BY 2.5 | Unless otherwise stated or granted, code samples licensed under the MIT license. This is a personal blog. The opinions expressed here represent my own and not those of my employer. Powered by Jekyll. Hosted with ❤ by GitHub