Building Dotnet with Gitlab CI
December 29, 2016 by Anuraj
aspnet core mvc Gitlab CI
This post is about enabling Continuous Integration of .NET projects in Gitlab. Majority of GitLab’s CI examples are around Open Source technologies. In this post I will explain about implementing CI in ASP.NET and ASP.NET Core projects with Gitlab.
Building ASP.NET project with Gitlab
In GitLab CI, Runners run your yaml. A runner is an isolated (virtual) machine that picks up builds through the coordinator API of GitLab CI. So for building ASP.NET you need to first create a runner on your Windows system. You can find the install and configuration details on GitLab wiki.
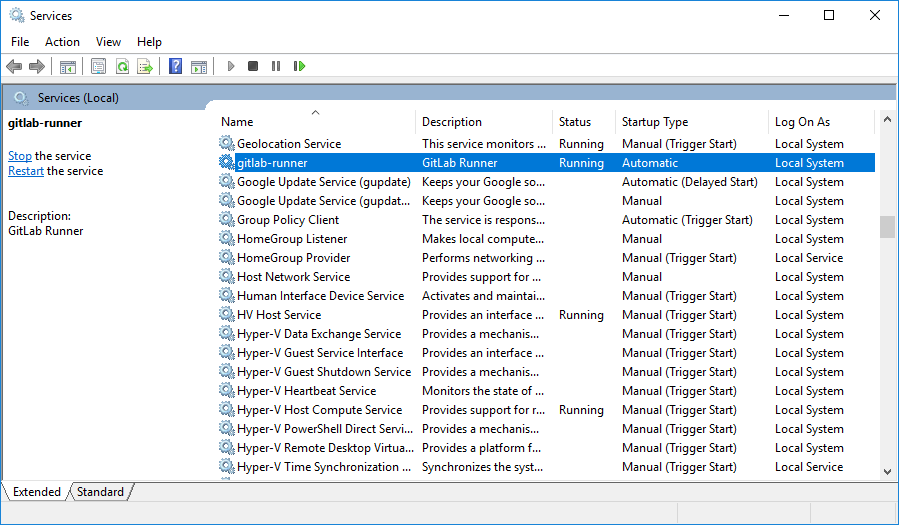
Once installation is proper, you can find the Gitlab runner in your services.

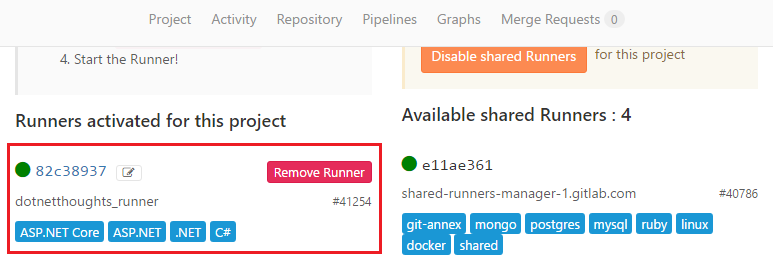
You can find the runner in the project runners section.

Now for enabling the continuous integration, need to add .gitlab-ci.yml file. Here is a sample .gitlab-ci.yml, which will restore the packages and build the solution.
stages:
    - build
before_script:
  - 'C:\Nuget\nuget.exe restore MVCApp.sln'
job:
    stage: build
    script: '"C:\Program Files (x86)\MSBuild\14.0\Bin\MSBuild.exe" "MVCApp.sln"'
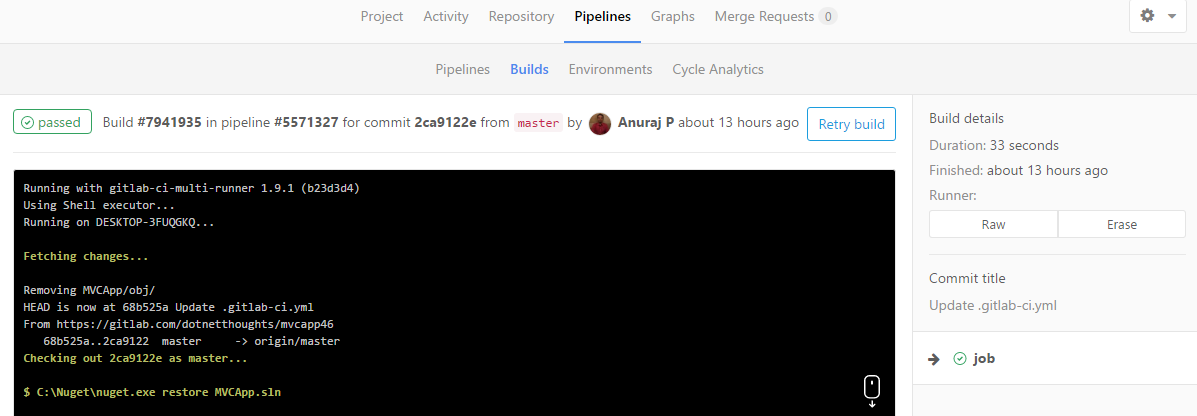
Make sure you have nuget.exe is installed on C:\Nuget folder. And you have MSBuild.exe (VS2015) installed on Program Files folder. Once you commit any changes, the build will be triggered and here is the details of completed build.

You can include the MSTest or NUnit as part of the yml file.
Building ASP.NET Core project with Gitlab
You can use similar approach for ASP.NET Core project as well. GitLab supports Docker based CI as well. So here is the .gitlab-ci.yml file for building ASP.NET Core projects.
image : microsoft/dotnet:latest
stages:
  - build
before_script:
  - 'dotnet restore'
build:
 stage: build
 script:
  - 'dotnet build'
 only:
   - master
This file will download the microsoft/dotnet image, before executing the build script, Gitlab will execute dotnet restore command, and in the build stage, Gitlab will execute the dotnet build command.
Happy Programming :)
Found this useful? Share it with your network!
Copyright © 2026 Anuraj. Blog content licensed under the Creative Commons CC BY 2.5 | Unless otherwise stated or granted, code samples licensed under the MIT license. This is a personal blog. The opinions expressed here represent my own and not those of my employer. Powered by Jekyll. Hosted with ❤ by GitHub
