Building your first MCP Server in .NET and C#
July 20, 2025 by Anuraj
dotnet ai mcp csharp
In the earlier blog post, I mentioned about the Microsoft.Extensions.AI.Templates - which comes with a MCP Server project template. We will be using this template to create MCP Server. MCP servers are services that expose capabilities to clients through the Model Context Protocol (MCP).
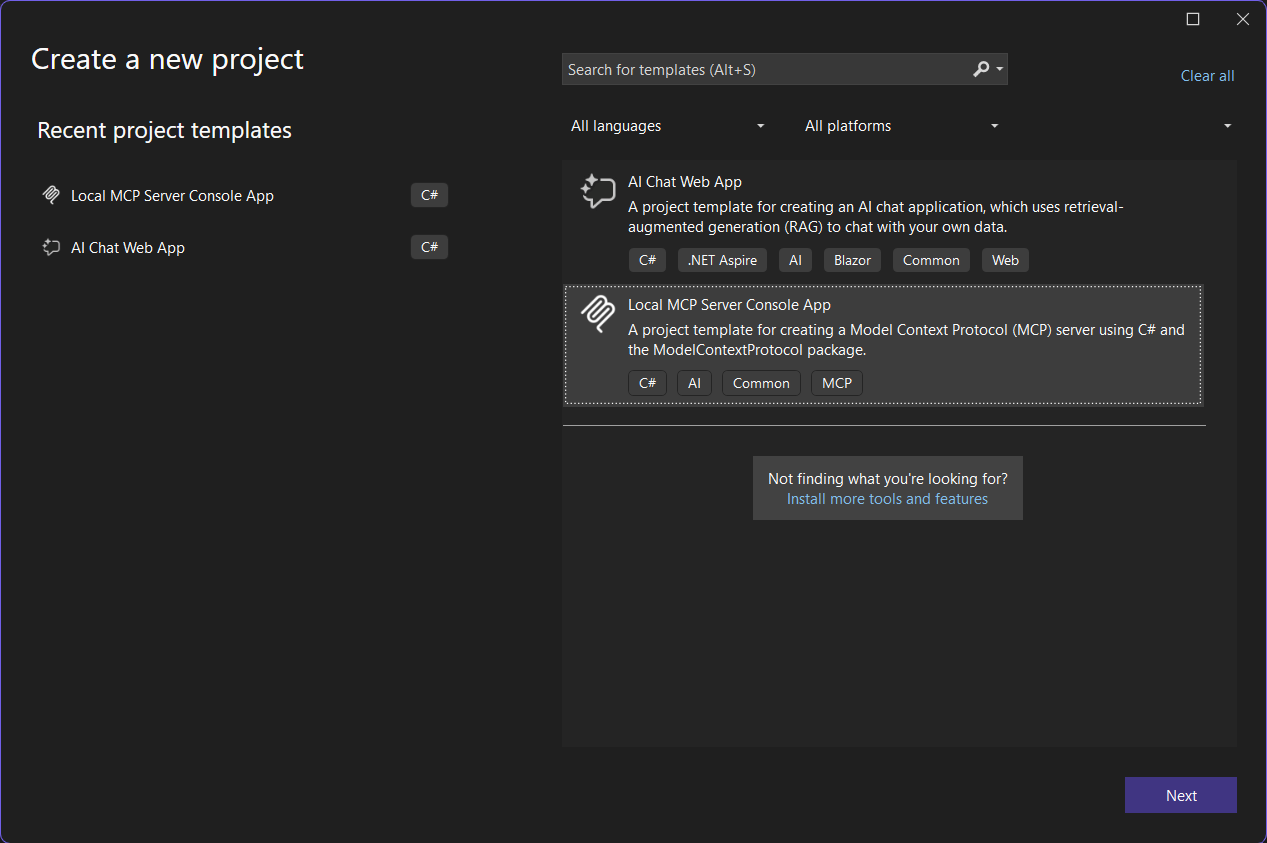
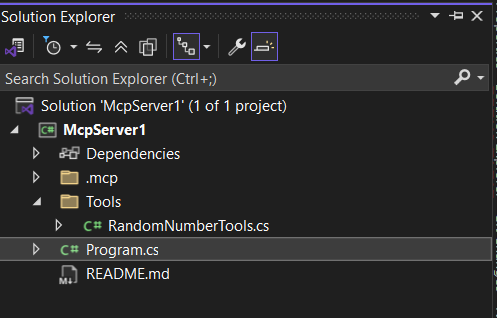
With the current project template, we can only create stdio projects - SSE or HTTP based MCP servers are not supported. The project creation is simple and straight forward, we need to set the name and location to store the project. It will create a project with following structure.
The program.cs contains the following code
using Microsoft.Extensions.DependencyInjection;
using Microsoft.Extensions.Hosting;
using Microsoft.Extensions.Logging;

var builder = Host.CreateApplicationBuilder(args);

// Configure all logs to go to stderr (stdout is used for the MCP protocol messages).
builder.Logging.AddConsole(o => o.LogToStandardErrorThreshold = LogLevel.Trace);

// Add the MCP services: the transport to use (stdio) and the tools to register.
builder.Services
    .AddMcpServer()
    .WithStdioServerTransport()
    .WithTools<RandomNumberTools>();

await builder.Build().RunAsync();
It is creating a console application with dependency injection and adding support for MCP Server middlewares and one MCP Tool. Instead of logging to stdout - we are configuring logging to stderr - because MCP server and client is communicated through stdout.
And here is the code inside RandomNumberTools.cs file
using System.ComponentModel;
using ModelContextProtocol.Server;

/// <summary>
/// Sample MCP tools for demonstration purposes.
/// These tools can be invoked by MCP clients to perform various operations.
/// </summary>
internal class RandomNumberTools
{
    [McpServerTool]
    [Description("Generates a random number between the specified minimum and maximum values.")]
    public int GetRandomNumber(
        [Description("Minimum value (inclusive)")] int min = 0,
        [Description("Maximum value (exclusive)")] int max = 100)
    {
        return Random.Shared.Next(min, max);
    }
}
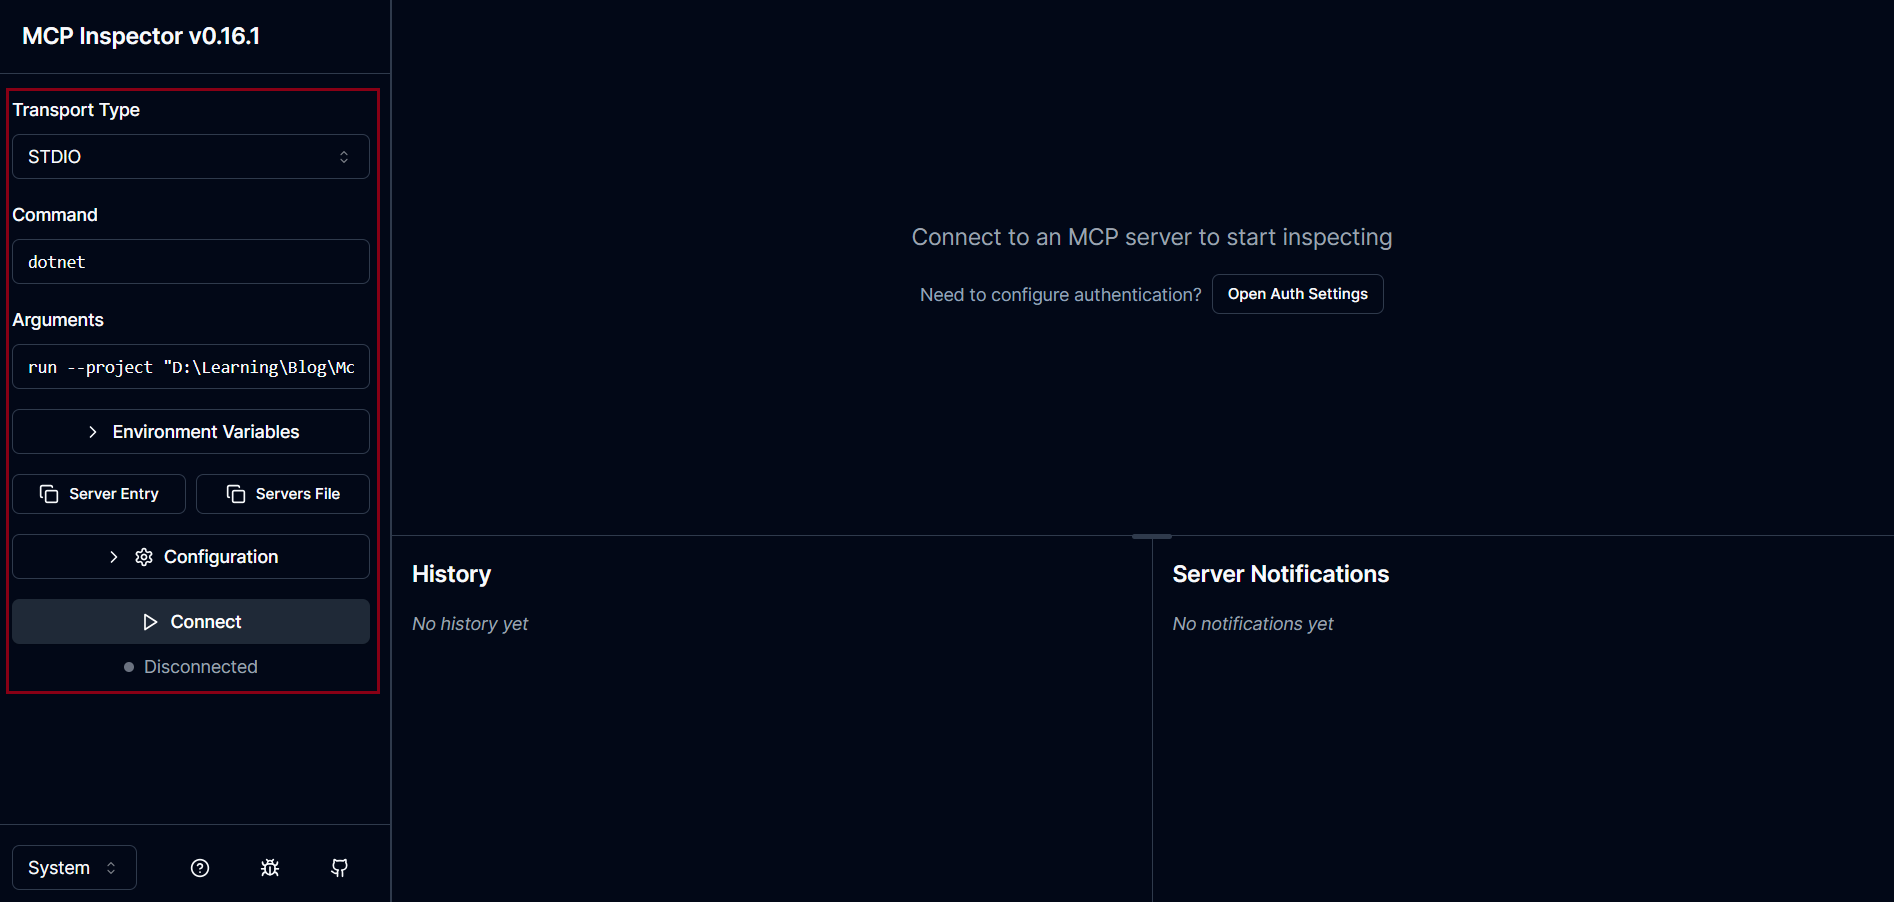
In this example, only one Random Number tool is implemented which returns a random number between minimum and maximum values specified. By decorating with a method with McpServerTool attribute will expose the method as MCP tool - which LLMs can be consumed. For testing the server - we can first run this command npx @modelcontextprotocol/inspector - which will open MCP Inspector app in browser, where we can configure Transport Type - select STDIO, next for Command set dotnet, and finally Arguments set the value run --project <LOCATION_OF_THE_MCP_SERVER_PROJECT>. Next click on the connect button.
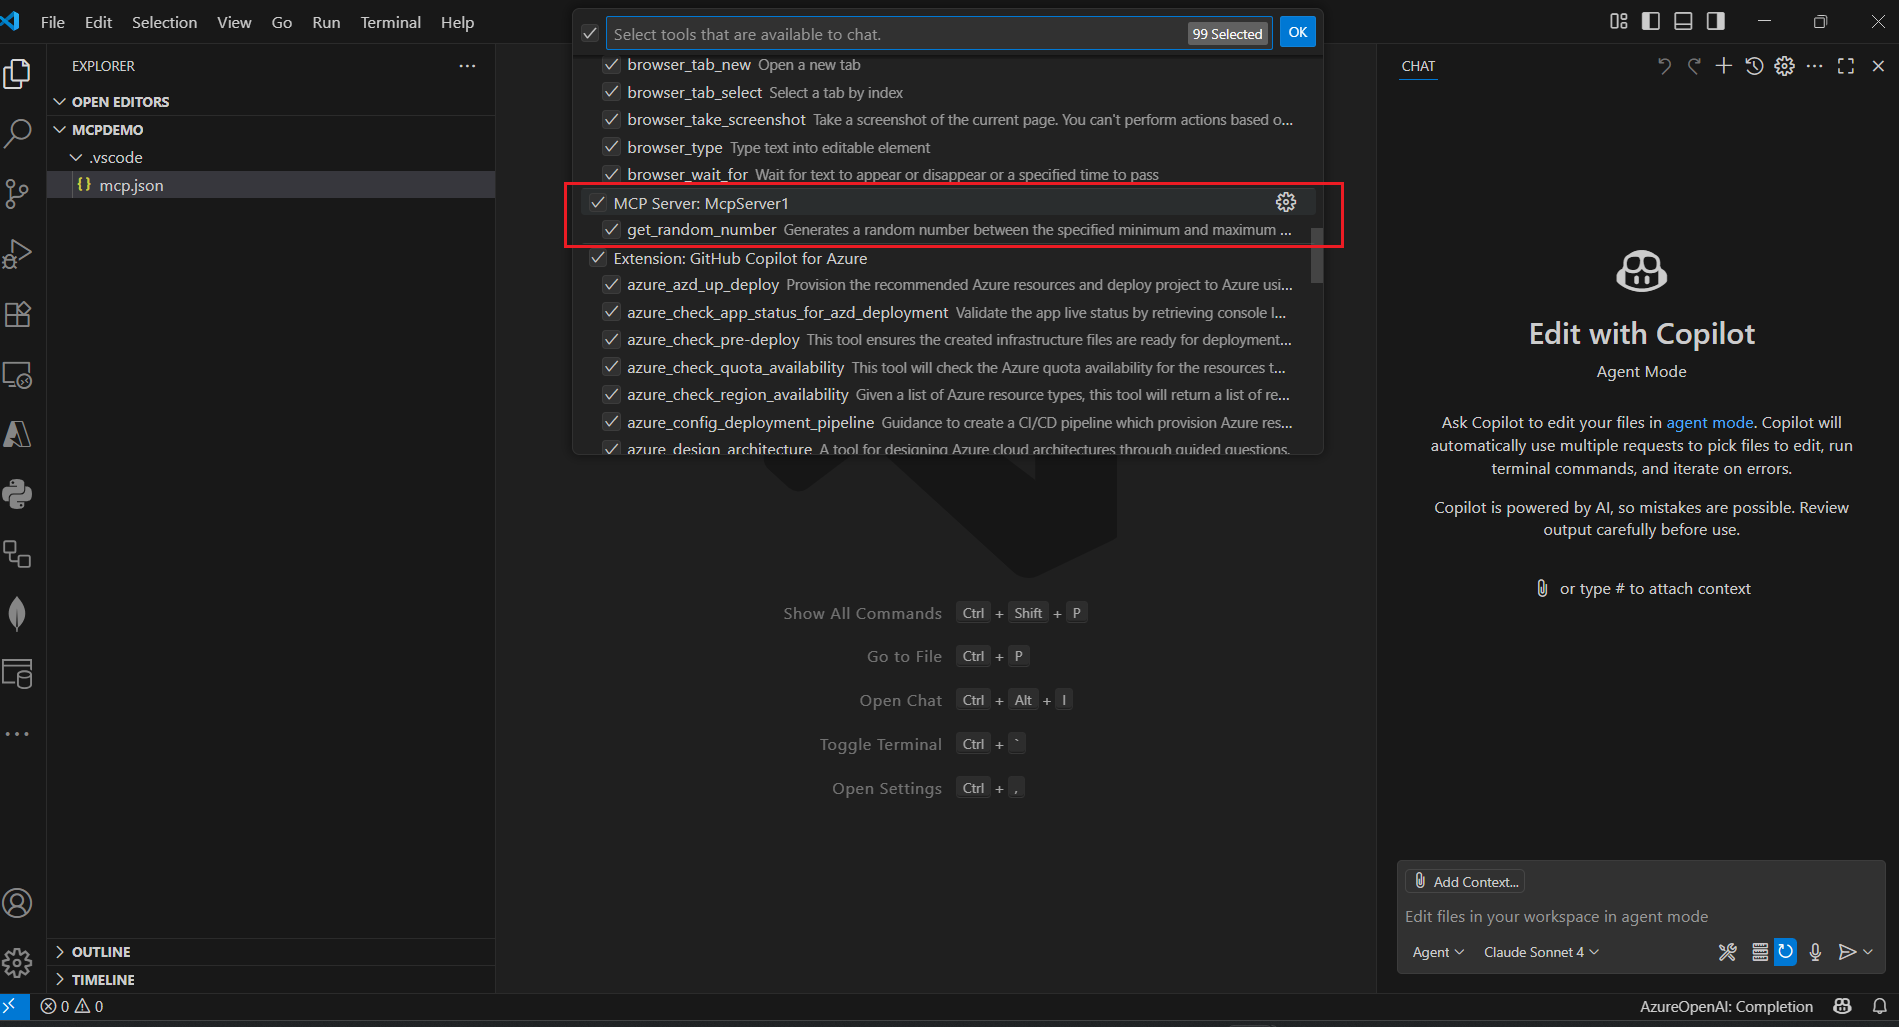
Once it is connected, we can click on the List Tools button - which will show the get_random_number function and the description. Then clicking on the tool will show the different parameters. We can input the minimum and maximum values and click on the run tool will execute the function and return the random number. Another option for testing is with GitHub Copilot in VS Code. To do this, create a .vscode folder in the root of the project if it is not available. Next create file mcp.json inside it with the following content.
{
  "servers": {
    "McpServer1": {
      "type": "stdio",
      "command": "dotnet",
      "args": [
        "run",
        "--project",
        "<LOCATION_OF_THE_MCP_SERVER_PROJECT>"
      ]
    }
  }
}
Next we can check the tools of GitHub Copilot in Agent mode - which will show the Server and Tool.
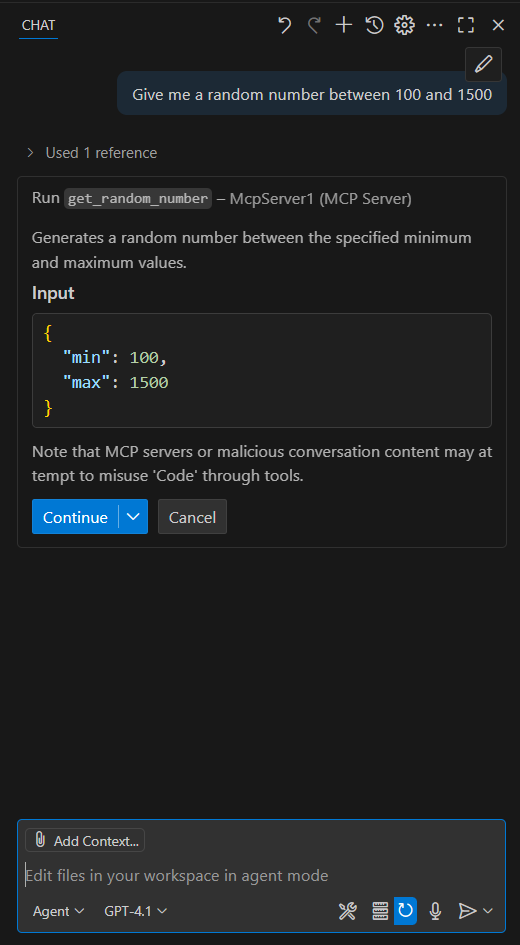
Once it is available, we can give a prompt like Give me a random number between 100 and 500 to GitHub Copilot and then Copilot will show a confirmation for execution of the Tool.
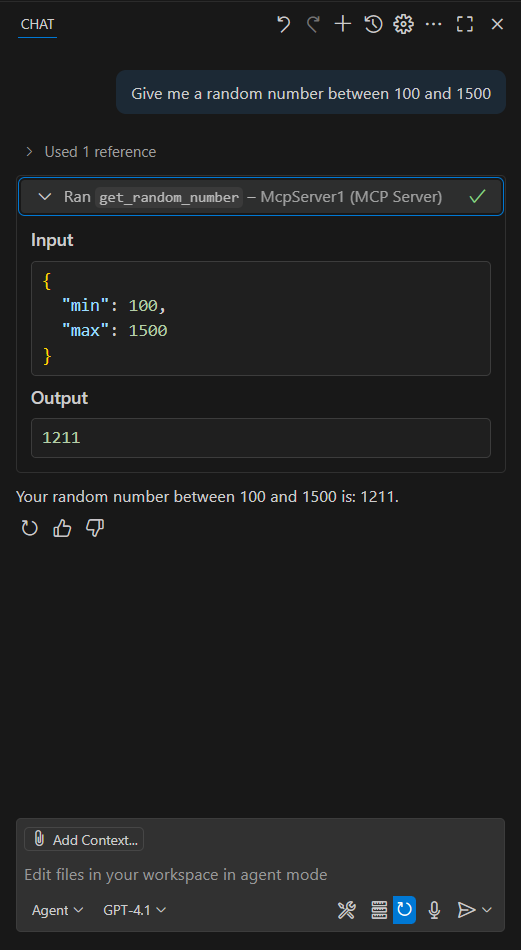
If we confirms, it will execute the tool and return the number.
This way we can create and test the MCP Server. We can add other tool like this.
[McpServerTool]
[Description("Gets a weather forecast based on the city in JSON format.")]
public async Task<string> GetWeatherForecast(
    [Description("Name of the city to get the weather forecast")] string city)
{
    var url = $"https://wttr.in/{Uri.EscapeDataString(city)}?format=j1"; // Updated format for JSON response
    try
    {
        var response = await _httpClient.GetStringAsync(url);
        return response;
    }
    catch (Exception ex)
    {
        return $"Error fetching weather data: {ex.Message}";
    }
}
I added reference of Microsoft.Extensions.Http nuget package. And modified the Program.cs file to inject HttpClient Factory instance to the tool.
using Microsoft.Extensions.DependencyInjection;
using Microsoft.Extensions.Hosting;
using Microsoft.Extensions.Logging;

var builder = Host.CreateApplicationBuilder(args);

// Configure all logs to go to stderr (stdout is used for the MCP protocol messages).
builder.Logging.AddConsole(o => o.LogToStandardErrorThreshold = LogLevel.Trace);

// Add the MCP services: the transport to use (stdio) and the tools to register.
builder.Services
    .AddHttpClient()
    .AddMcpServer()
    .WithStdioServerTransport()
    .WithTools<RandomNumberTools>();

await builder.Build().RunAsync();
And when we ask a question like this with GitHub Copilot, I will get a response like this.
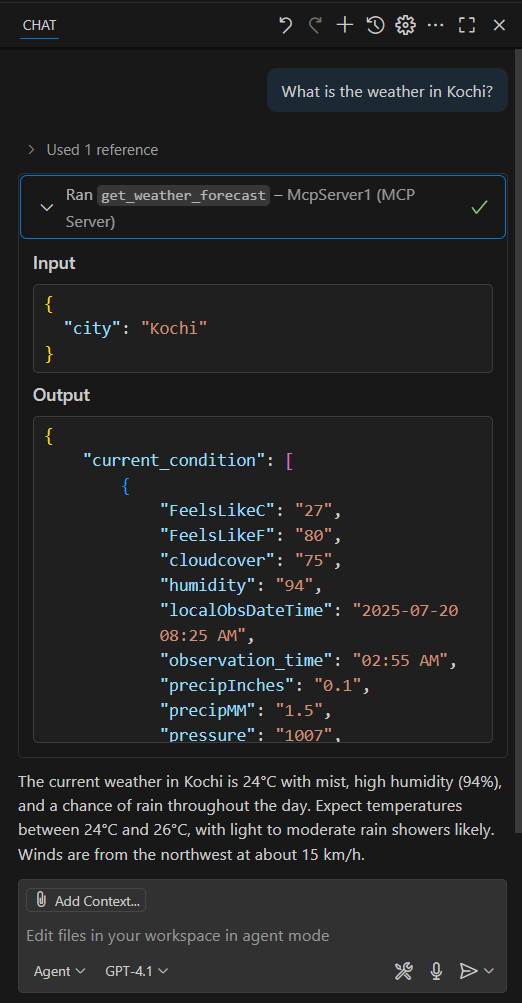
In the implementation, the response from tool is JSON string - but GitHub Copilot is parsing the response from the tool and give a humanly readable response.
Now we can publish MCP Servers to NuGet.org. It is simple and straight forward. We need to create nuget package for the MCP Server using dotnet pack command with release configuration, we can use dotnet pack -c Release command. Once the nuget package is created, publish the nuget package using dotnet nuget push command.
In this blogpost we learned about how to create MCP Servers using C# and .NET. We also learned about how to test it with mcp inspector tool and VS Code GitHub Copilot. We also learned how to create another tool which fetches weather forecast information from external APIs. And finally we learned about publishing it to NuGet.org.
Happy Programming
If you find my content helpful, consider supporting my work. Your support helps me continue creating valuable resources for the community.

Found this useful? Share it with your network!
Copyright © 2025 Anuraj. Blog content licensed under the Creative Commons CC BY 2.5 | Unless otherwise stated or granted, code samples licensed under the MIT license. This is a personal blog. The opinions expressed here represent my own and not those of my employer. Powered by Jekyll. Hosted with ❤ by GitHub