Deploying Your Angular Application To Azure
February 06, 2018 by Anuraj
ASP.NET Core Angular CodeProject Azure Kudu
This post is about deploying you Angular application to Azure App service. Unlike earlier versions of Angular JS, Angular CLI is the preferred way to develop and deploy Angular applications. In this post I will show you how to build a CI/CD pipeline with GitHub and Kudu, which will deploy your Angular application to an Azure Web App. I am using ASP.NET Core Web API application, which will be the backend and Angular application is the frontend.
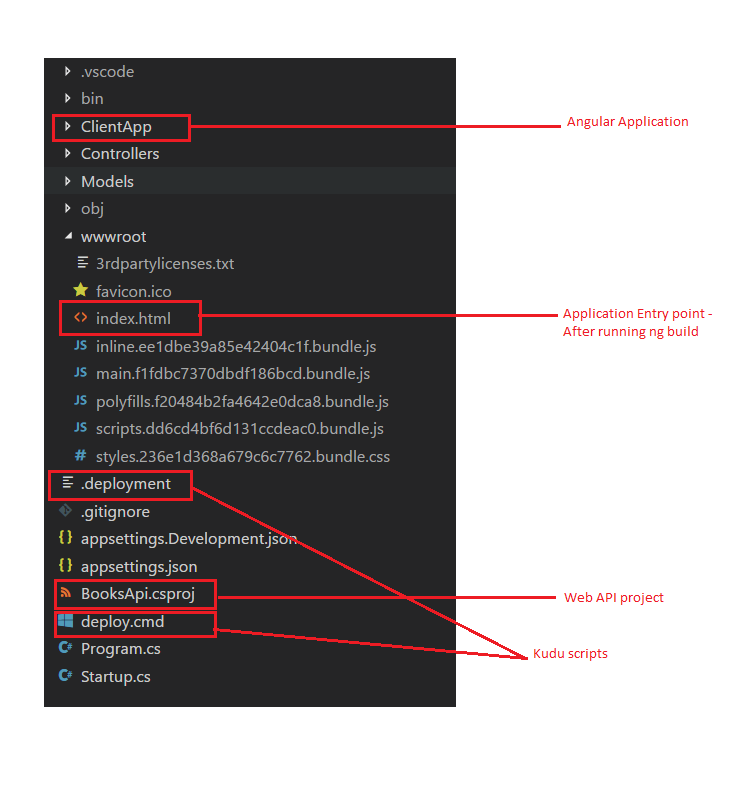
First I created a ASP.NET Core Web API application, inside the project, I have created a Angular application with name ClientApp. In the .angular-cli.json, changed the outDir to wwwroot folder of Web API application. Once I build the application, Angular CLI will build the application and generate index.html page, which will be deployed to wwwroot folder, which is the main entry point of the application. I have modified Startup class code to handle the Angular routing. Here is the structure of my application.
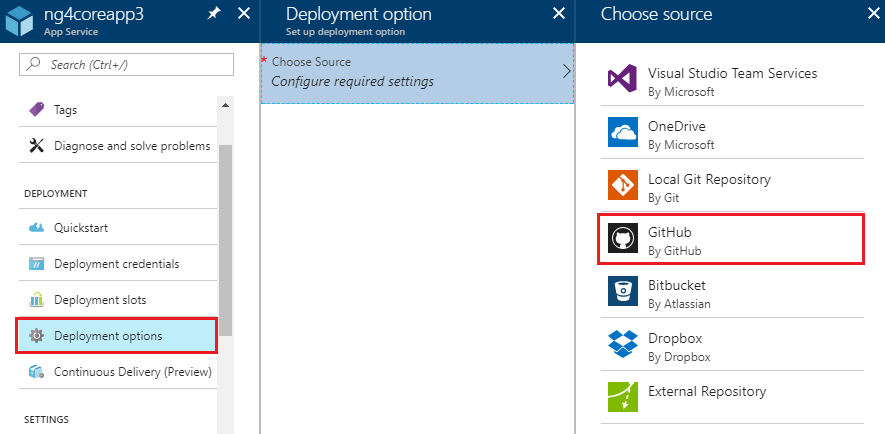
I am using GitHub as the source control. And in the Azure Web Application, I have configured deploy from GitHub. You can do it from Deployment Options > Select the Choose Source option.
If you’re doing first time, you need to authenticate yourself with GitHub and authorise azure to access organizations and repositories. Once you’re authorised, you need to select the organization, project and branch.
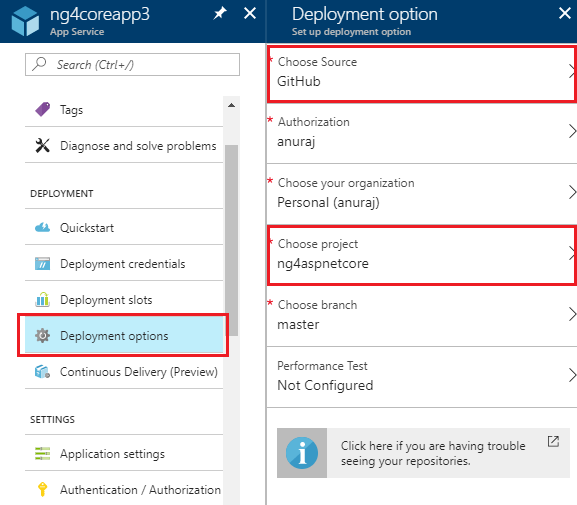
Once you choose all these, Azure will deploy the app with a latest commit from GitHub. First time the deployment will be successful, but app may not work since we didn’t build the angular files. For that you need to customize the deployment process. To customize the deployment process you need to use Kuduscript. Kuduscript is tool for generating deployment scripts for Azure Websites. To use Kudu script, first you need to install Kuduscript, you can install it using npm install kuduscript -g command. You can get various command line options using --help command.
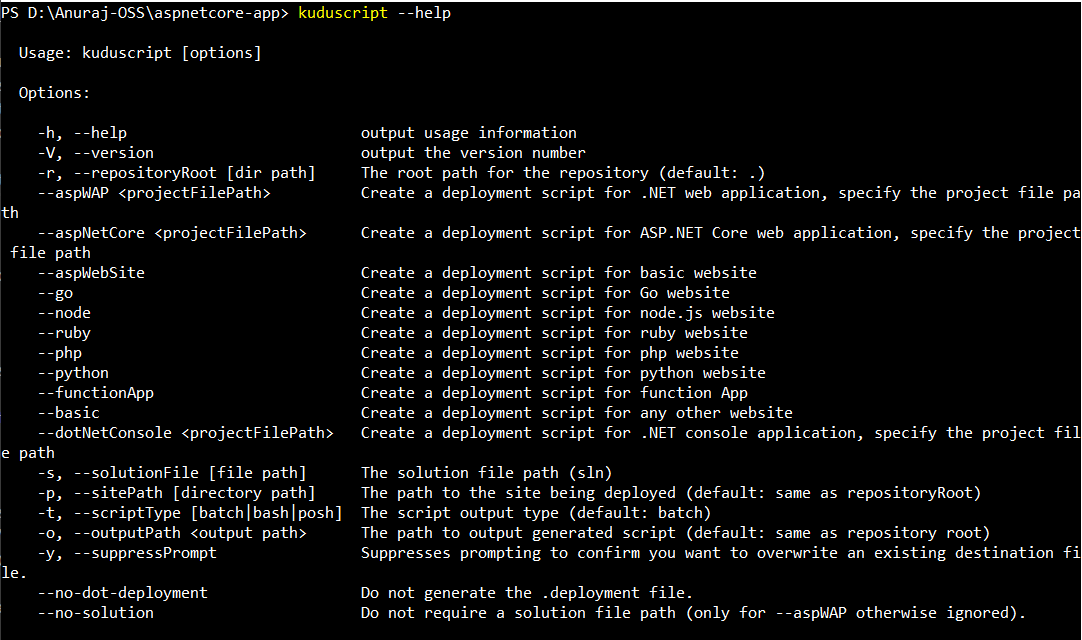
Next navigate to your application root directory, run the following command.(In this post I am using ASP.NET Core WEB API. If you’re using ASP.NET MVC app or Node or PHP, the command options will be different.)
kuduscript -y --aspNetCore BooksApi.csprojThis will generate two files, .deployment and deploy.cmd. The .deployment file contains the command to run for deploying your site, deploy.cmd file contains the deployment script (or deploy.sh if running on Mac/Linux). You can customize the deployment steps by modifying deploy.cmd file.
Open the deploy.cmd file, after the setup environment variables, you can add steps to install the node dependency packages and running the angular build.
:: Installing NPM dependencies.
IF EXIST "%DEPLOYMENT_SOURCE%\ClientApp\package.json" (
  pushd "%DEPLOYMENT_SOURCE%\ClientApp"
  call npm install --save
  IF !ERRORLEVEL! NEQ 0 goto error
  popd
)
The above code will look for the package.json file, and run npm install command on the directory. This will install all the required dependencies in the node_modules folder under ClientApp folder. Next you need to run the ng build, which you can do like this.
:: Building the Angular App
IF EXIST "%DEPLOYMENT_SOURCE%\ClientApp\.angular-cli.json" (
  pushd "%DEPLOYMENT_SOURCE%\ClientApp"
  call :ExecuteCmd node_modules\.bin\ng build --progress false --prod
  IF !ERRORLEVEL! NEQ 0 goto error
  popd
)
In this you’re looking for .angular-cli.json and running the ng build command from node_modules folder. You’re completed the changes. Next commit the changes to GitHub and Azure will run the commands and will deploy the app to web app service.
It may take sometime, depending on the number of dependencies and size of the project. Once it is done, you will be able to see the status from the Deployment options, like this.
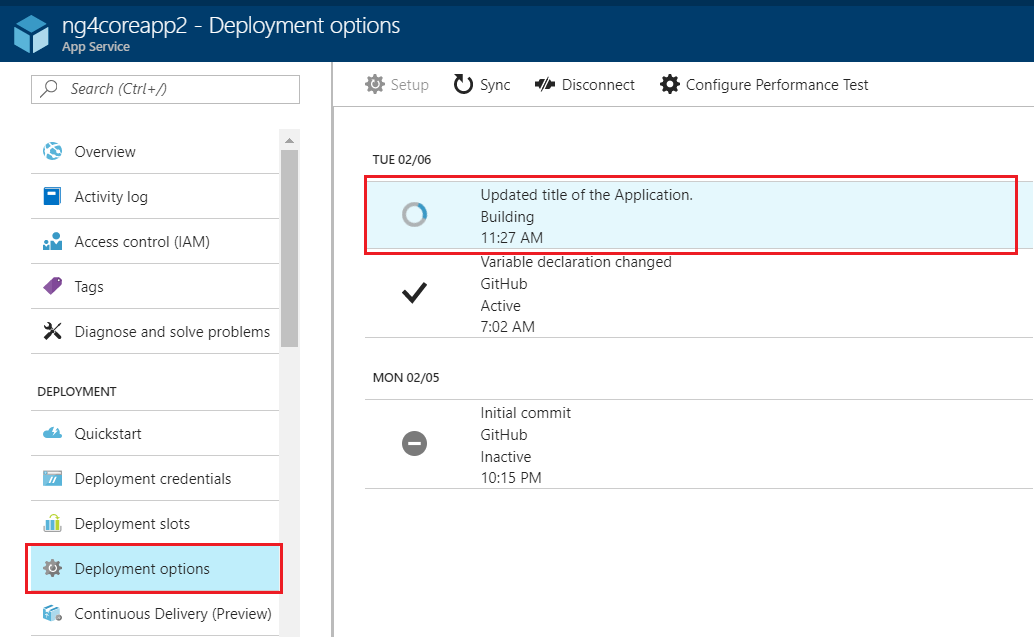
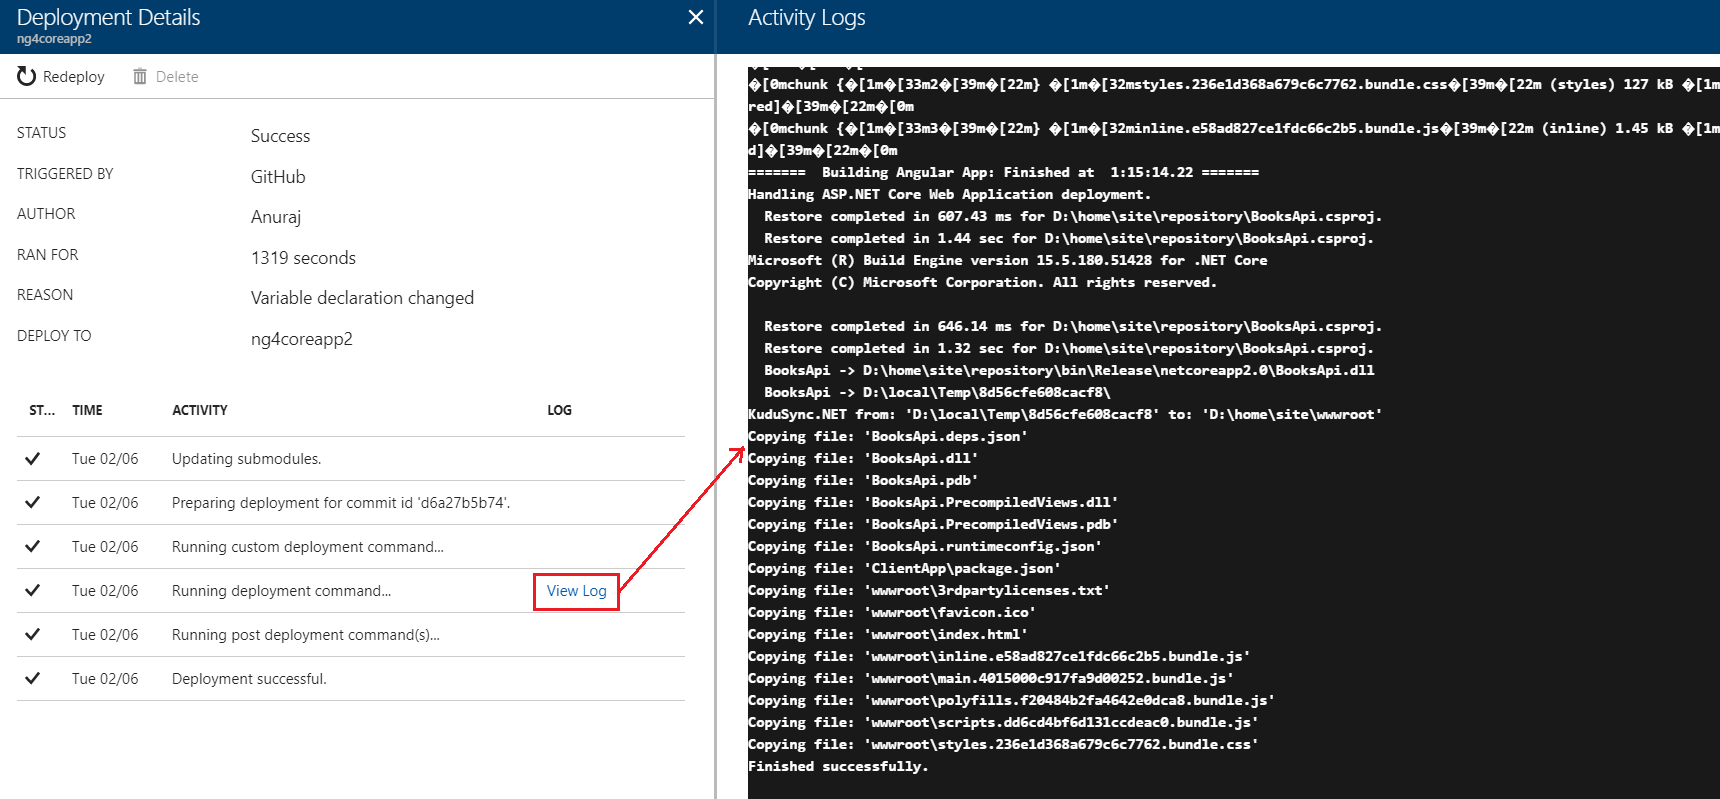
Once it is successful, you will be able to the status and detailed log, when you click on the deployment.
You can find the running app here, and source code on GitHub
Happy Programming :)
Found this useful? Share it with your network!
Copyright © 2026 Anuraj. Blog content licensed under the Creative Commons CC BY 2.5 | Unless otherwise stated or granted, code samples licensed under the MIT license. This is a personal blog. The opinions expressed here represent my own and not those of my employer. Powered by Jekyll. Hosted with ❤ by GitHub
