Dockerize an existing ASP.NET MVC 5 application
October 19, 2017 by Anuraj
ASP.NET Docker Container
This post is about describe the process of the migrating of existing ASP.NET MVC 5 or ASP.NET Web Forms application to Windows Containers. Running an existing .NET Framework-based application in a Windows container doesn’t require any changes to your app. To run your app in a Windows container you create a Docker image containing your app and start the container.
First you need to enable the Containers option from Programs and Features.
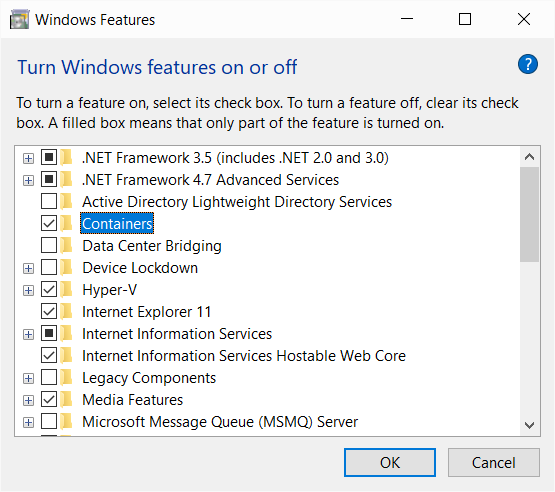
Once you enabled this feature, you need to download and install Docker for Windows. Once you installed the Docker, you can create a new ASP.NET MVC project in Visual Studio. After you created the project, you can create a new file with name Dockerfile in the project application root. Once you created the Dockerfile, you need to add the following lines.
FROM microsoft/aspnet
COPY ./bin/Release/PublishOutput /inetpub/wwwroot
Next you need to Publish the project, right now I am publishing to File System. If you’re publishing to a different location, you need to provide that instead of the ./bin/Release/PublishOutput location. Once it is done, you need to run docker build command, which helps to create the image that runs your ASP.NET app.
docker build -t mvchelloworld .-t argument will specify the tag name, which helps to identify the image. Since I already downloaded the microsoft/aspnet image earlier, build command will run very fast, and it build the image. If you’re doing it first time, it might take some time.

Now you can run the docker images command, which will display all the docker images in your system.

Next you need to start the container, you can use the following command to do it.
docker run -d --name mvchelloworld mvchelloworldThe -d argument helps to run the image in detached mode, the docker images runs disconnected from the shell. The --name argument helps to give a name to the container. The default aspnet image has already configured the container to listen on port 80 and expose it. If you’re running IIS, make sure it is stopped, otherwise your container may not start.

If it successful, you will a unique identifier. With the current Windows Container release, you can’t browse to http://localhost. This is a known behavior in WinNAT, and it will be resolved in the future. Until that is addressed, you need to use the IP address of the container. You can use the following command to identify the IP Address of the docker container.
docker inspect -f {{ .NetworkSettings.Networks.nat.IPAddress }} mvchelloworldThis will display the IP Address of the container running.

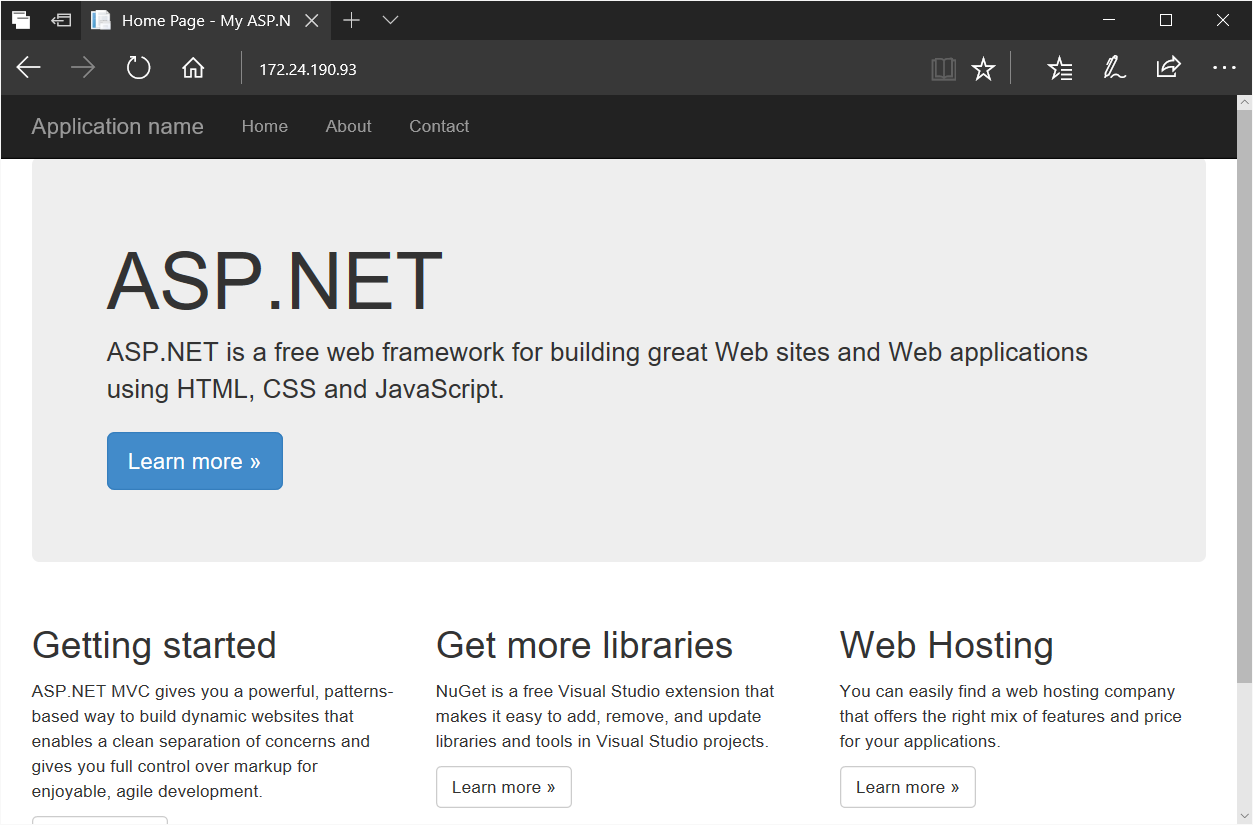
Now you can browse with the IP Address.
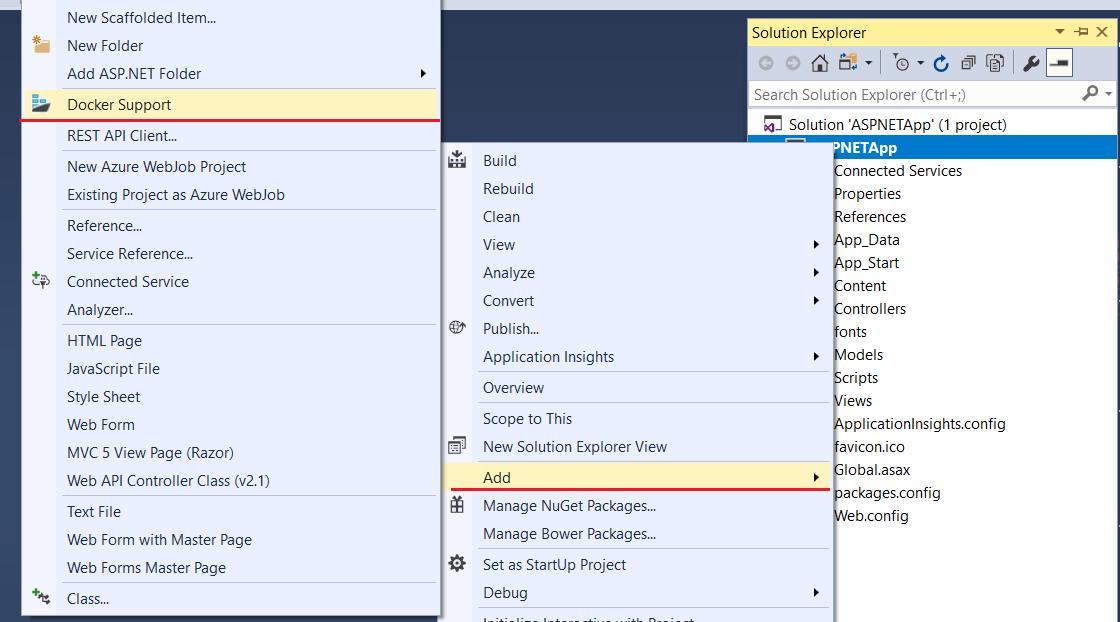
Instead of adding the Dockerfile manually, Visual Studio helps us to add Docker support, which also helps us to debug the app running in Docker. First you need to right click on the project, select Add <Docker Support.
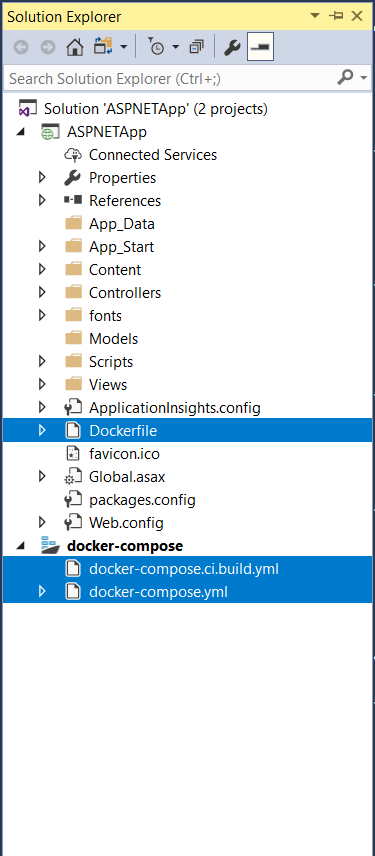
This will add a Dockerfile and a docker-compose project to your solution.
Next click on the docker-compose.yml, you will be able to see Docker as target for debugging.
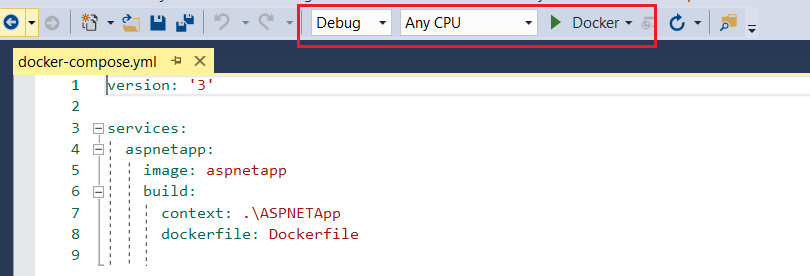
When you click on the Docker option, Visual Studio will build the app and deploy it to the docker container and start the debugging process, it will also launch the app in your browser. Debugging a docker application is simple and straight forward, you just need to put the break point, Visual Studio will pause the execution when you reach the break point.
Happy Programming :)
Found this useful? Share it with your network!
Copyright © 2026 Anuraj. Blog content licensed under the Creative Commons CC BY 2.5 | Unless otherwise stated or granted, code samples licensed under the MIT license. This is a personal blog. The opinions expressed here represent my own and not those of my employer. Powered by Jekyll. Hosted with ❤ by GitHub
