Exploring the new AI chat template
July 18, 2025 by Anuraj
dotnet ai
In this blog post, we’ll explore the new AI chat project template - we will discuss - how to install the project template, creating and configure various options. The .NET AI Chat Web App is a new template from Microsoft that shows how to get started building a chat style application backed by a large language model (LLM). This project template helps us to create two project types - Local MCP Server Console App and AI Chat Web App - We will explore the MCP project template in a later blog post. The AI Chat Web App project template is for creating an AI chat application, which uses retrieval-augmented generation (RAG) to chat with your own data.
Unlike the other .NET project template this project template didn’t come out of the box with .NET or Visual Studio installation. We need to run this command to install the templates - dotnet new install Microsoft.Extensions.AI.Templates.
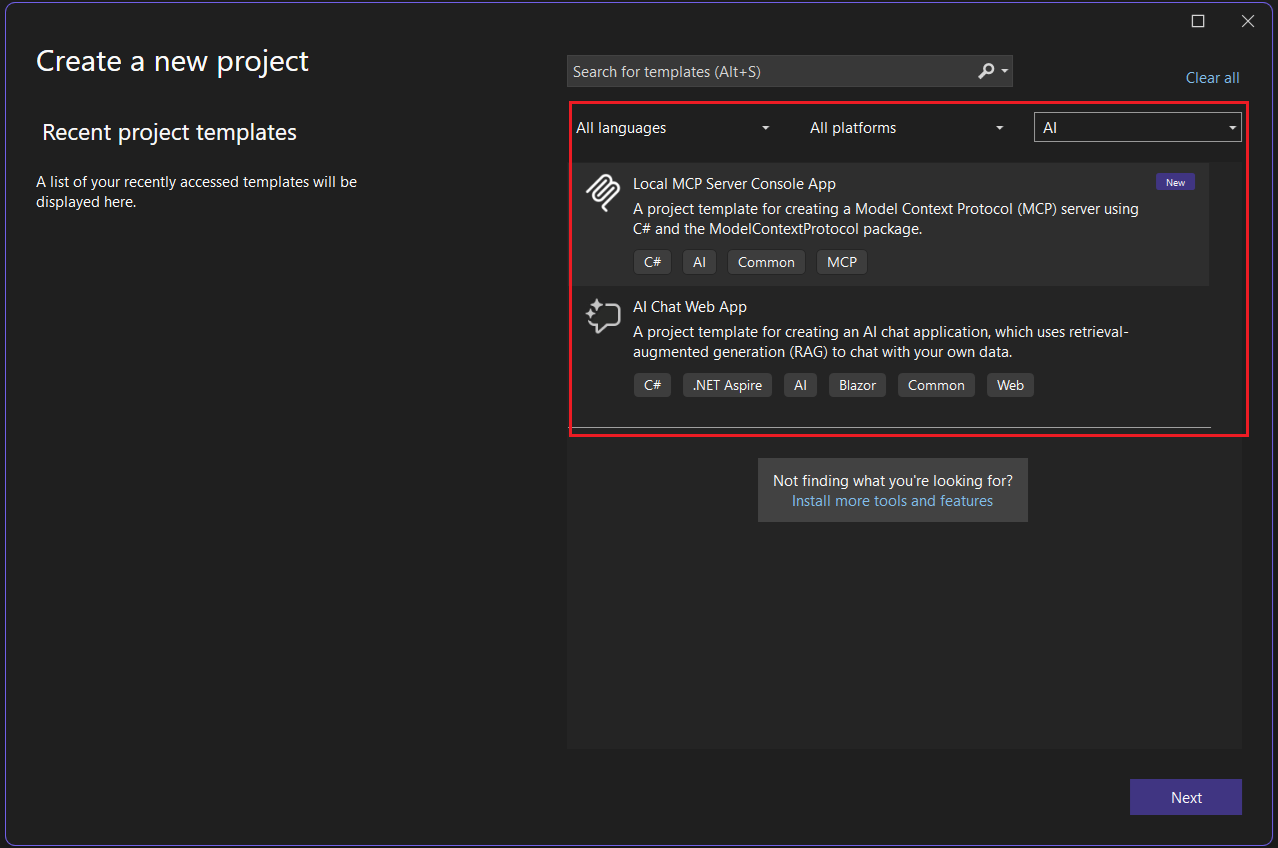
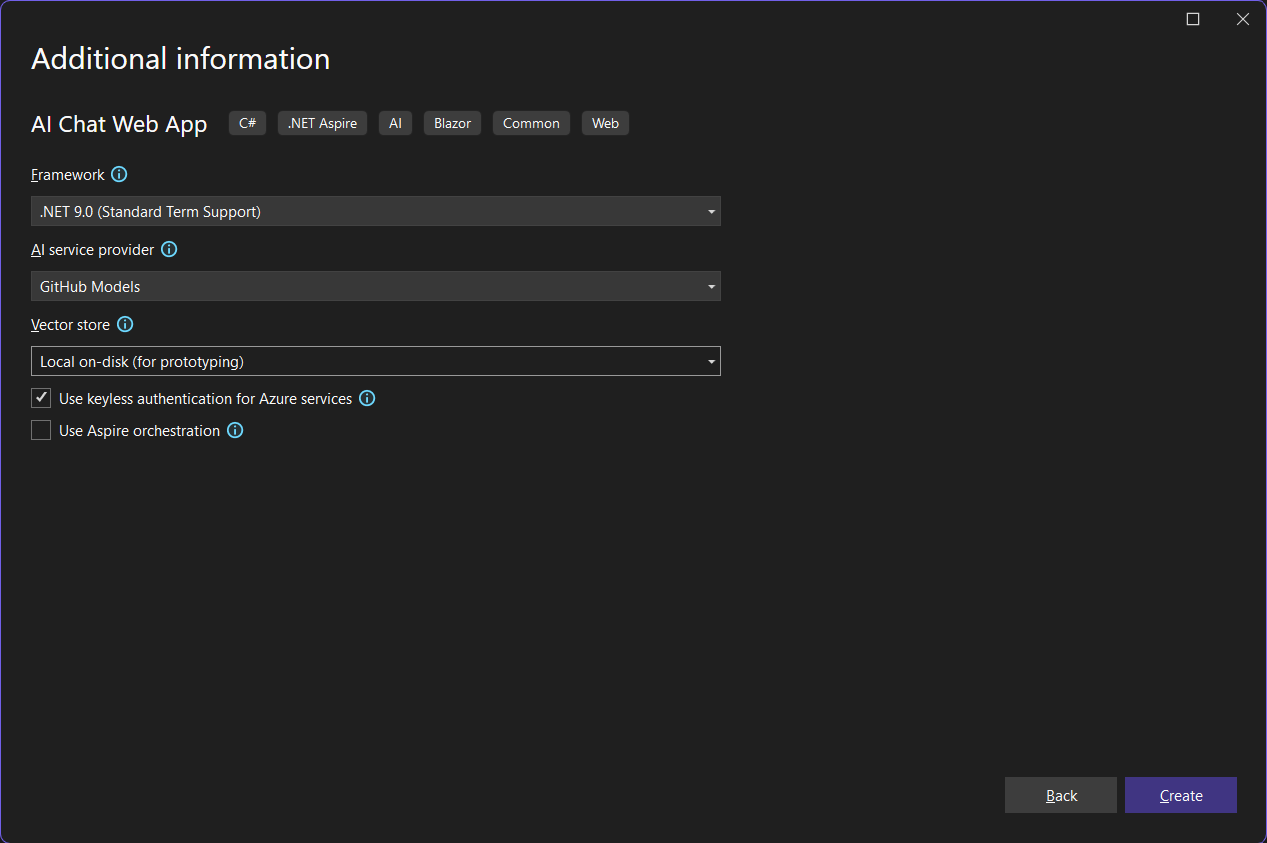
We will be exploring the AI Chat Web App project in the blog post. This is a Blazor chat application - where we can ask questions to two PDF files. So select the AI Chat Web App project type, then click next - where we need to configure the project name and location. In the next screen we need to select the .NET version, AI Service provider and Vector store. For AI Service provider - the LLM we will get various choices like Azure Open AI Service, GitHub Models, Ollama and Open AI. And for vector store options like Local on disk, Azure AI Search and Qdrant. By default GitHub Models and Local options will be selected. The Ollama and Local on disk options are for development purposes. There is two more options - Use keyless authentication for Azure Services - which will help to provision managed identity instead of Keys to work with Azure Open AI and Azure AI Search. The Use Aspire orchestration check box will enable Aspire support for the application. If we choose Qdrant - it will be enabled automatically.
For this demo, I am choosing the default values - GitHub Models and local on disk options. And then click on Create button. This will create the project and loads the solution in Visual Studio. Visual Studio will display a README file which will help to us to configure the GitHub Token. Here is the details - to use models hosted by GitHub Models, first we need to create a GitHub personal access token with models:read permissions, but no other scopes or permissions. Next right click on the project and select Manage User Secrets option. It may prompt to install nuget packages, click Yes and then it will display an empty JSON secrets file - secrets.json - where we need to add the GitHub Personal Access Token, like this.
{
    "GitHubModels:Token": "YOUR-TOKEN"
}
To learn more about GitHub Models checkout - Prototyping with AI models
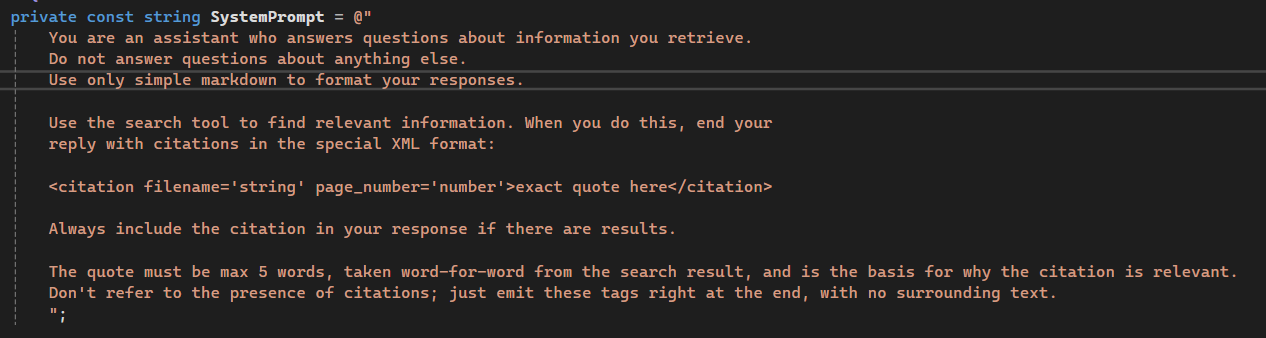
In this project, we will be using two models - gpt-4o-mini and text-embedding-3-small. Since we are using GitHub models we don’t need to provision or deploy any of these. It will work automatically. But if we are using any other option like Azure Open AI or Ollama, we need to provision and deploy compatible models and update the code based on that. As mentioned earlier this project helps us to chat with two PDF files, we can see them in the wwwroot/Data folder. If we want to add more PDF files, we can add them here and update the Chat.razor file to include the files in the UI. We can find the System prompt also in chat.razor file.
If we didn’t configure the Github Token app will throw an error. Since I already configured GitHub Personal Access token in my system environment, I am modifying the code like this in the Program.cs
var token = builder.Configuration["GITHUB_TOKEN"];

var credential = new ApiKeyCredential(token ?? throw new InvalidOperationException("Missing configuration: GITHUB_TOKEN. See the README for details."));
var openAIOptions = new OpenAIClientOptions()
{
    Endpoint = new Uri("https://models.inference.ai.azure.com")
};
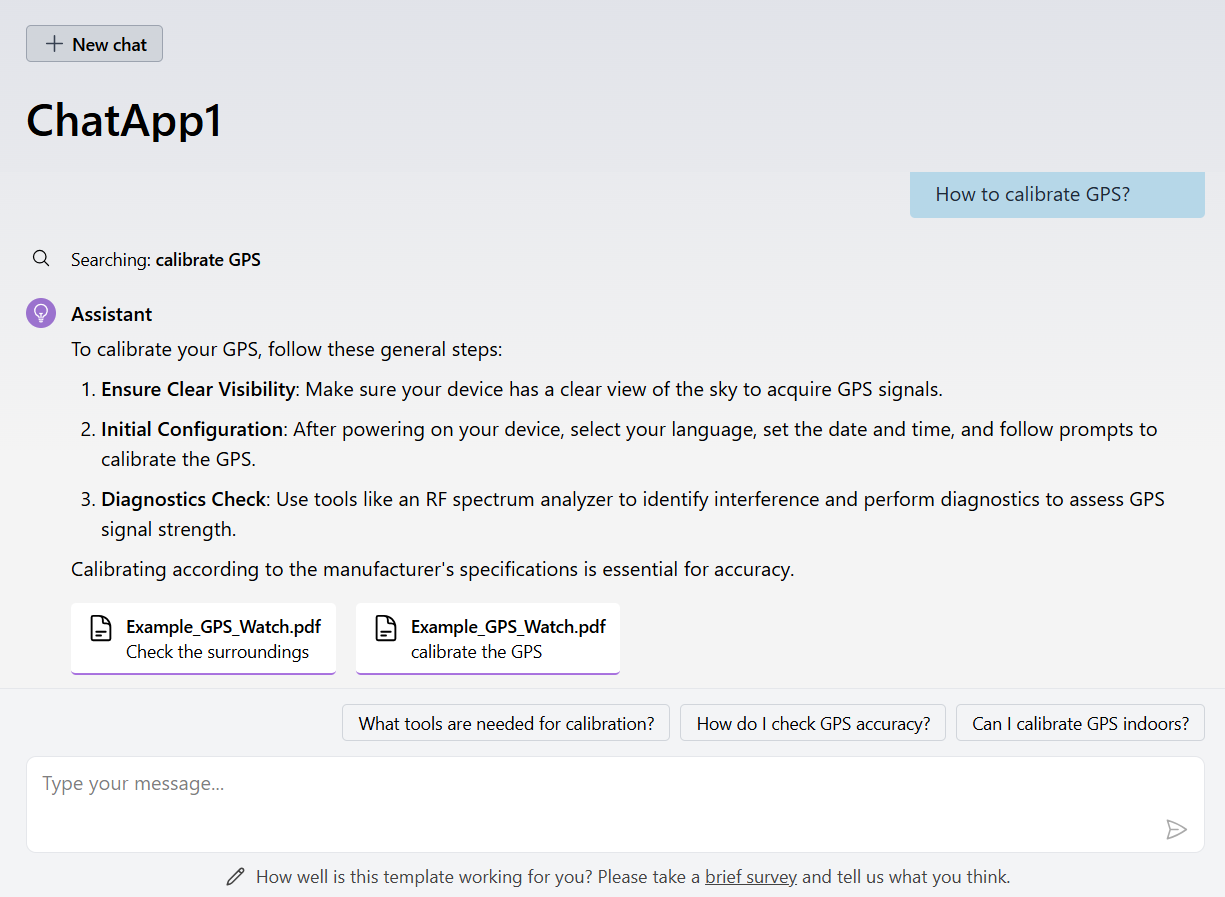
Here is a screenshot of the app running on my machine.
In this post I introduced the new .NET AI Chat Web App template and explained basic configuration. We can customize the application to ingest any other type of files like word documents or URLs.
Happy Programming
If you find my content helpful, consider supporting my work. Your support helps me continue creating valuable resources for the community.

Found this useful? Share it with your network!
Copyright © 2026 Anuraj. Blog content licensed under the Creative Commons CC BY 2.5 | Unless otherwise stated or granted, code samples licensed under the MIT license. This is a personal blog. The opinions expressed here represent my own and not those of my employer. Powered by Jekyll. Hosted with ❤ by GitHub