Improving Angular CI Build Time Using Azure DevOps Cache task
June 28, 2021 by Anuraj
AzureDevOps Angular DevOps
This article will discuss about improving Angular CI build time using Azure DevOps Cache task. If you’re building Angular applications with Azure DevOps, you will be running npm install command every time even if you’re not changed anything in the package.json. It is a time consuming process. Azure Devops offers a Cache task, which will help you to cache downloaded libraries or tools your build pipeline. In this example, I am using a minimal angular application, which is added to Azure Repo - you can use GitHub or any other source control supported by Azure DevOps. And then I created a build pipeline for the Angular application.
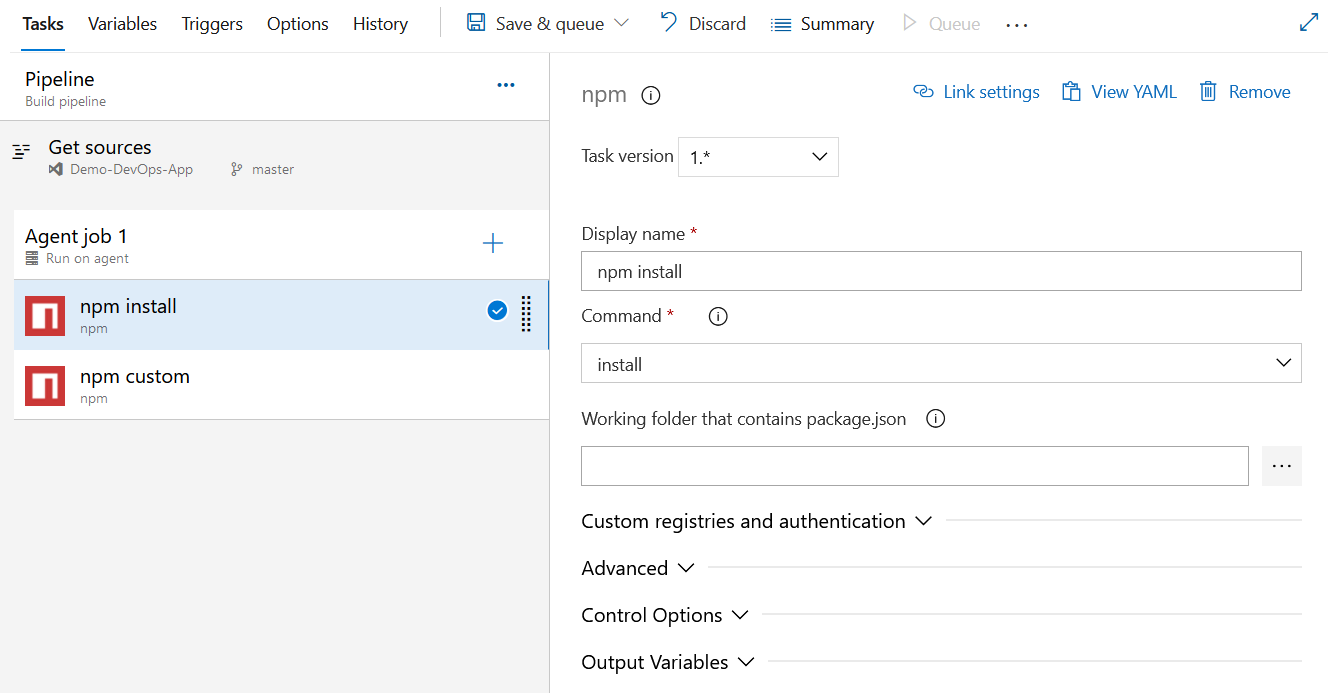
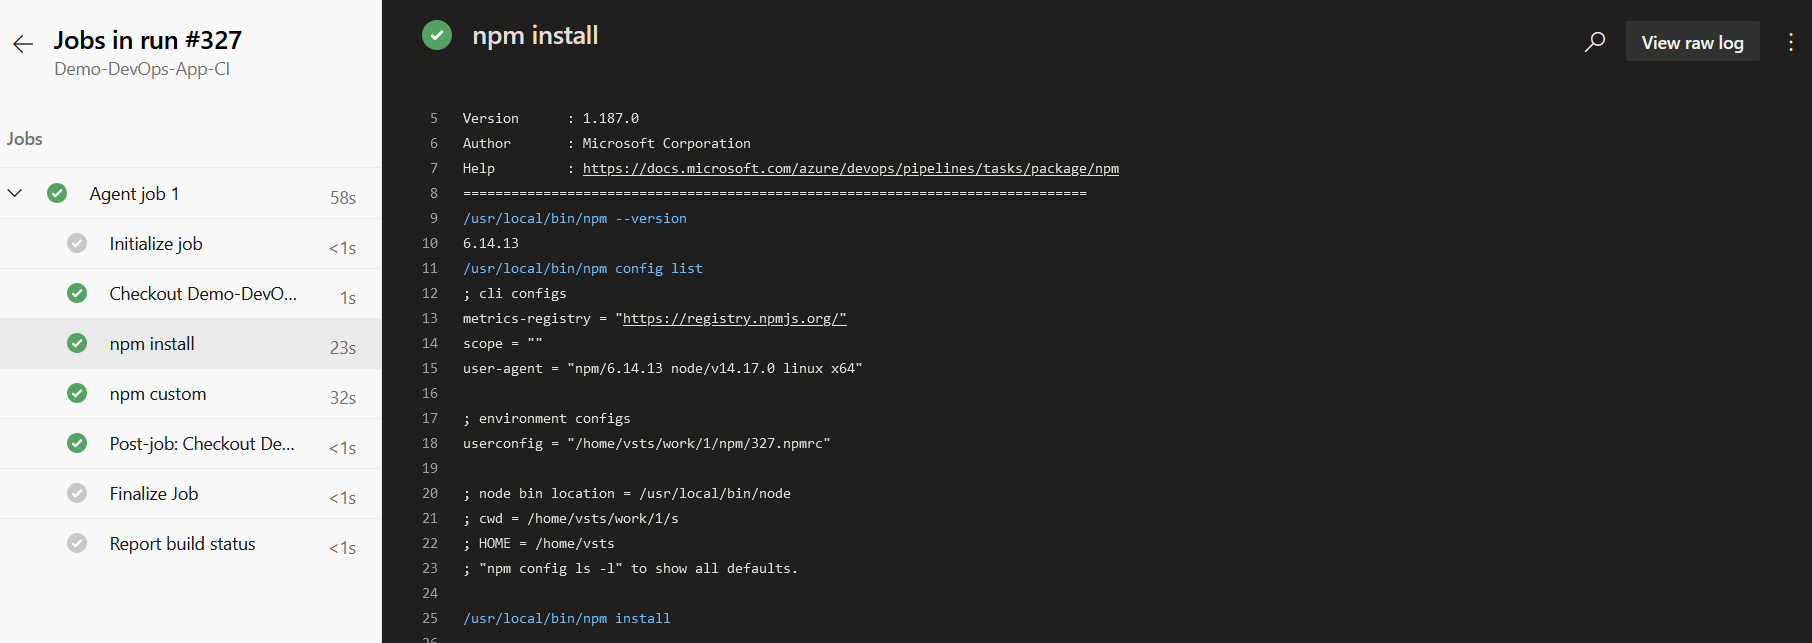
And lets run the build pipeline. You will be able to see - npm install is taking 23 seconds - for a minimal Angular application.
Let’s add the cache step. You can click on the Add Step button, and search for Cache. In there Cache options you need to configure Key and Path values. The Key value should be set to the identifier for the cache you want to restore or save.
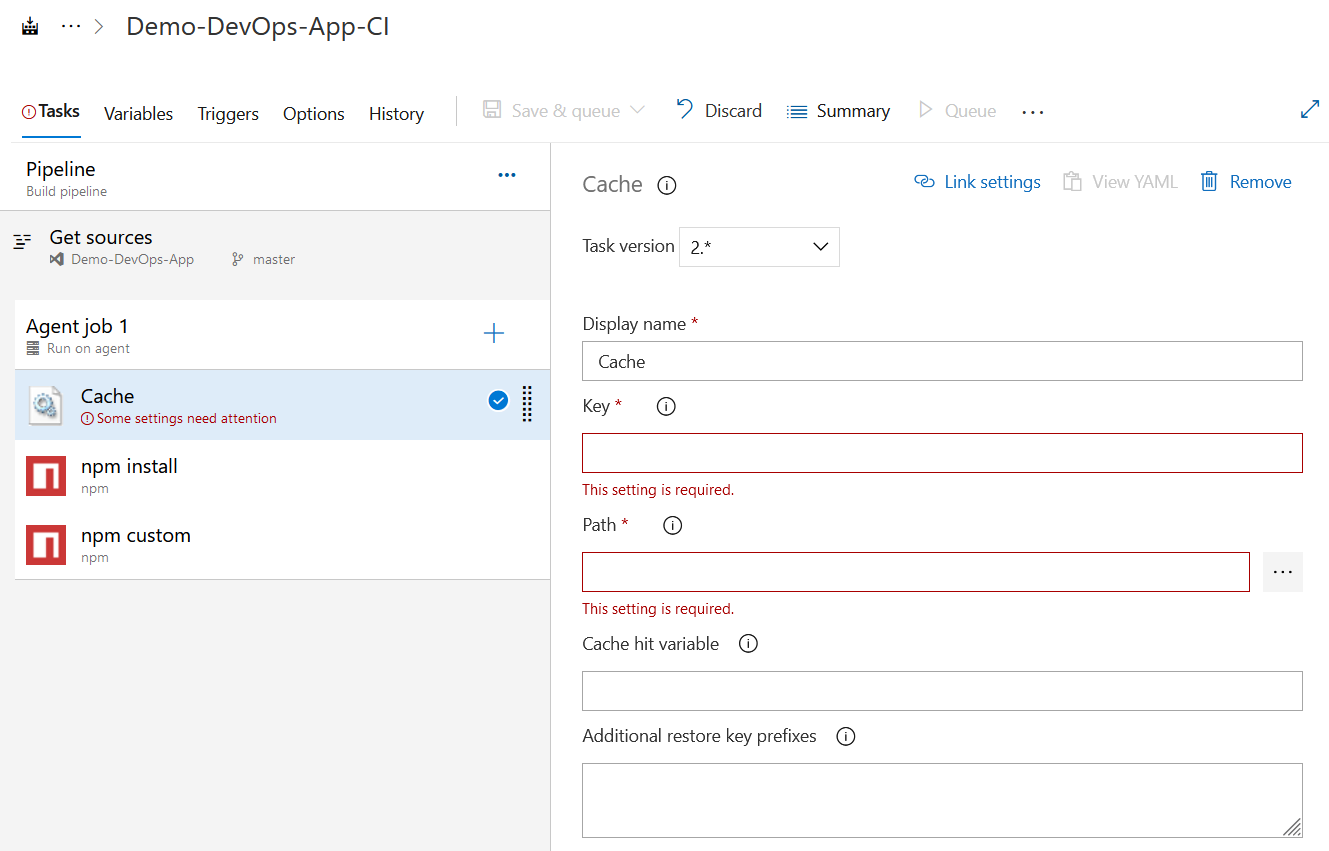
In this example the key will be a hash of the package-lock.json file which lives in the root level - $(System.DefaultWorkingDirectory)/package-lock.json, and Path is the node_modules in the $(System.DefaultWorkingDirectory). And to optimise the caching and restore, you need to configure Cache hit variable - this variable to set to ‘true’ when the cache is restored (i.e. a cache hit), otherwise set to ‘false’. I am setting the Cache hit variable to CacheRestored.

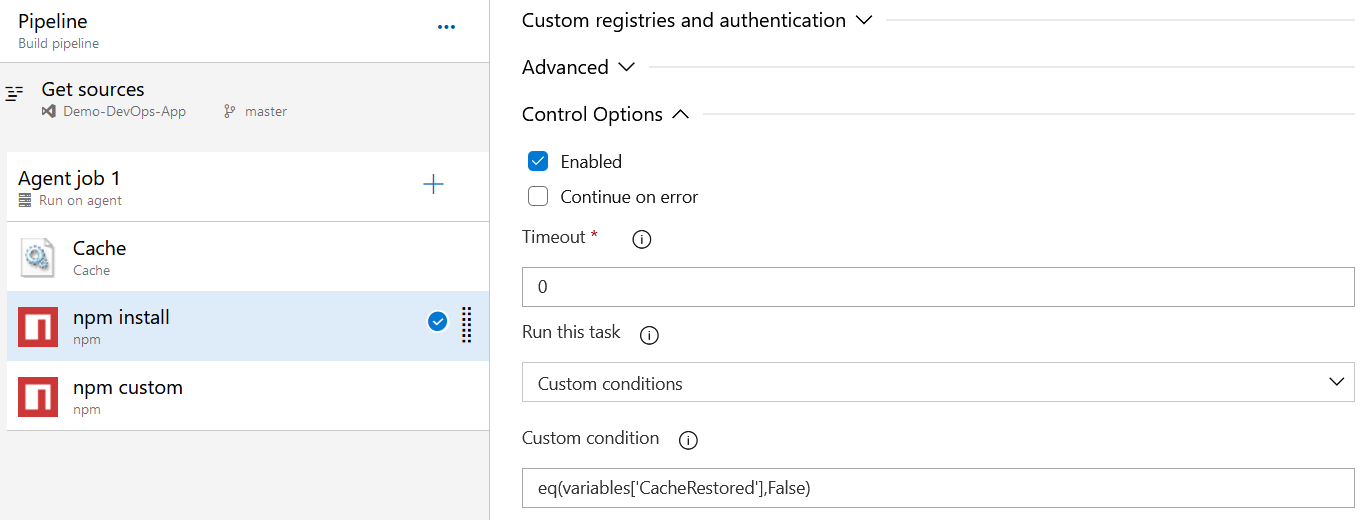
And in the npm install step, modify the Run this task and select Custom condition. And in the Custom condition textbox set the value like this - eq(variables['CacheRestored'],False).
Next let’s the build again. Since it is first time running with Cache it will run the npm install step again. But next run the pipeline, it will be cached. It will be like this.
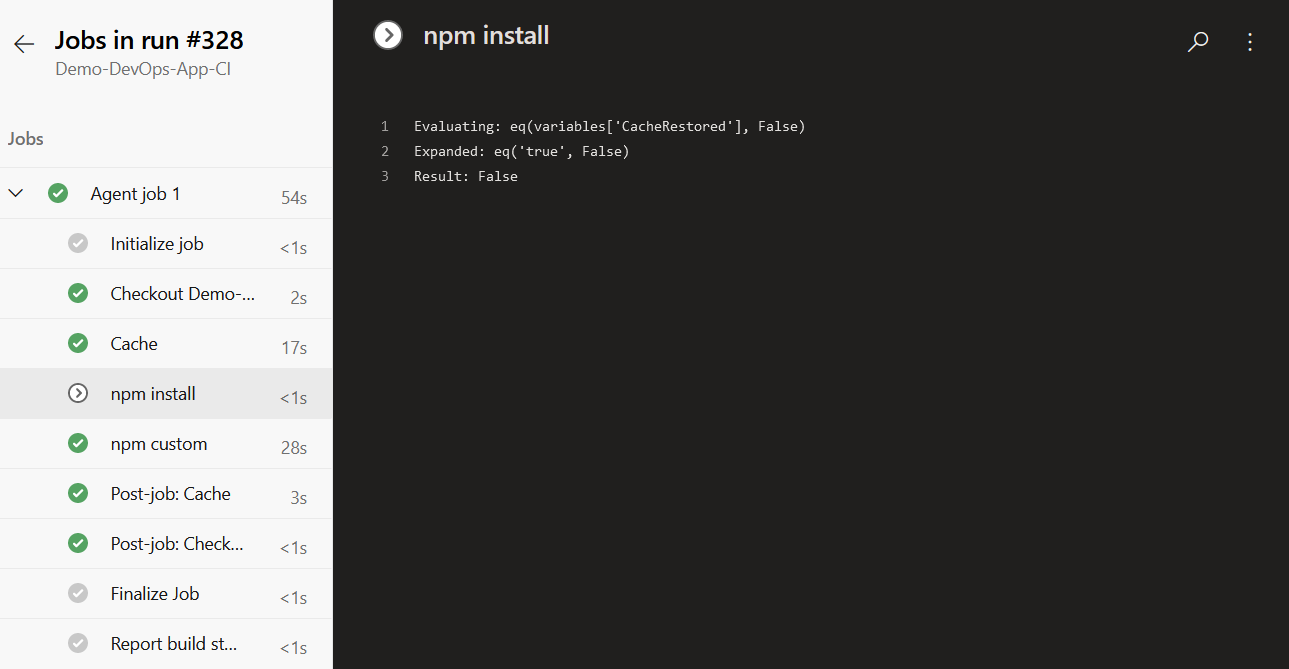
Sometimes you will get a warning like this - ##[warning]The given cache key has changed in its resolved value between restore and save steps;. And because of this you might miss the cache. This is because the node version of Azure DevOps and your source code is different. You can fix this by adding one more node installer step - with the same version as your code.
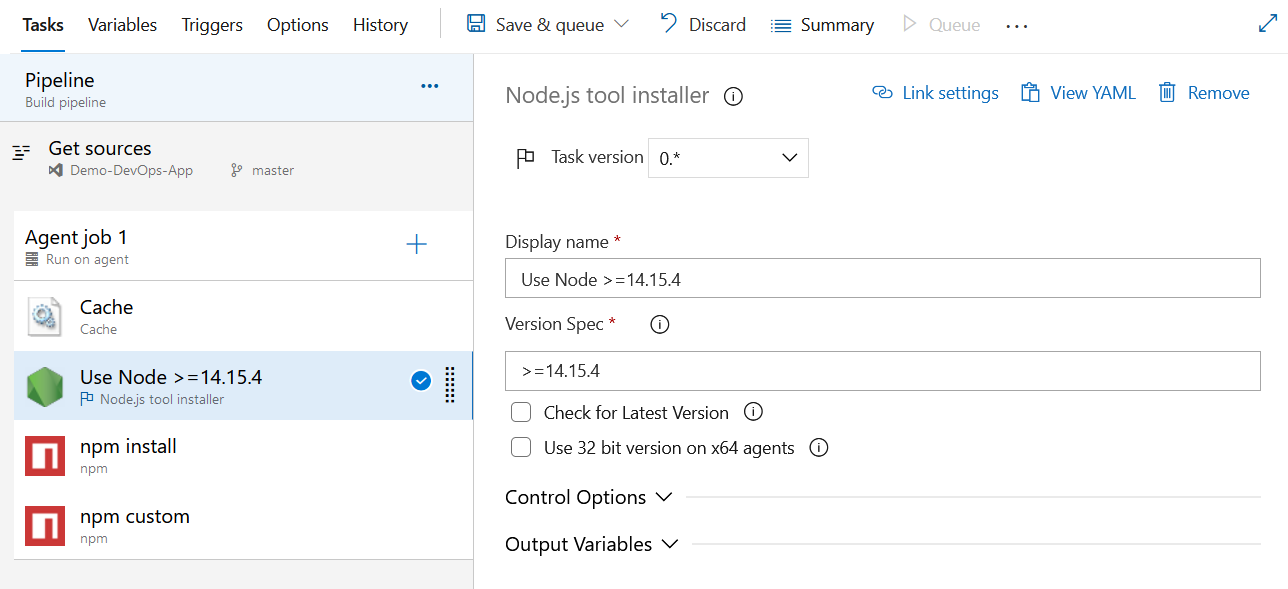
This way you can cache the node modules in your build pipeline. If you apply caching into your real world project it can save lot of time and lot of API calls. You can find more details about the Pipeline caching in official Microsoft documentation. And you will be able to see how to cache other tools as well.
Happy Programming :)
Found this useful? Share it with your network!
Copyright © 2026 Anuraj. Blog content licensed under the Creative Commons CC BY 2.5 | Unless otherwise stated or granted, code samples licensed under the MIT license. This is a personal blog. The opinions expressed here represent my own and not those of my employer. Powered by Jekyll. Hosted with ❤ by GitHub
