Integrate OpenAI API in ASP.NET Core
November 28, 2023 by Anuraj
DotNet OpenAI Azure
This post is about integrating Open AI API in ASP.NET Core. We can integrate Open AI using REST API and using Open AI SDK.
Configuring Open AI in Azure Portal
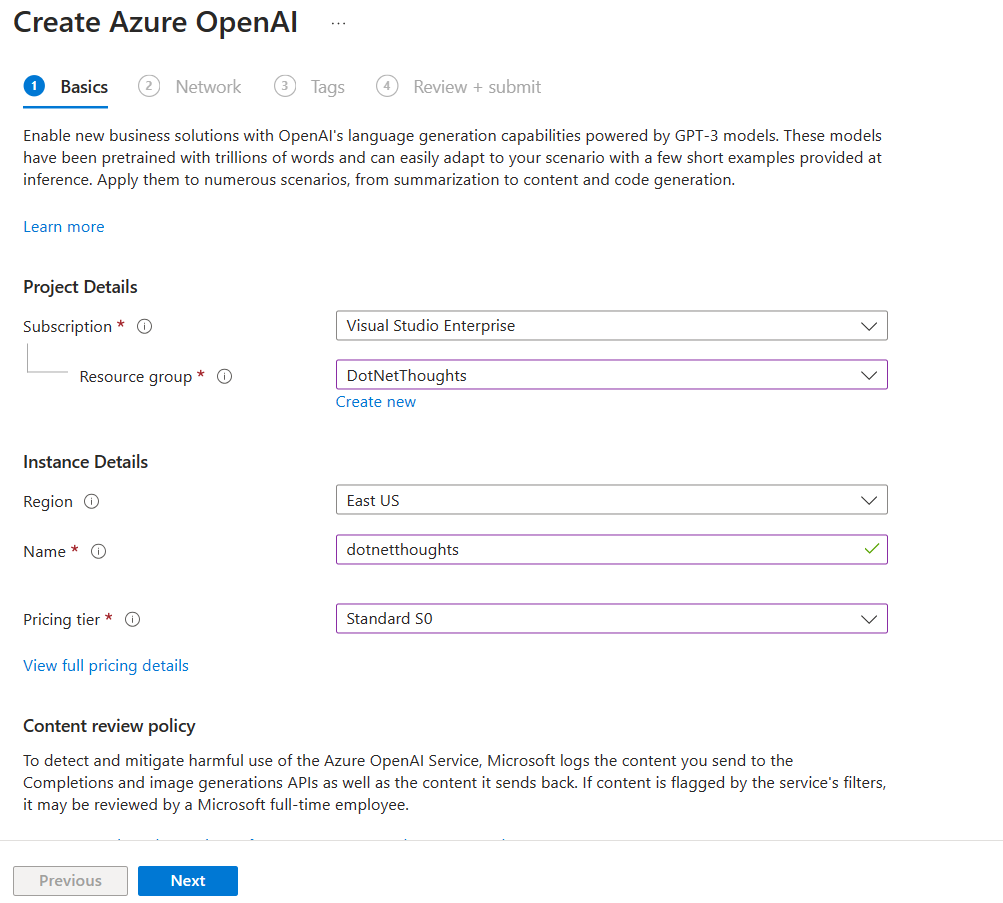
First we need to create an Azure Open AI instance and deploy a model. Open Azure portal, search for Azure Open AI. And click on Create button. In the Basics screen, we need to select or create new resource group, select Region, configure Name and select Pricing tier - currently Standard S0 only available.

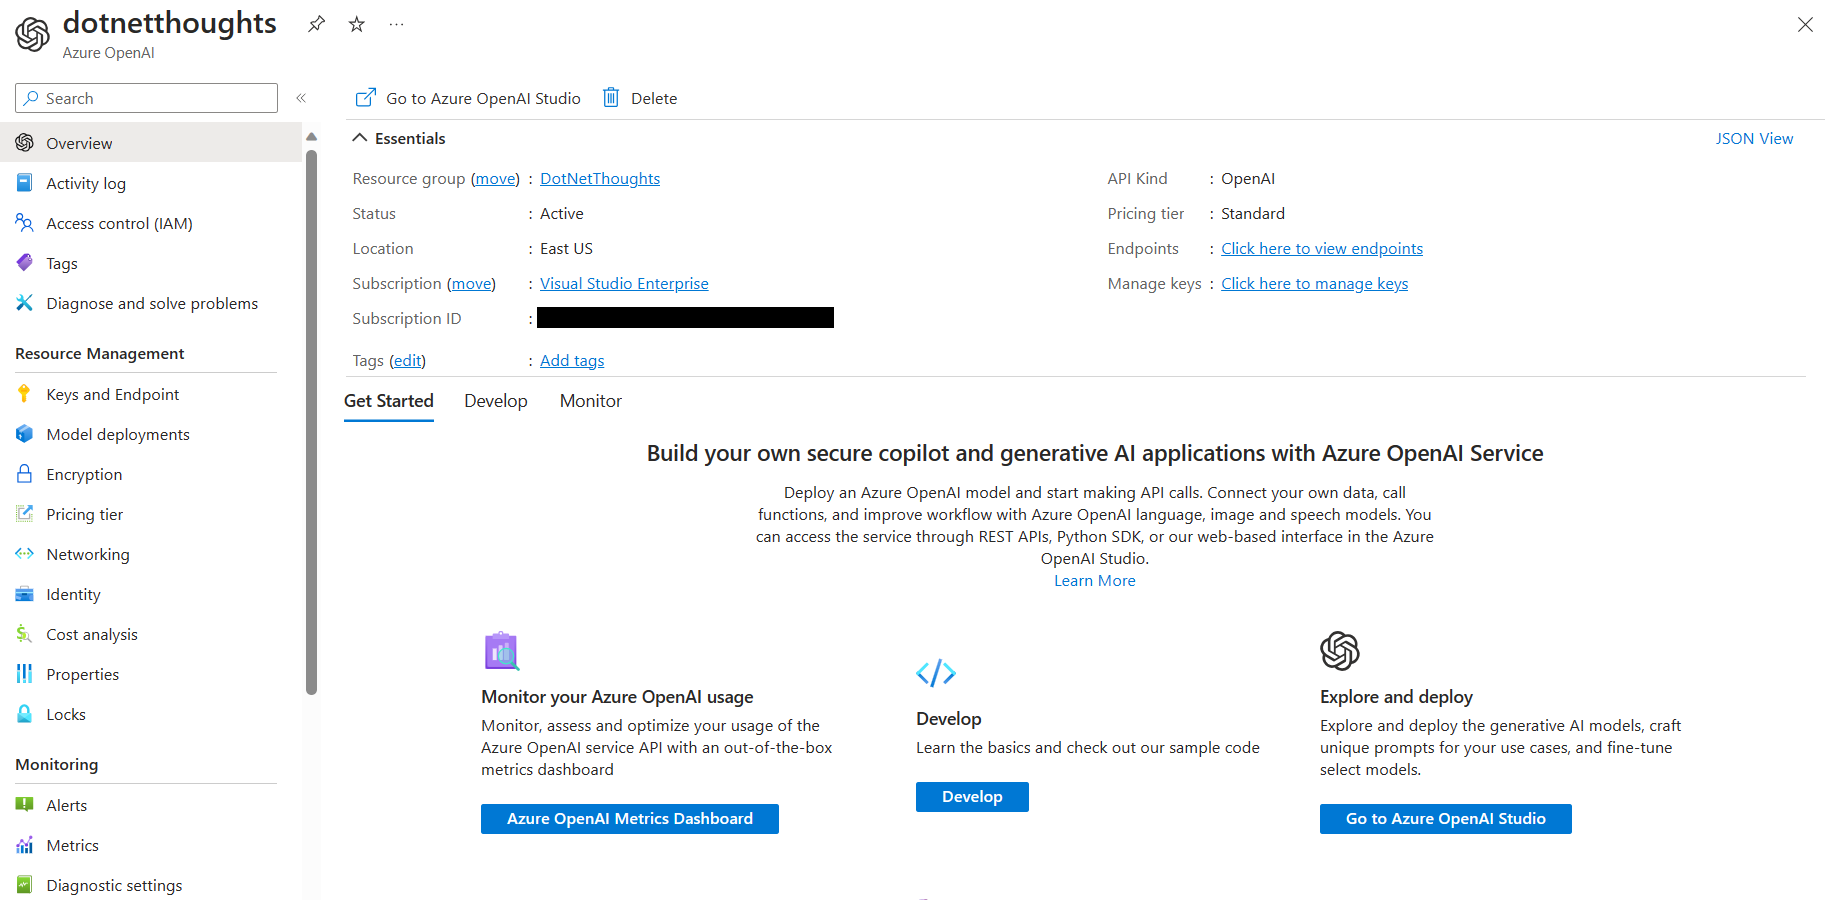
In the Network tab, we can select the default one - All networks, including the internet, can access this resource.. We can associate tags if required, and finally we can look into the configuration and create the resource. Once it is created, we can go to the resource.

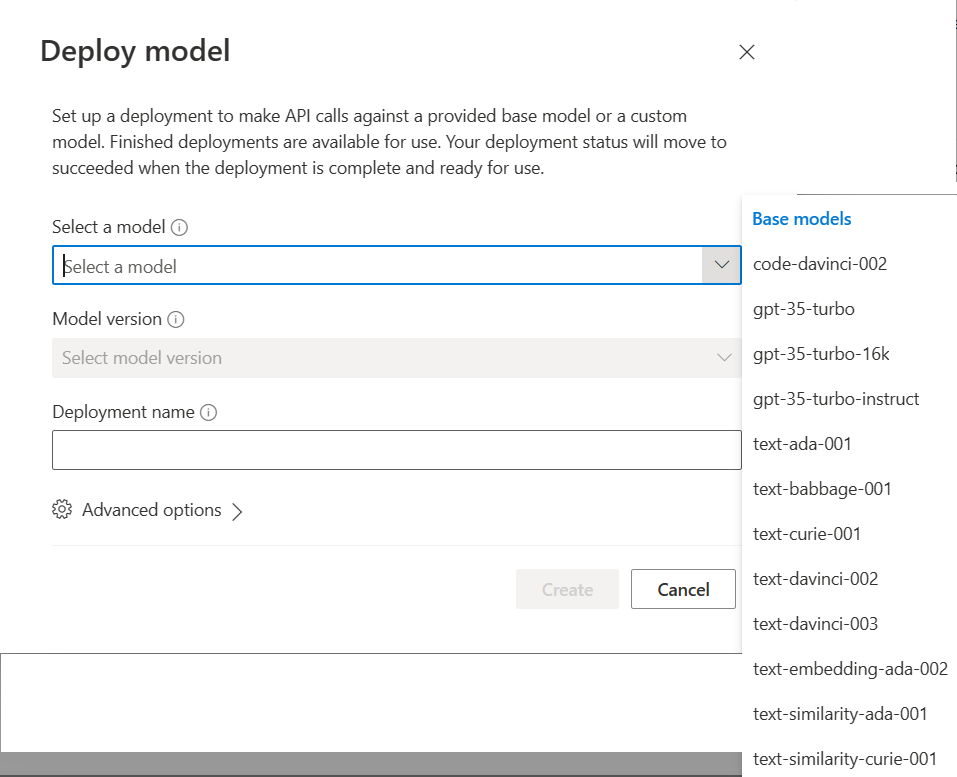
For integrating Open AI service, we need keys and endpoint, we can select Keys and Endpoint menu. Then we need to deploy models, we can select the Model deployments menu - currently it is part of Azure OpenAI Studio, we can click on the Manage deployments button which will open Azure AI Studio. In the Azure AI Studio select Deployments tab, click on Create new deployment button. In the dialog, we need to select the model to use - for this post I am using gpt-35-turbo, Model version, select the default, and finally set the Deployment name - this value we will be using the code.

This may take some time. Once it is completed successfully, we can start consuming the Open AI API in the ASP.NET Core web application.
Integrating Open AI with ASP.NET Core web app
As mentioned earlier, we can integrate Open AI in ASP.NET Core using REST APIs and using Open AI C# SDK. We will be looking into both these approaches. First we need to create an ASP.NET Core project, I am using an MVC project for the demo. We can create using dotnet new mvc -o OpenAIDemoWebApp command.
Using REST API
All the Open AI services are versioned using the api-version query parameter. All versions follow the YYYY-MM-DD date structure. Currently the version is 2023-09-15-preview.
In the program.cs file add the following code to configure the dependency injection of HTTP Client.
builder.Services.AddHttpClient("OpenAIClient", client =>
{
    client.BaseAddress = new Uri("https://dotnetthoughts.openai.azure.com/");
    client.DefaultRequestHeaders.Clear();
    client.DefaultRequestHeaders.Add("api-key", $"{builder.Configuration["OpenAIAPIKey"]}");
});
And in the controller action method, we can consume it like this.
public class OpenAIDemoController(ILogger<OpenAIDemoController> logger, IHttpClientFactory httpClientFactory) : Controller
{
    private readonly ILogger<OpenAIDemoController> _logger = logger;
    private readonly IHttpClientFactory _httpClientFactory = httpClientFactory;

    public async Task<IActionResult> Interact()
    {
        var openAiClient = _httpClientFactory.CreateClient("OpenAIClient");
        var response = await openAiClient.PostAsync("openai/deployments/dotnetthoughts/completions?api-version=2023-09-15-preview",
            new StringContent(JsonSerializer.Serialize(new { prompt = "Once upon a time", max_tokens = 5 }), Encoding.UTF8, "application/json"));
        var responseContent = await response.Content.ReadAsStringAsync();

        return View();
    }
}
The URL will be in the following format openai/deployment/[YOUR_DEPLOYMENT_NAME]/completions?api-version=2023-09-15-preview.
This way we can interact with Open AI using REST. This method is useful when we don’t have a SDK available, for example, if we want to interact with Open AI API from Php or some other languages. For C# and .NET there is an SDK available, we will explore that in the next section.
Using Azure.AI.OpenAI nuget package
To use the SDK, first we need to reference the NuGet package to the project. We can do this by running the command - dotnet add package Azure.AI.OpenAI --version 1.0.0-beta.5. Please note, this package is in preview right now. Once we add this NuGet package, we will get classes and extension methods to interact with Azure Open AI service.
In the program.cs we can add the following code to inject the OpenAIClient class.
builder.Services.AddSingleton(new OpenAIClient(new Uri("https://dotnetthoughts.openai.azure.com/"),
       new AzureKeyCredential(builder.Configuration["OpenAIAPIKey"]!)));
And in the controller action, we can do something like this.
public class OpenAIDemoController(ILogger<OpenAIDemoController> logger, OpenAIClient openAIClient) : Controller
{
    private readonly ILogger<OpenAIDemoController> _logger = logger;
    private readonly OpenAIClient _openAIClient = openAIClient;

    public async Task<IActionResult> Interact()
    {
        var completionsResponse = await _openAIClient.GetCompletionsAsync(
            deploymentOrModelName: "dotnetthoughts",
            new CompletionsOptions()
            {
                Prompts = { "Once upon a time" },
                MaxTokens = 5
            }, cancellationToken);

        var completions = completionsResponse.Value;

        return View();
    }
}
We can use the Open AI Client SDK in ASP.NET Core.
This way we can make our ASP.NET Core applications intelligent using Azure Open AI.
Happy Programming.
Found this useful? Share it with your network!
Copyright © 2026 Anuraj. Blog content licensed under the Creative Commons CC BY 2.5 | Unless otherwise stated or granted, code samples licensed under the MIT license. This is a personal blog. The opinions expressed here represent my own and not those of my employer. Powered by Jekyll. Hosted with ❤ by GitHub
