Write your first GitHub action - Part 1
August 19, 2019 by Anuraj
CI GitHub Actions ASPNET Core
GitHub Actions makes it easy to automate all your software workflows. GitHub actions is still in Beta and it is free for Open source projects. This post is writing your first GitHub action for implementing continuous integration for a dotnet core application. Similar to Azure DevOps or Travis CI, it is also supports YAML scripts to implement automation.
To get started, open your GitHub repository, select Actions Tab. If you never created an action before it will show a get started screen. Based on the repository code type it will suggest a workflow.
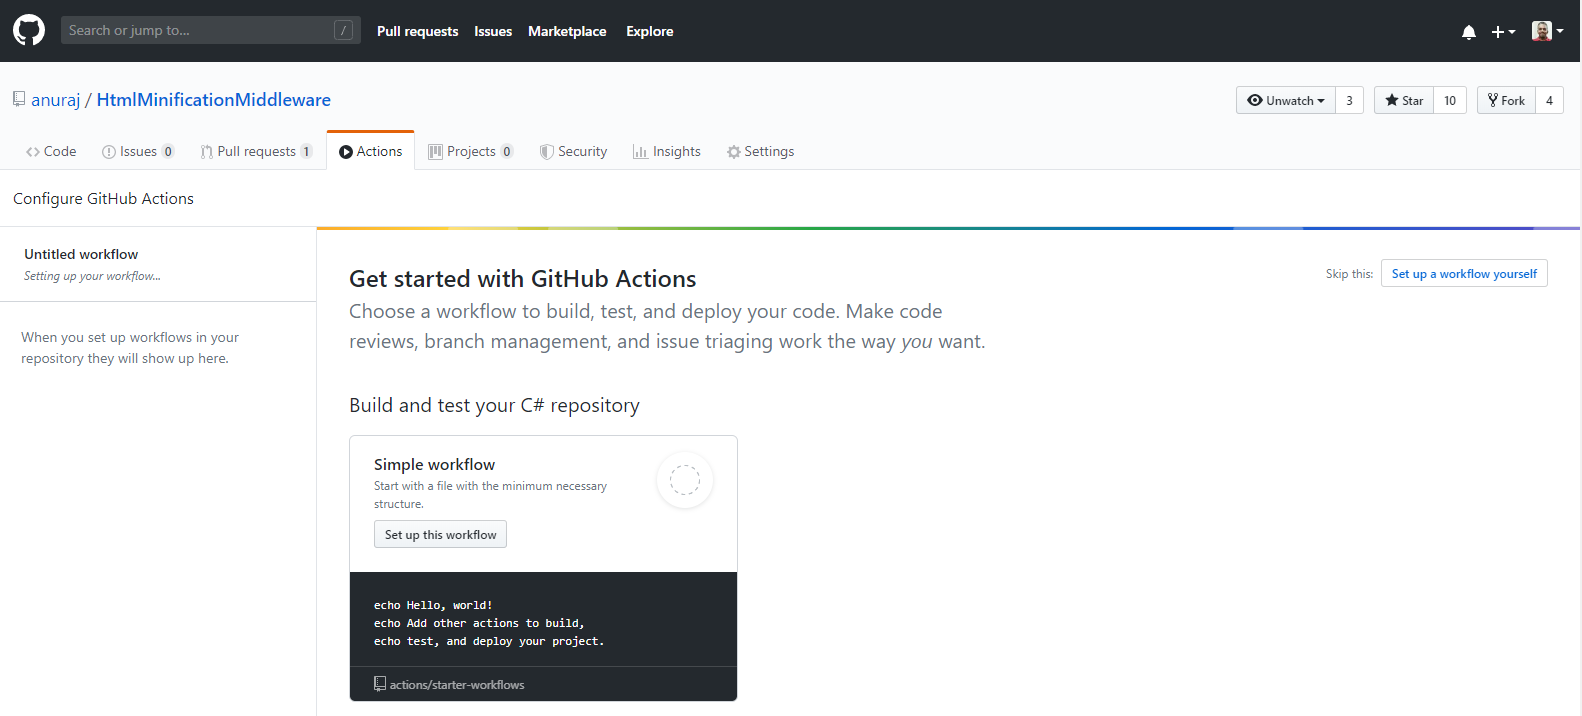
Since I am building CI for dotnet core application, you can scroll down and you will be able to find ASP.NET Core workflow.
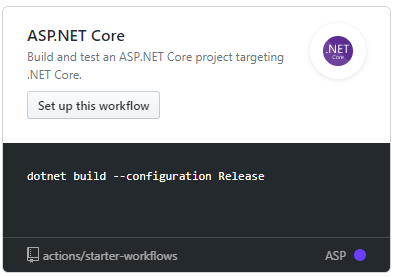
Click on the Set up this workflow button, which will create aspnetcore.yml file inside workflows folder under .github folder.
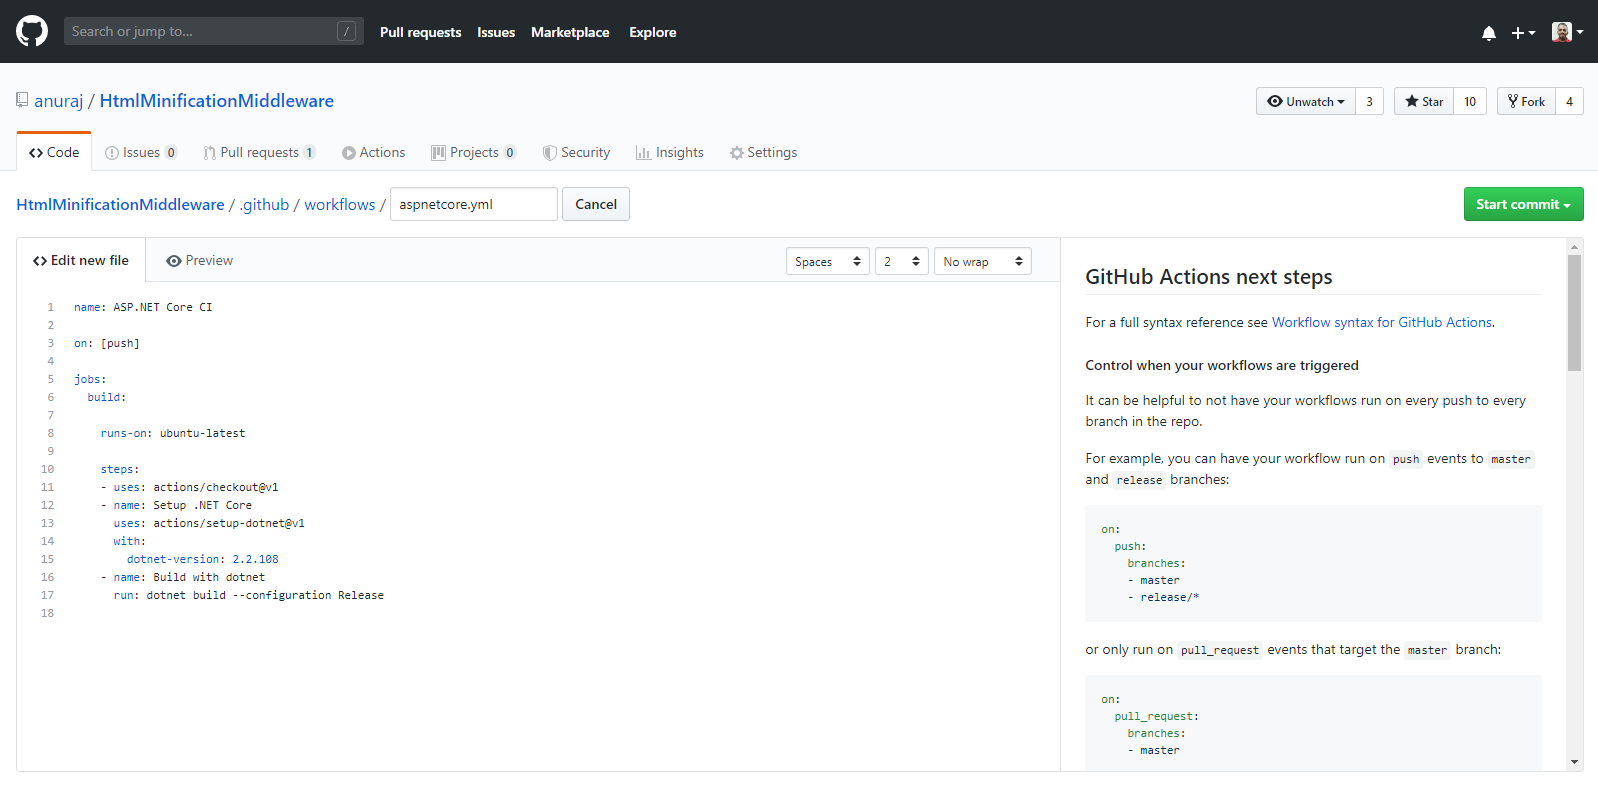
The project I am enabling CI contains unit tests, so I am including a step for unit tests as well. So here is the final yaml file.
name: dotnet core - build

on: [push]

jobs:
  build:
    runs-on: ubuntu-latest
    steps:
    - uses: actions/checkout@v1
    - name: Setup .NET Core
      uses: actions/setup-dotnet@v1
      with:
        dotnet-version: 2.2.108
    - name: Build with dotnet
      run: dotnet build --configuration Release
    - name: Unit Tests
      run: dotnet test
I just added one step, Running Unit tests step and dotnet test command to run. Next when I am committing the file, it will trigger the build and run the tests.
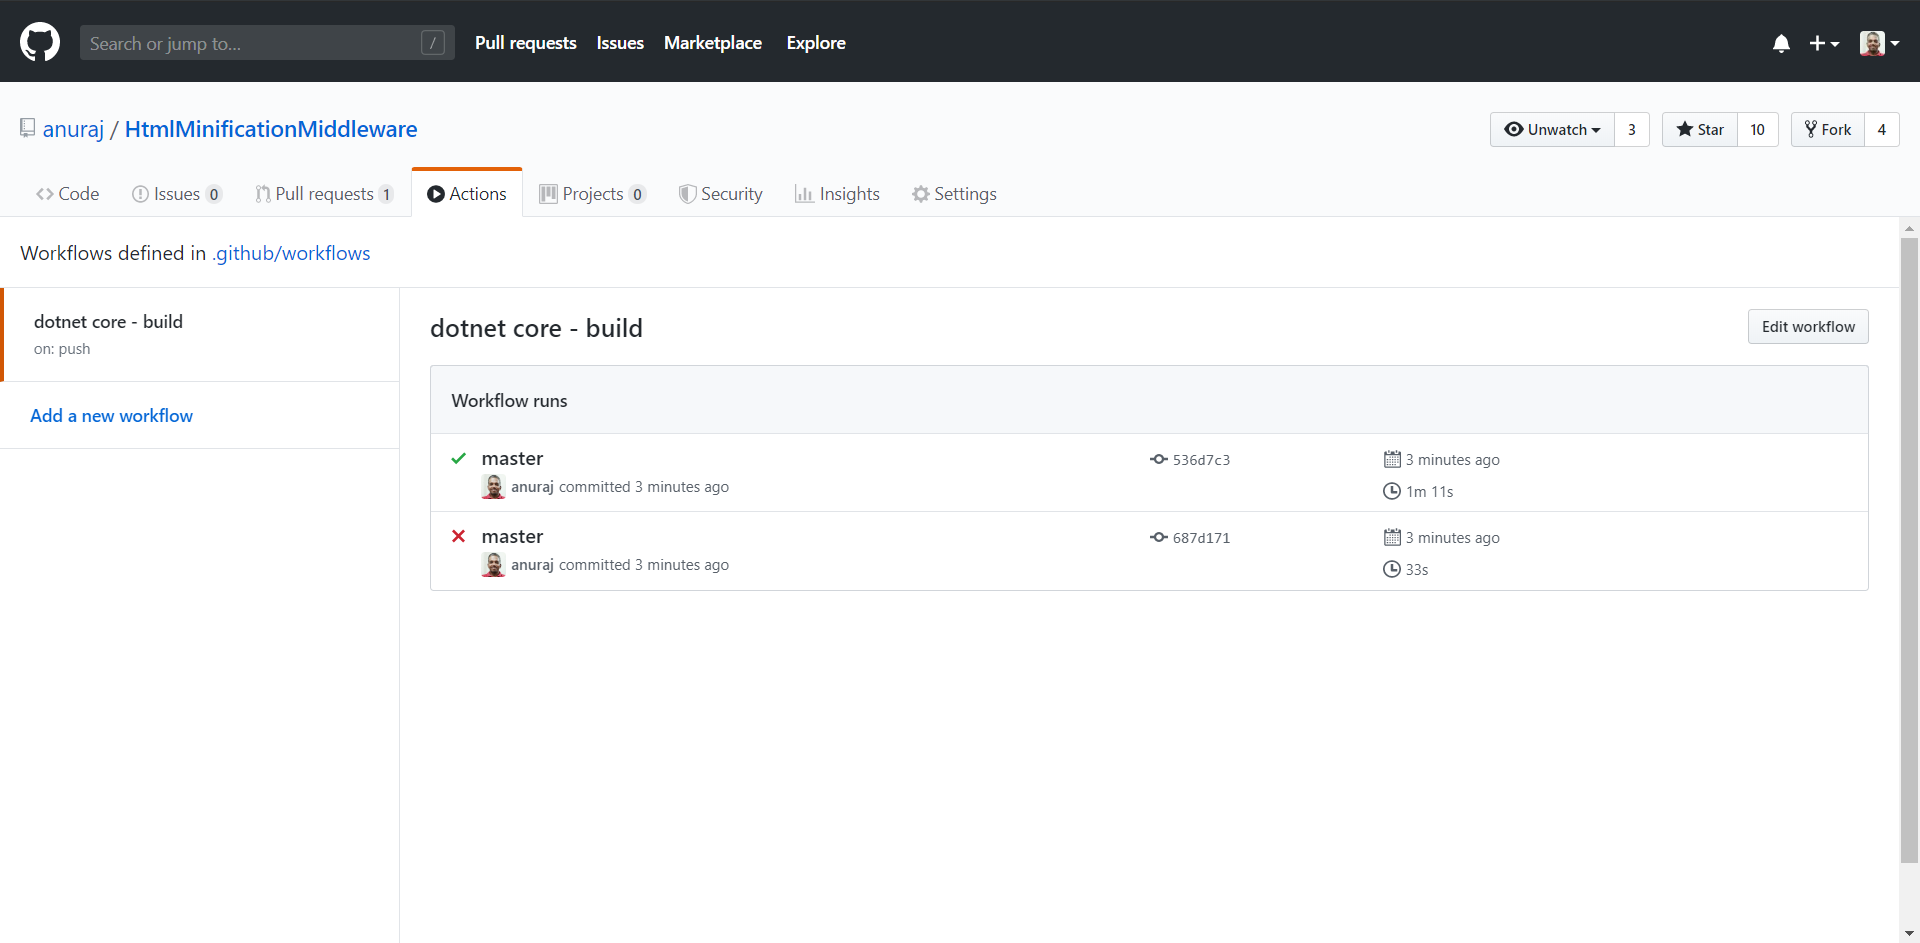
You will be able to find the details about the steps and debug information on clicking on the workflow name. You will get something like this.
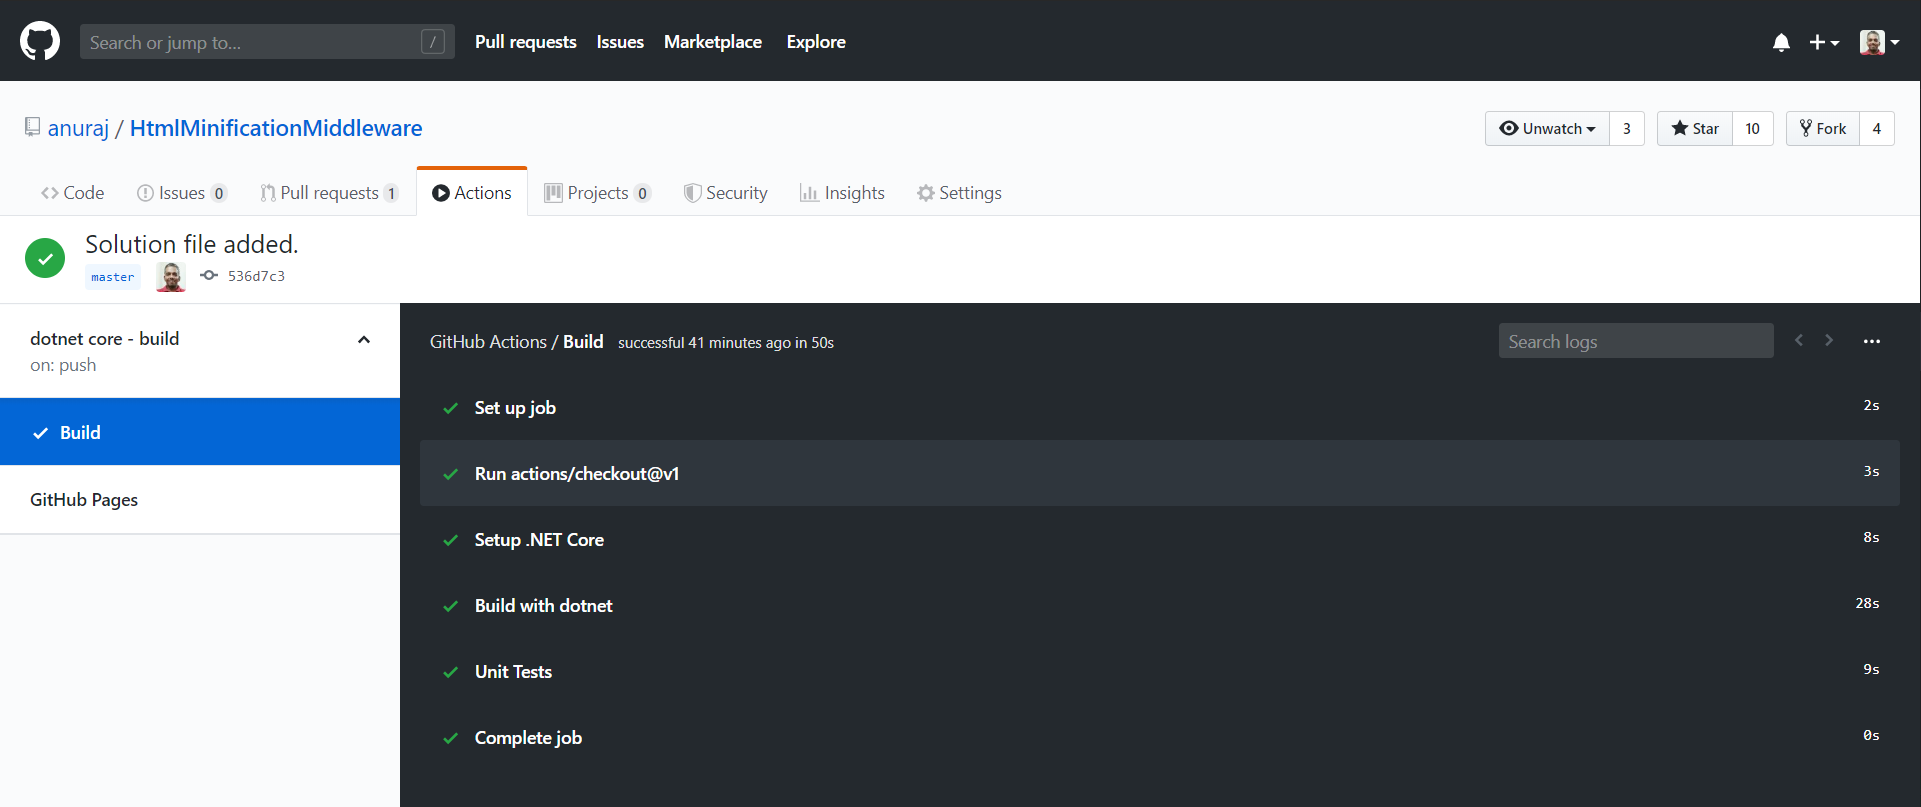
In this post we created a basic dotnet core workflow using GitHub Actions - which helps to build a dotnet core project and run unit tests. It is still in beta and may improve the features. In the next part we will look into deploying the application to Azure.
Happy Programming :)
Found this useful? Share it with your network!
Copyright © 2026 Anuraj. Blog content licensed under the Creative Commons CC BY 2.5 | Unless otherwise stated or granted, code samples licensed under the MIT license. This is a personal blog. The opinions expressed here represent my own and not those of my employer. Powered by Jekyll. Hosted with ❤ by GitHub
