Xamarin Android Push Notifications using Google Cloud Messaging (GCM) and ASP.Net
January 01, 2014 by Anuraj
.Net ASP.Net Xamarin
This post is about implementing Push Notifications in Xamarin Android using Google Cloud Messaging (GCM). Google Cloud Messaging for Android (GCM) is a free service that helps developers send data from servers to their Android applications on Android devices, and upstream messages from the user’s device back to the cloud. The GCM service handles all aspects of queueing of messages and delivery to the target Android application running on the target device. A GCM implementation includes a Google-provided connection server, a 3rd-party app server that interacts with the connection server, and a GCM-enabled client app running on an Android device.
Here is the workflow
- Application will send “sender Id” to GCM server for registration
- Upon successful registration, the GCM server will issue a registration id to the device. The registration id required by the GCM server to identify the device and which will help to deliver the notification.
- After receiving the registration id, application will send the registration id to our server. This registration id required for the server application to send notifications to the devices.
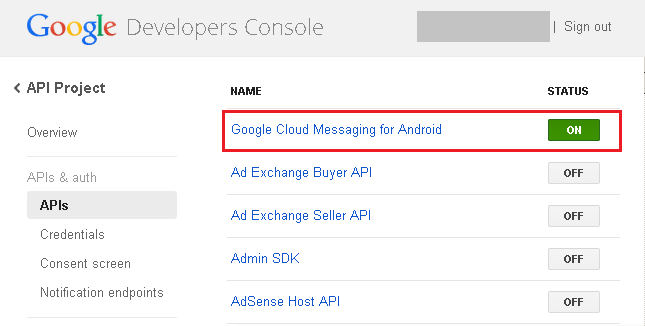
As the first step you need to create a new project. To create a Google API project, open the google api console. If you haven’t created an API project yet, click Create Project. Supply a project name and click Create. Once the project has been created, a page appears that displays your project ID and project number. For example, Project Number: 670330094152. Copy down your project number. You will use it later on as the GCM sender ID. By default GCM service will be disabled, you can enable it by clicking on the APIs & auth menu item, from the displayed list of APIs, turn on the Google Cloud Messaging for Android.
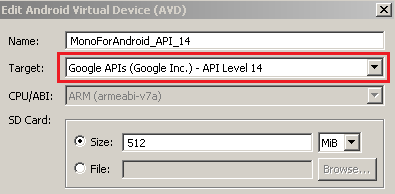
Before start developing, you need to setup an Google account in the emulator. For that you need to change the target API for the virtual device. You can either create one or edit the existing AVDs. Instead of creating a new virtual device, I modified the Target and changed to Google APIs (Google Inc.) - API Level 14.
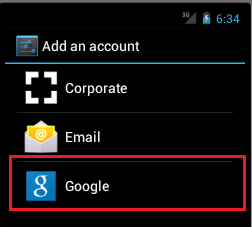
Start the emulator and go to Accounts & Sync option in the Settings. And then press Add Account button and add a Google account.(Without changing the target to google api this option will not be available.)
Now we will create the client application, open the Xamarin studio and create a new Android project. Right click on the components folder in the solution and add Google Cloud Messaging Client, this is a component which will help to setup Push Notifications quickly and easily. The components feature in Xamarin studio, is similar to the nuget in Visual Studio.
For registration, application need to send the sender id to the GCM server the following code will help you to do that.
GcmClient.CheckDevice(this);
GcmClient.CheckManifest(this);

GcmClient.Register(this, GcmBroadcastReceiver.SENDER_IDS);
The GcmClient.CheckDevice() and GcmClient.CheckManifest() will help to see that GCM is supported and that the manifest has the correct information. GcmClient.Register() method will try to register the device in the GCM server, with the sender id. Now you need to add a BroadcastReceiver and Service in the application to receive Registration id and the notifications.
Here is the implementation of BroadcastReceiver
[BroadcastReceiver(Permission=Constants.PERMISSION_GCM_INTENTS)]
[IntentFilter(new string[] { Constants.INTENT_FROM_GCM_MESSAGE },
	Categories = new string[] { "@PACKAGE_NAME@" })]
[IntentFilter(new string[] { Constants.INTENT_FROM_GCM_REGISTRATION_CALLBACK },
	Categories = new string[] { "@PACKAGE_NAME@" })]
[IntentFilter(new string[] { Constants.INTENT_FROM_GCM_LIBRARY_RETRY },
	Categories = new string[] { "@PACKAGE_NAME@" })]
public class GcmBroadcastReceiver : GcmBroadcastReceiverBase<GcmService>
{
	//IMPORTANT: Change this to your own Sender ID!
	//The SENDER_ID is your Google API Console App Project Number
	public static string[] SENDER_IDS = new string[] {"123456789"};
}
And here is the implementation of Service. Once the device registration is successful, you will get the registration id in the OnRegistered event. And when ever a notification received the OnMessage method will be invoked. The intent parameter in the OnMessage() will contains all the notification details.
[Service]
public class GcmService : GcmServiceBase
{
	public GcmService() : base(GcmBroadcastReceiver.SENDER_IDS) { }

	protected override void OnRegistered (Context context, string registrationId)
	{
		Console.WriteLine ("Device Id:" + registrationId);
	}

	protected override void OnMessage (Context context, Intent intent)
	{
		if (intent != null && intent.Extras != null) {
			var message = intent.Extras.GetString ("message");
			createNotification ("Push Sample", message);
		}
	}

	protected override void OnUnRegistered (Context context, string registrationId)
	{
		//Receive notice that the app no longer wants notifications
	}

	protected override void OnError (Context context, string errorId)
	{
		//Some more serious error happened
	}

	private void createNotification(string title, string desc)
	{
		var notificationManager = GetSystemService(Context.NotificationService)
			                      as NotificationManager;
		var uiIntent = new Intent(this, typeof(MainActivity));
		var notification = new Notification(Resource.Drawable.Icon, title);
		notification.Flags = NotificationFlags.AutoCancel;
		notification.Defaults = NotificationDefaults.Sound;
		notification.SetLatestEventInfo(this, title, desc,
				PendingIntent.GetActivity(this, 0, uiIntent, 0));
		notificationManager.Notify(1, notification);
	}
}
Our client implementation is finished. If you look into the code, I am not sending the registration id to the our server, instead I am printing the same on the console. Now we need to implement the server. And here is a server implementation.
public string SendNotification(string deviceId, string message)
{
var GoogleAppID = "123456789ABCDEFGHIJKLMNOP";
var SENDER_ID = "123456789";
var value = message;
var webRequest = WebRequest.Create("https://android.googleapis.com/gcm/send");
webRequest.Method = "post";
webRequest.ContentType = " application/x-www-form-urlencoded;charset=UTF-8";
webRequest.Headers.Add(string.Format("Authorization: key={0}", GoogleAppID));
webRequest.Headers.Add(string.Format("Sender: id={0}", SENDER_ID));
var postData = "collapse_key=score_update&time_to_live=108&delay_while_idle=1&data.message="
+ value + "®istration_id=" + deviceId + "";
Byte[] bytes = Encoding.UTF8.GetBytes(postData);
webRequest.ContentLength = bytes.Length;
var dataStream = webRequest.GetRequestStream();
dataStream.Write(bytes, 0, bytes.Length);
dataStream.Close();
var webResponse = webRequest.GetResponse();
dataStream = webResponse.GetResponseStream();
var streamReader = new StreamReader(dataStream);
var responseFromServer = streamReader.ReadToEnd();
streamReader.Close();
dataStream.Close();
webResponse.Close();
return responseFromServer;
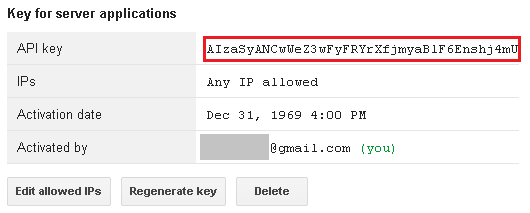
}In the server, you can see a google appid is required, which is nothing but a browser key you need to generate from the API console. Select credentials menu under APIs & auth, and create a new key for Public API access. From the Create new key option popup, select Server Key, and click create.
Now you can run the Android application, get the registration Id from output window. Run the ASP.Net application, provide the registration id and message. Click send notification. If everything goes well, you see a notification in the emulator.
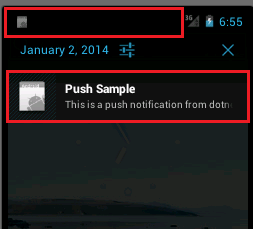
You can find the source code on github – https://github.com/anuraj/PushNotification
Happy Programming :)
Found this useful? Share it with your network!
Copyright © 2026 Anuraj. Blog content licensed under the Creative Commons CC BY 2.5 | Unless otherwise stated or granted, code samples licensed under the MIT license. This is a personal blog. The opinions expressed here represent my own and not those of my employer. Powered by Jekyll. Hosted with ❤ by GitHub
