Authenticating ASP.NET Core MVC applications with Azure Active Directory B2C - Part1
August 10, 2021 by Anuraj
Azure AspNetCore AzureADB2C
This article will discuss about implementing Authentication of ASP.NET Core MVC applications with Azure Active Directory B2C. Azure Active Directory B2C (Azure AD B2C) is a cloud identity management solution for web and mobile apps. The service provides authentication for apps hosted in the cloud and on-premises. I couldn’t find any documentation on how to use Azure AD B2C in ASP.NET Core MVC applications.
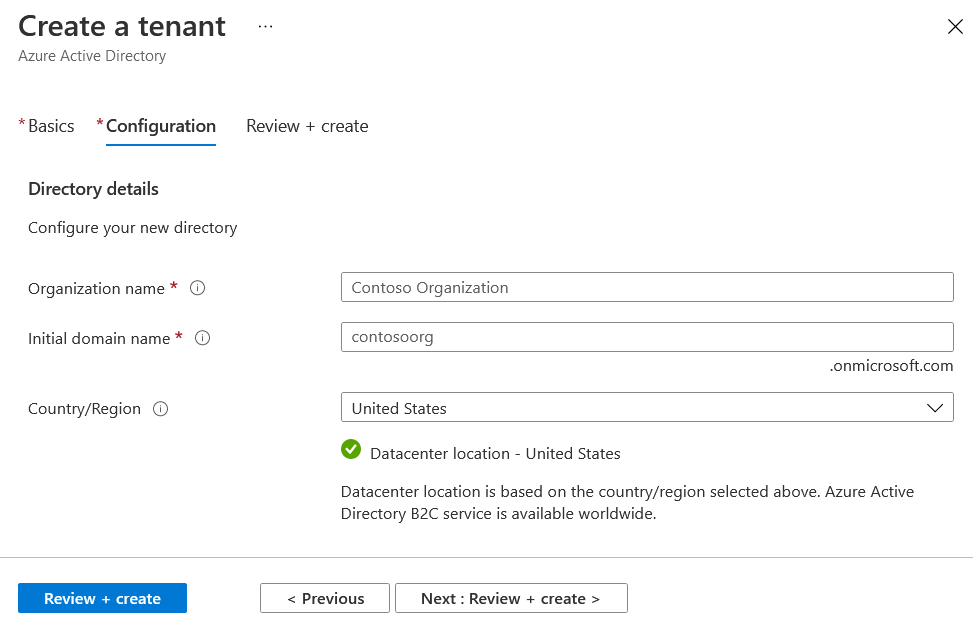
To get started first you need to create an Azure B2C tenant from Azure Portal. It is simple and straight forward.
Once it is completed. You need to create an ASP.NET Core MVC application. You can use dotnet new mvc command or you can use new project option in Visual Studio. Next you need to create an App Registration. You can do it from App Registrations menu of Azure B2C.
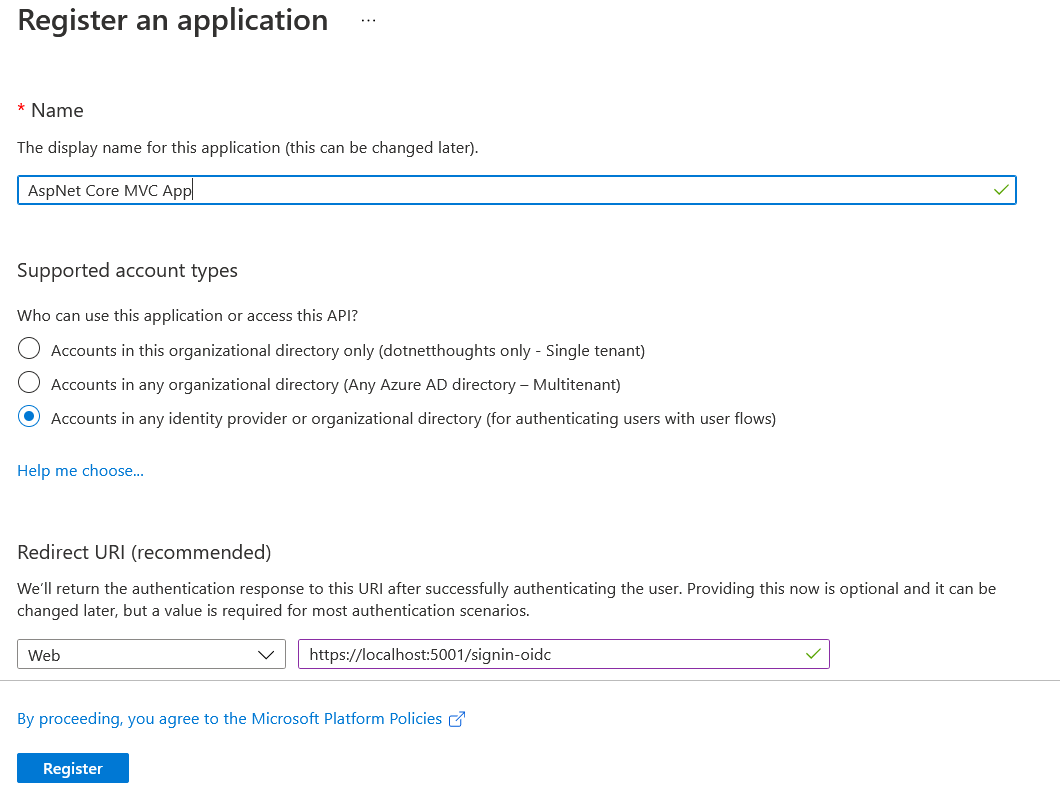
If you’re using VS Code, set the Redirect URI as https://localhost:5001/signin-oidc and if you’re using Visual Studio use the port number of your application assigned by Visual Studio. Next add two nuget packages to your project.
dotnet add package Microsoft.Identity.Web --version 1.4.0
dotnet add package Microsoft.Identity.Web.UI --version 1.4.0
The Microsoft.Identity.Web package includes the basic set of dependencies for authenticating with the Microsoft Identity platform. And the Microsoft.Identity.Web.UI includes UI functionality encapsulated in an area named MicrosoftIdentity.
Next add the following configuration settings in your appsettings.json file.
"AzureB2C": {
    "Instance": "https://login.microsoftonline.com/",
    "Domain": "dotnetthoughts.onmicrosoft.com",
    "ClientId": "99999999-9999-9999-9999-999999999999",
    "TenantId": "common",
    "CallbackPath": "/signin-oidc"
}- For Domain, use the domain of your Azure AD B2C tenant.
- For ClientId, use the Application (client) ID from the app registration you created in your tenant.
- Leave all other values as they are.
Next modify the ConfigureServices with the following code.
services.AddAuthentication(OpenIdConnectDefaults.AuthenticationScheme)
    .AddMicrosoftIdentityWebApp(Configuration.GetSection("AzureB2C"));
services.AddAuthorization(options =>
{
    options.FallbackPolicy = options.DefaultPolicy;
});
services.AddRazorPages(options =>
{
    options.Conventions.AllowAnonymousToPage("/Index");
})
.AddMvcOptions(options => { })
.AddMicrosoftIdentityUI();
Above the services.AddControllersWithViews(); code. And modify the Configure method and add app.UseAuthentication(); before app.UseAuthorization(); and endpoints.MapRazorPages(); in the app.UseEndpoints.
public void Configure(IApplicationBuilder app, IWebHostEnvironment env)
{
    //Code omitted for brevity
    app.UseRouting();
    app.UseAuthentication();
    app.UseAuthorization();

    app.UseEndpoints(endpoints =>
    {
        endpoints.MapControllerRoute(
            name: "default",
            pattern: "{controller=Home}/{action=Index}/{id?}");
        endpoints.MapRazorPages();
    });
}
Now you’re ready to run the application. If you run the application now it will automatically will be redirected to Azure AD B2C login page. It may not be a good user experience. You can fix this removing the following code.
services.AddAuthorization(options =>
{
    options.FallbackPolicy = options.DefaultPolicy;
});
And create a partial view with the following code.
@using System.Security.Principal

<ul class="navbar-nav">
@if (User.Identity.IsAuthenticated)
{
        <li class="nav-item">
            <span class="navbar-text text-dark">Hello @User.Identity.Name!</span>
        </li>
        <li class="nav-item">
            <a class="nav-link text-dark" asp-area="MicrosoftIdentity"
                asp-controller="Account" asp-action="SignOut">Sign out</a>
        </li>
}
else
{
        <li class="nav-item">
            <a class="nav-link text-dark" asp-area="MicrosoftIdentity"
                asp-controller="Account" asp-action="SignIn">Sign in</a>
        </li>
}
</ul>
And modify the _Layout.cshtml file and include the partial view in the header like this.
<div class="navbar-collapse collapse d-sm-inline-flex justify-content-between">
    <ul class="navbar-nav flex-grow-1">
        <li class="nav-item">
            <a class="nav-link text-dark" asp-area="" asp-controller="Home" asp-action="Index">Home</a>
        </li>
        <li class="nav-item">
            <a class="nav-link text-dark" asp-area="" asp-controller="Home" asp-action="Privacy">Privacy</a>
        </li>
    </ul>
    <partial name="_LoginPartial" />
</div>
Now if you run the application you will be able to see Sign in button when you’re launching the app and when you click on Sign in you will be redirected to Azure B2C login page and you will be able to Sign in or Sign up. By default once you login, you will be able to see your email address. You can change it to name using the following code.
services.Configure<OpenIdConnectOptions>(OpenIdConnectDefaults.AuthenticationScheme, options =>
{
options.TokenValidationParameters = new TokenValidationParameters
{
NameClaimType = "name",
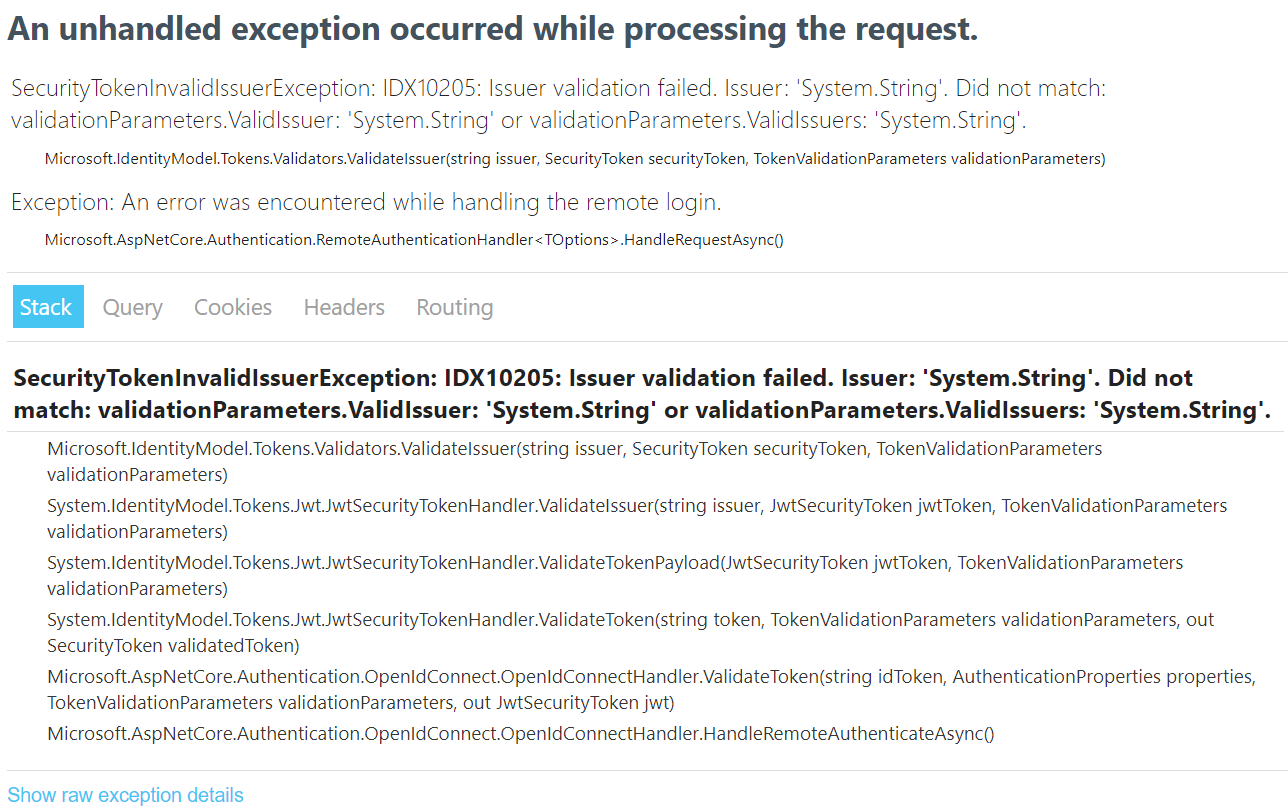
ValidateIssuer = false
};
});Without the ValidateIssuer = false configuration you will get an exception like this.
And if you like to store the information of the logged in users, you can add code like this - this code will called once the user logged in to the application. And in the code sample I am reading the claims and saving the information to database using DbContext.
options.Events = new OpenIdConnectEvents()
{
    OnTicketReceived = async (context) =>
    {
        using (var scope = context.HttpContext.RequestServices.CreateScope())
        {
            var applicationDbContext = scope.ServiceProvider.GetRequiredService<ApplicationDbContext>();
            var objectidentifier = context.Principal
                .FindFirstValue("http://schemas.microsoft.com/identity/claims/objectidentifier");
            var nameidentifier = context.Principal.FindFirstValue(ClaimTypes.NameIdentifier);
            var name = context.Principal.FindFirstValue("name");
            var email = context.Principal.FindFirstValue("preferred_username");
            var isUserExists = await applicationDbContext.ApplicationUsers
                .AnyAsync(u => u.ObjectIdentifier == objectidentifier);
            if (!isUserExists)
            {
                var applicationUser = new ApplicationUser()
                {
                    Email = email,
                    Name = name,
                    ObjectIdentifier = objectidentifier,
                    NameIdentifier = nameidentifier
                };
                applicationDbContext.ApplicationUsers.Add(applicationUser);
                await applicationDbContext.SaveChangesAsync();
            };
        }
    }
};
In this blog post I explained how to use Azure B2C to login to an ASP.NET Core MVC application and store information about the user to the application database. Azure B2C offers customized user registration and login workflow and UI customization as well. It is called User flows. I will explain how to create User flows and how to use them in your ASP.NET Core MVC application.
Happy Programming :)
Copyright © 2024 Anuraj. Blog content licensed under the Creative Commons CC BY 2.5 | Unless otherwise stated or granted, code samples licensed under the MIT license. This is a personal blog. The opinions expressed here represent my own and not those of my employer. Powered by Jekyll. Hosted with ❤ by GitHub