Authenticating ASP.NET Core MVC applications with Azure Active Directory B2C - User flows - Part2
August 11, 2021 by Anuraj
Azure AspNetCore AzureADB2C
This article will discuss about implementing Authentication of ASP.NET Core MVC applications with Azure Active Directory B2C. Azure Active Directory B2C (Azure AD B2C) is a cloud identity management solution for web and mobile apps. The service provides authentication for apps hosted in the cloud and on-premises. I couldn’t find any documentation on how to use Azure AD B2C in ASP.NET Core MVC applications. In this blog post we will explore how to use User flows - which is a customization feature offered by Azure B2C.
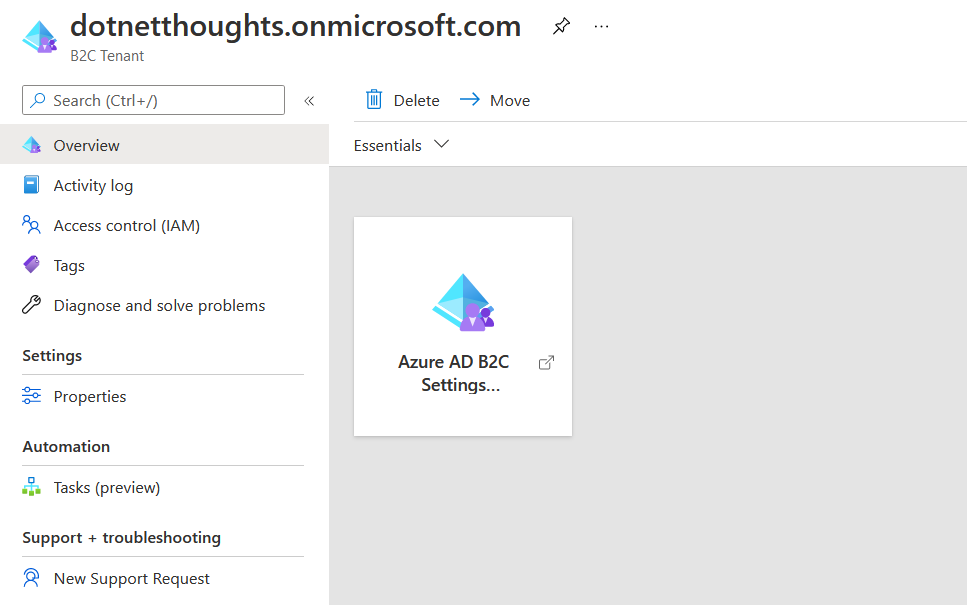
To access User flows, open your Azure B2C settings and click on the Azure AD B2C Settings.
And from the menu, you can access User flows.

And in the screen, click on the new user flow, and Select the user flow type as Sign up and sign in and Version as Recommended.
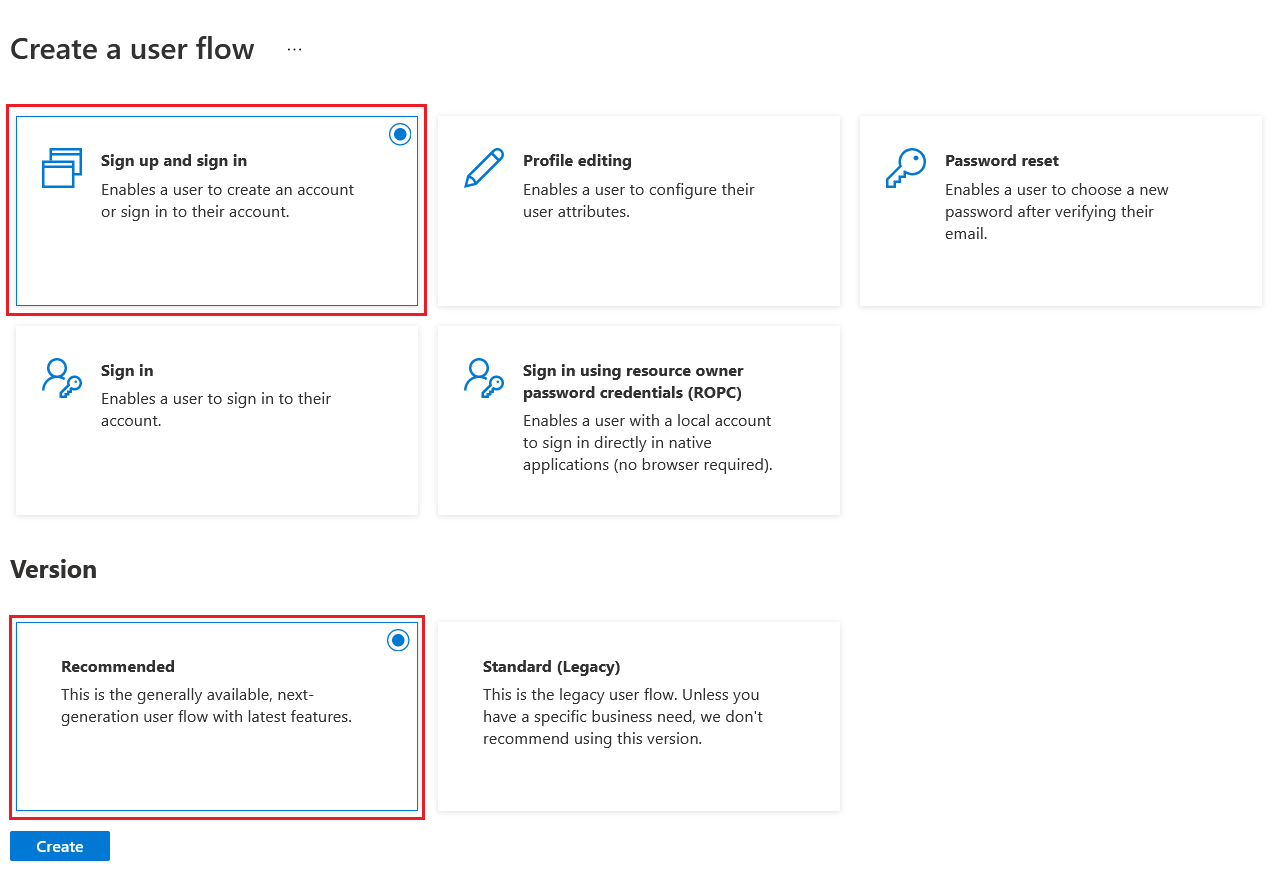
And then click on Create. In the create step, configure name for the User flow, identity provider (since you’re creating it first time you see only one - Email Signup). All the other options are optional, which you can configure later if required.

It will create a User flow with the name B2C_1_demo. Once it is done, create a section in your appsettings.json file, like the following.
 "AzureAdB2C": {
    "Instance": "https://dotnetthoughts.b2clogin.com",
    "Domain": "dotnetthoughts.onmicrosoft.com",
    "ClientId": "99999999-9999-9999-9999-999999999999",
    "TenantId": "88888888-8888-8888-8888-888888888888",
    "SignedOutCallbackPath ": "/signout-callback-oidc",
    "SignUpSignInPolicyId": "B2C_1_demo",
    "ClientSecret": "A2D9M_c.YR1nf~B.vXfM7H98.V5PXP00b~"
}- For Domain, use the domain of your Azure AD B2C tenant.
- For ClientId, use the Application (client) ID from the app registration you created in your tenant.
- For Instance, use the domain of your Azure AD B2C tenant.
- For SignUpSignInPolicyId, use the user flow policy defined in the Azure B2C tenant
- For ClientSecret, create one secret value for your app registration.
Next modify the ConfigureServices with the following code.
services.AddAuthentication(OpenIdConnectDefaults.AuthenticationScheme)
.AddMicrosoftIdentityWebApp(Configuration.GetSection("AzureAdB2C"));
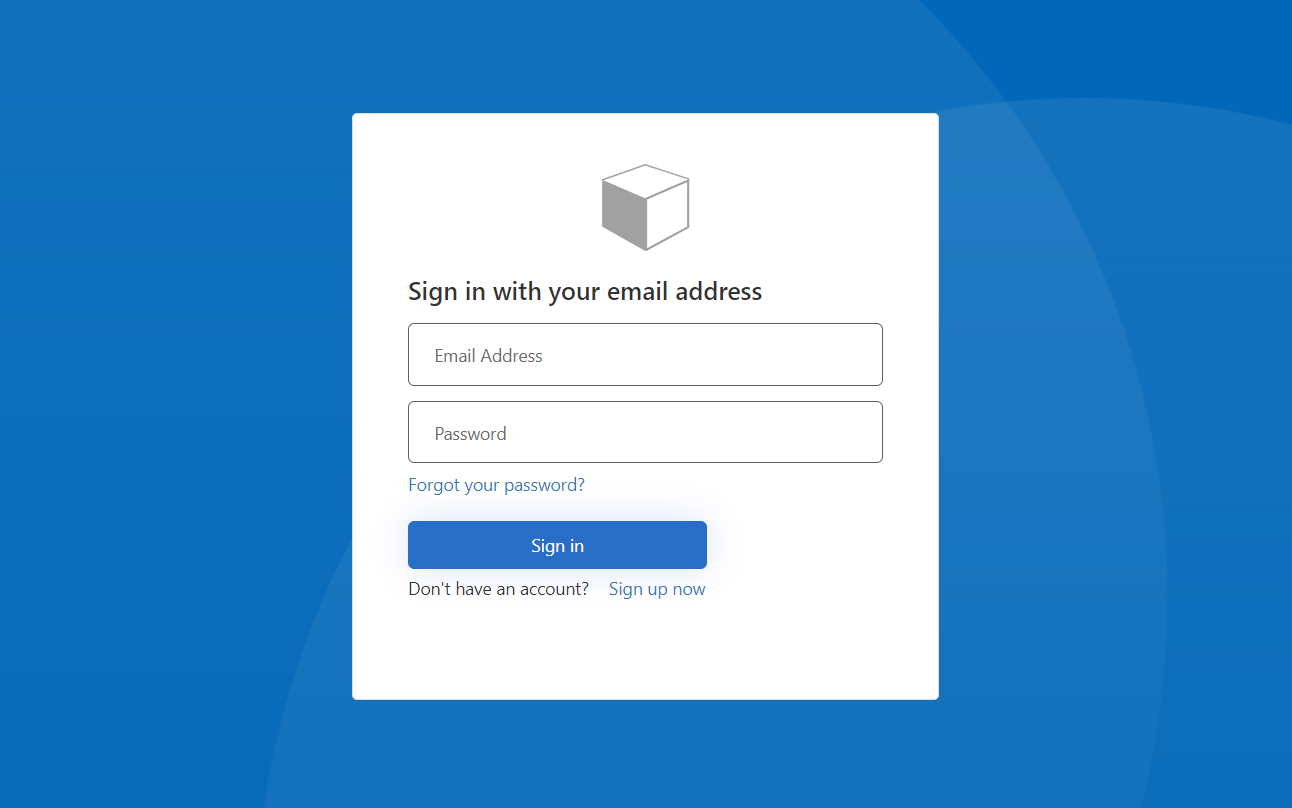
//Code omitted for brevityNow you will be able to run the application. And when you click on Sign In you will be able to see a different login page - not the Microsoft one, like this.
And if you click on Sign up now link, you will be able to see registration form like this.
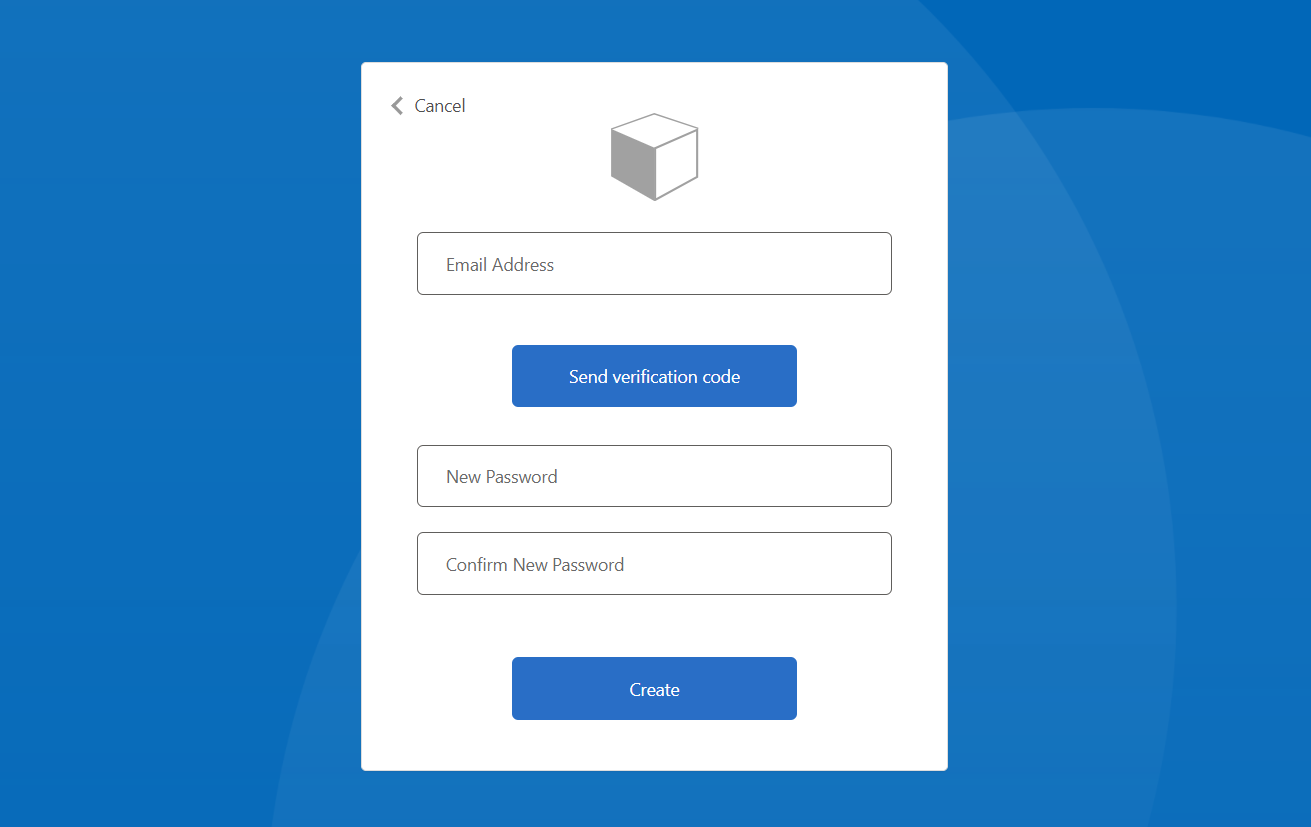
In the registration, first you need to provide an email address, Azure B2C will send a code to your email address provided like this.
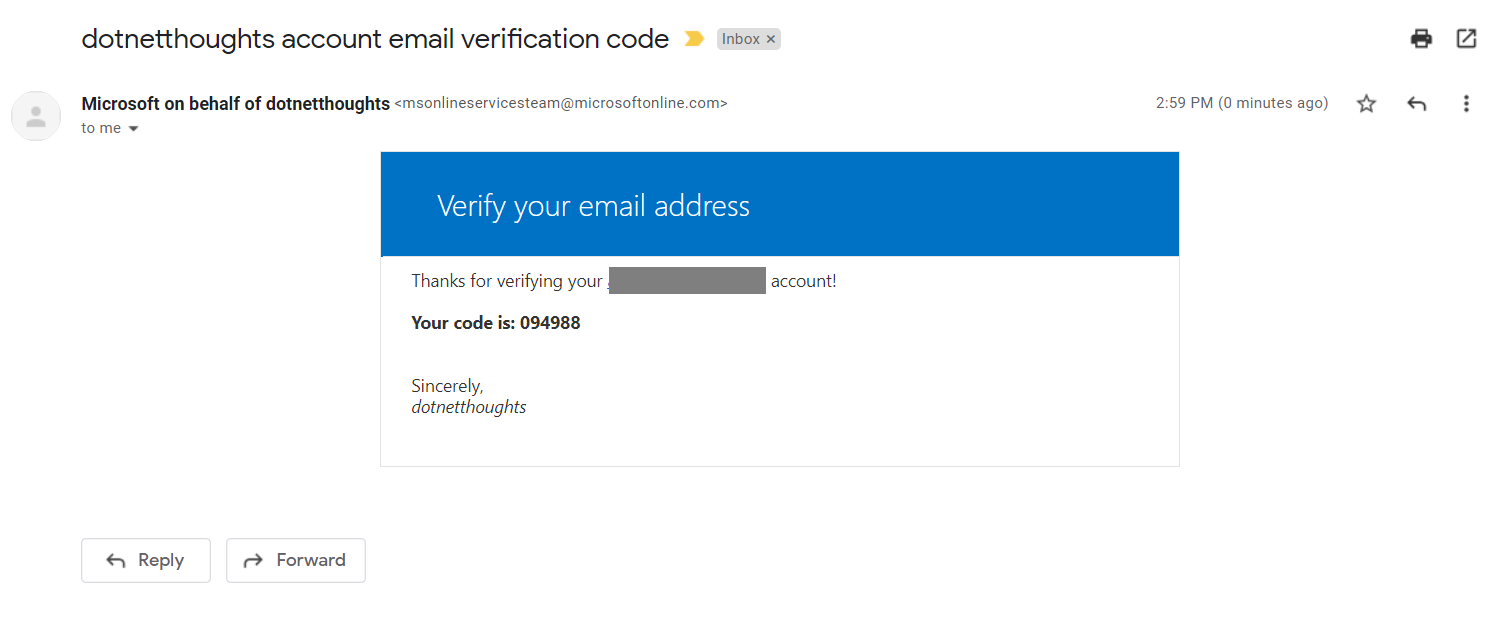
And you need to take this code and provide in the Form to complete the verification process. Then you need to give the password and click on Create button to create an account with your ASP.NET Core MVC application. Once you create an account, you will be able to get the data in the OnTicketReceived method similar to the earlier implementation. By default User flows comes with less claims and you can customize them based on your requirements. And since we didn’t customized the userflow you might not get all the parameters like email or name while the user sign in to the application. I will explain about customizing User flow fields in a later post.
Happy Programming :)
Copyright © 2024 Anuraj. Blog content licensed under the Creative Commons CC BY 2.5 | Unless otherwise stated or granted, code samples licensed under the MIT license. This is a personal blog. The opinions expressed here represent my own and not those of my employer. Powered by Jekyll. Hosted with ❤ by GitHub