How to Build a CRUD Application with ASP.NET Core 3.0 and EF Core 3.0
December 01, 2019 by Anuraj
ASPNETCore EFCore CodeGeneration Scaffolding
This post is about how to build a CRUD application using ASP.NET Core MVC using EF Core database first approach. So I am not writing very minimal code and building an application from the existing database. In this post I am using the NorthWind sample database from Microsoft.
So first we need to restore or create the NorthWind database. We can download it from Northwind Sample Database script. Once we download the script, execute it and create the Northwind database. Next create an ASP.NET Core MVC application using dotnet new mvc command. Once the project created, we need to add the reference of Microsoft.EntityFrameworkCore.Design package and Microsoft.EntityFrameworkCore.SqlServer package. Both these packages required to scaffold the Model classes and DbContext class. Once the packages installed successfully. The project file will look something like this.
<Project Sdk="Microsoft.NET.Sdk.Web">
  <PropertyGroup>
    <TargetFramework>netcoreapp3.1</TargetFramework>
  </PropertyGroup>
  <ItemGroup>
    <PackageReference Include="Microsoft.EntityFrameworkCore.Design" Version="3.1.0-preview3.19554.8">
      <IncludeAssets>runtime; build; native; contentfiles; analyzers; buildtransitive</IncludeAssets>
      <PrivateAssets>all</PrivateAssets>
    </PackageReference>
    <PackageReference Include="Microsoft.EntityFrameworkCore.SqlServer" Version="3.1.0-preview3.19554.8" />
  </ItemGroup>
</Project>
Next you need to run the following command to scaffold the model and dbcontext classes.
dotnet ef dbcontext scaffold "Server=.\SQLEXPRESS;Database=Northwind;Trusted_Connection=true" Microsoft.EntityFrameworkCore.SqlServer -d -o Models --context-dir DatabaseContext
In this command I am specifying the connection string and the provider, these two are mandatory arguments for the dotnet ef dbcontext scaffold command. And the -o Models command parameter helps to save the generated model classes to the Models folder in MVC. Once we execute this command, all the tables and views scaffolded and saved in the models directory.
We may need to update the connection string from the Database context class and keep it in the configuration file. Also modify the
startupfile class and include theAddDbContext()method.
Next we need to install the Microsoft.VisualStudio.Web.CodeGeneration.Design package - this package is required to generate the controller class and razor views. And once the installation is completed the project file will look like this.
<Project Sdk="Microsoft.NET.Sdk.Web">
  <PropertyGroup>
    <TargetFramework>netcoreapp3.1</TargetFramework>
  </PropertyGroup>
  <ItemGroup>
    <PackageReference Include="Microsoft.EntityFrameworkCore.Design" Version="3.1.0-preview3.19554.8">
      <IncludeAssets>runtime; build; native; contentfiles; analyzers; buildtransitive</IncludeAssets>
      <PrivateAssets>all</PrivateAssets>
    </PackageReference>
    <PackageReference Include="Microsoft.EntityFrameworkCore.SqlServer" Version="3.1.0-preview3.19554.8" />
    <PackageReference Include="Microsoft.VisualStudio.Web.CodeGeneration.Design" Version="3.1.0-preview3.19558.8" />
  </ItemGroup>
</Project>
Here is the command to generate controller and views.
dotnet aspnet-codegenerator controller -udl -dc NorthwindContext -m Categories -name CategoriesController -outDir .\Controllers\
Unlike model class scaffolding, there is no way to generate controllers and views for all the model classes, we need to execute the command for each model class individually. For the controller generator, the datacontext (-dc) and model (-m) parameters are required. The -udl parameter specify to use the Default Layout view file. Execute the command for all the tables in the database. Once it is completed, build the project and run it.
If we try to access the Categories controller, we will be able to see something like this.
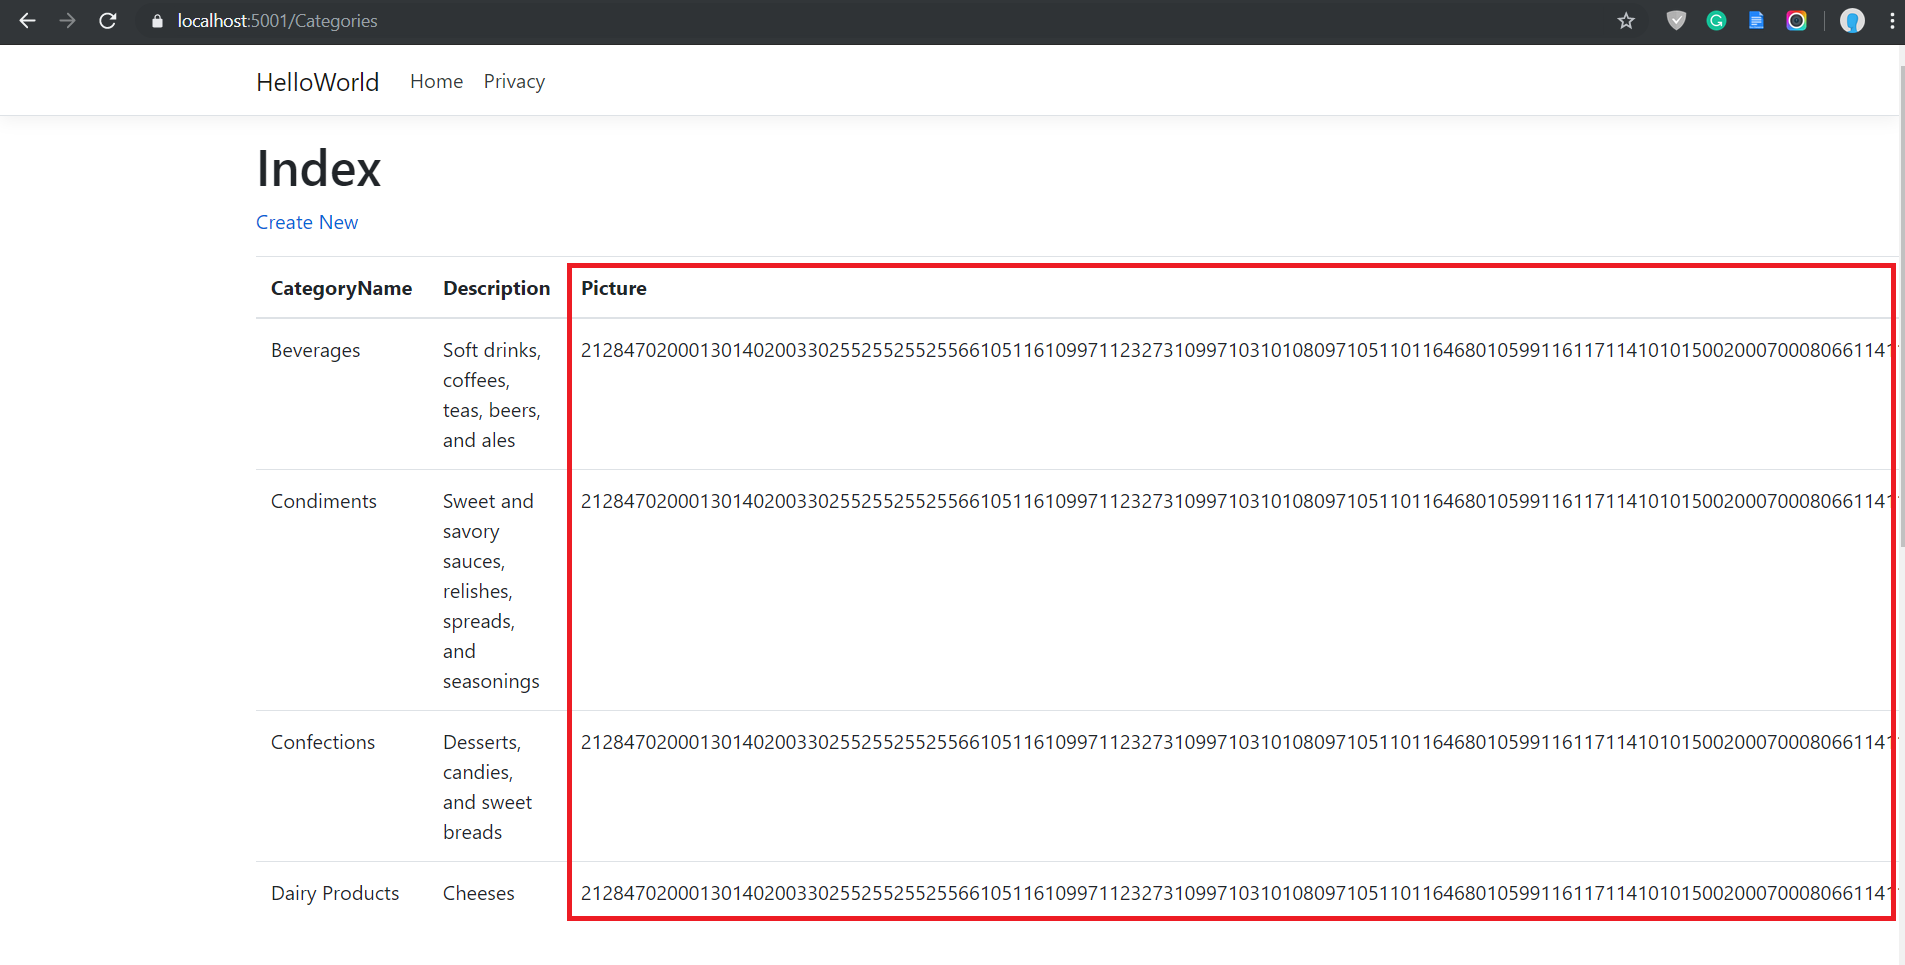
In the backend model class, it is a byte array, but the view is displaying it as text not an image. So we need to modify the code a little bit and convert the byte array to an image and return it. We can write an action method like this, which will look for the Image bytes using the id and returns a image file.
public IActionResult GetImageById(int id)
{
    var imageData = _context.Categories.Find(id).Picture;
    return File(imageData, "image/png");
}
And we can use it in the view like this
<img src="@Url.Action("GetImageById",new { id = item.CategoryId })" alt="@item.CategoryName" />
And now if we run the application and browse the categories controller, we will be able to see the images.
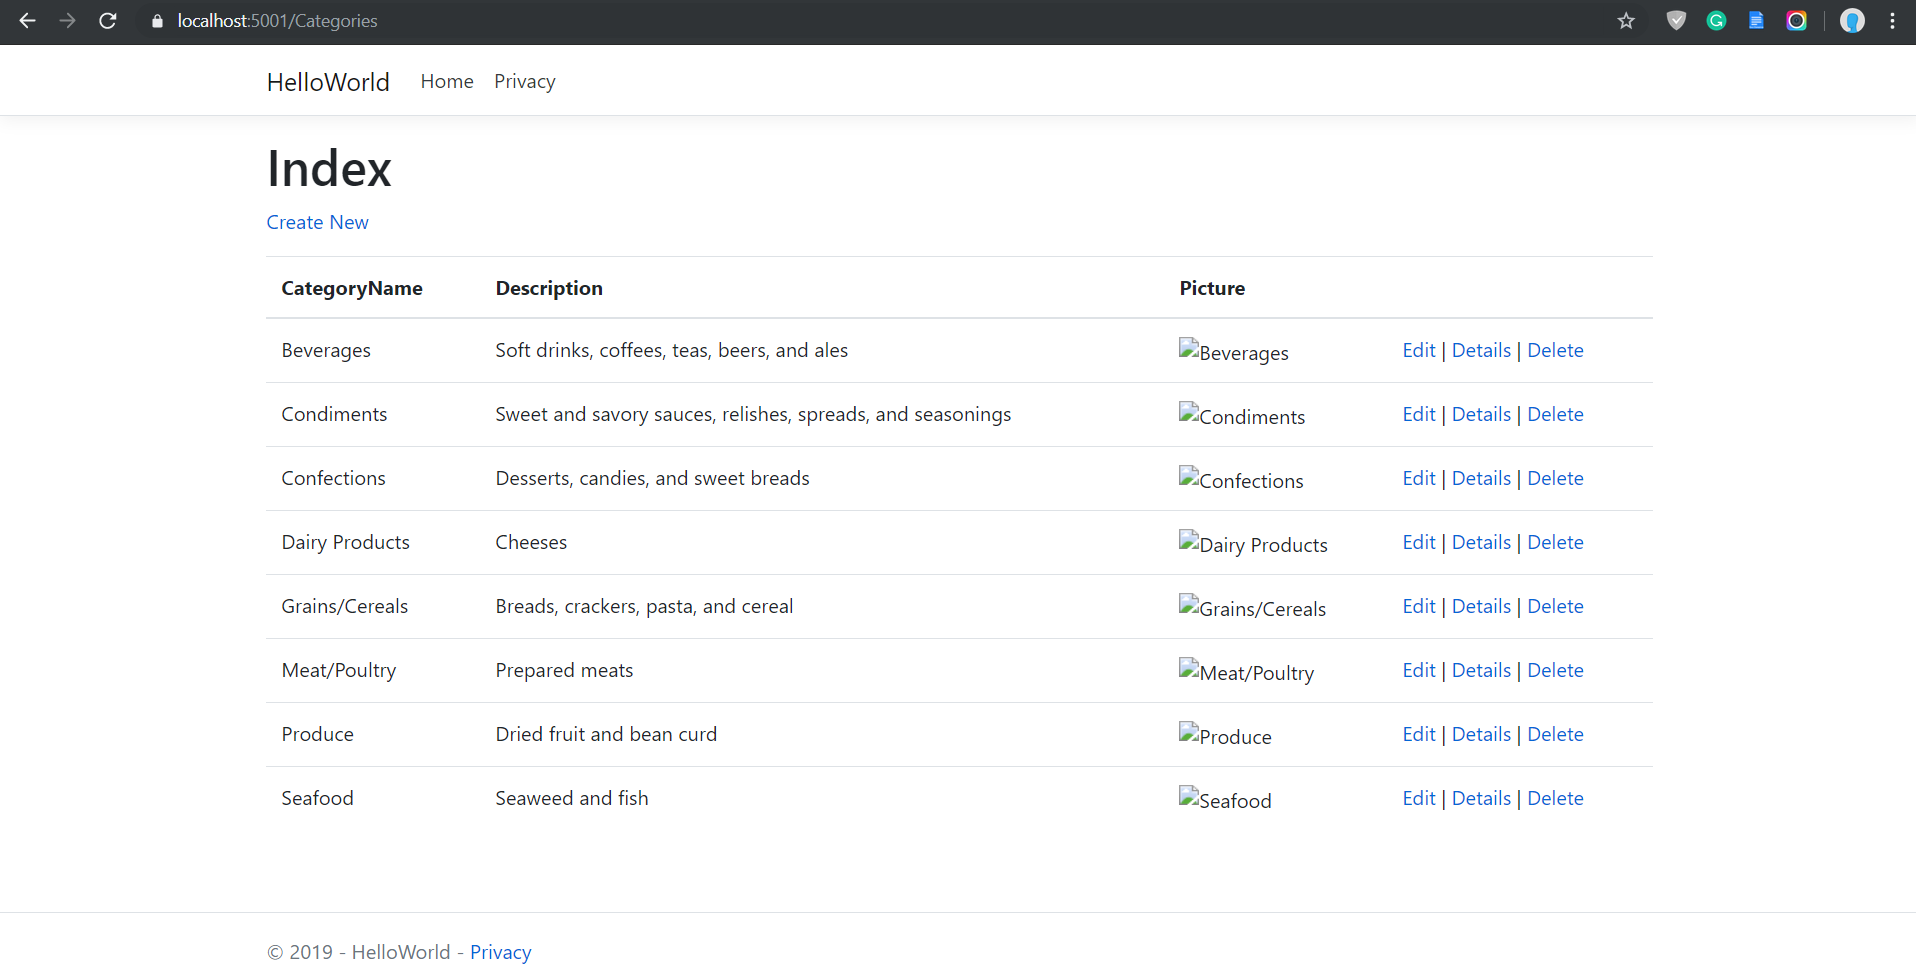
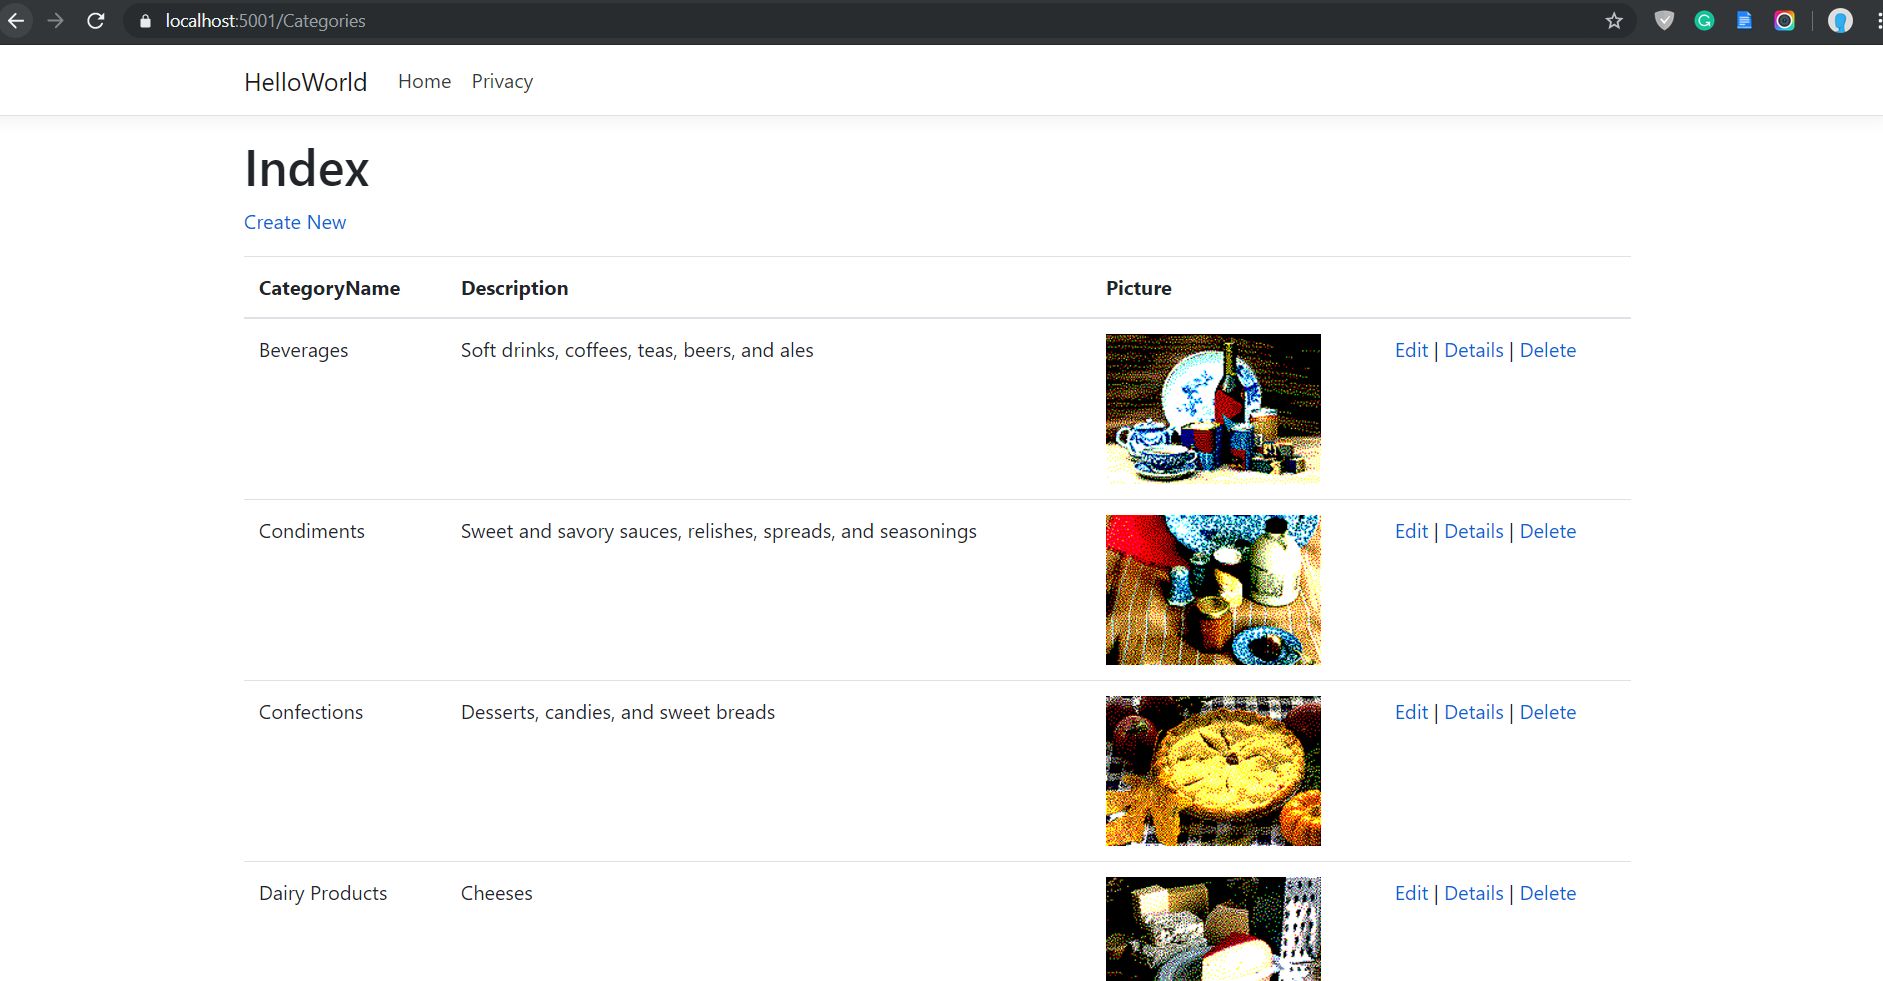
Ideally we should be able to see the images, but in Northwind database the Images are stores in a different way (MS Access format) so we need to modify the code a little but to render the images properly. Here is the updated GetImageById method.
public IActionResult GetImageById(int id)
{
    var offset = 78;
    var imageData = _context.Categories.Find(id).Picture;
    var bytes = new byte[imageData.Length - offset];

    Array.Copy(imageData, offset, bytes, 0, bytes.Length);
    return File(bytes, "image/png");
}
And here is the Categories Index view with proper images.
So in this post we have used the .NET Core scaffolding tools to generate model classes, controllers and views. If you want to build simple CRUD applications, it is recommended to use these tools.
Happy Programming :)
If you find my content helpful, consider supporting my work. Your support helps me continue creating valuable resources for the community.

Found this useful? Share it with your network!
Copyright © 2026 Anuraj. Blog content licensed under the Creative Commons CC BY 2.5 | Unless otherwise stated or granted, code samples licensed under the MIT license. This is a personal blog. The opinions expressed here represent my own and not those of my employer. Powered by Jekyll. Hosted with ❤ by GitHub