Building .NET Aspire applications with Visual Studio 2022
May 30, 2024 by Anuraj
AspNetCore dotnet Aspire
In this blog post, we’ll learn how to create a .NET Aspire applications with Visual Studio 2022. Microsoft announced general availability of .NET Aspire in Microsoft Build 2024.
First we need to install the .NET Aspire along with Visual Studio installer.
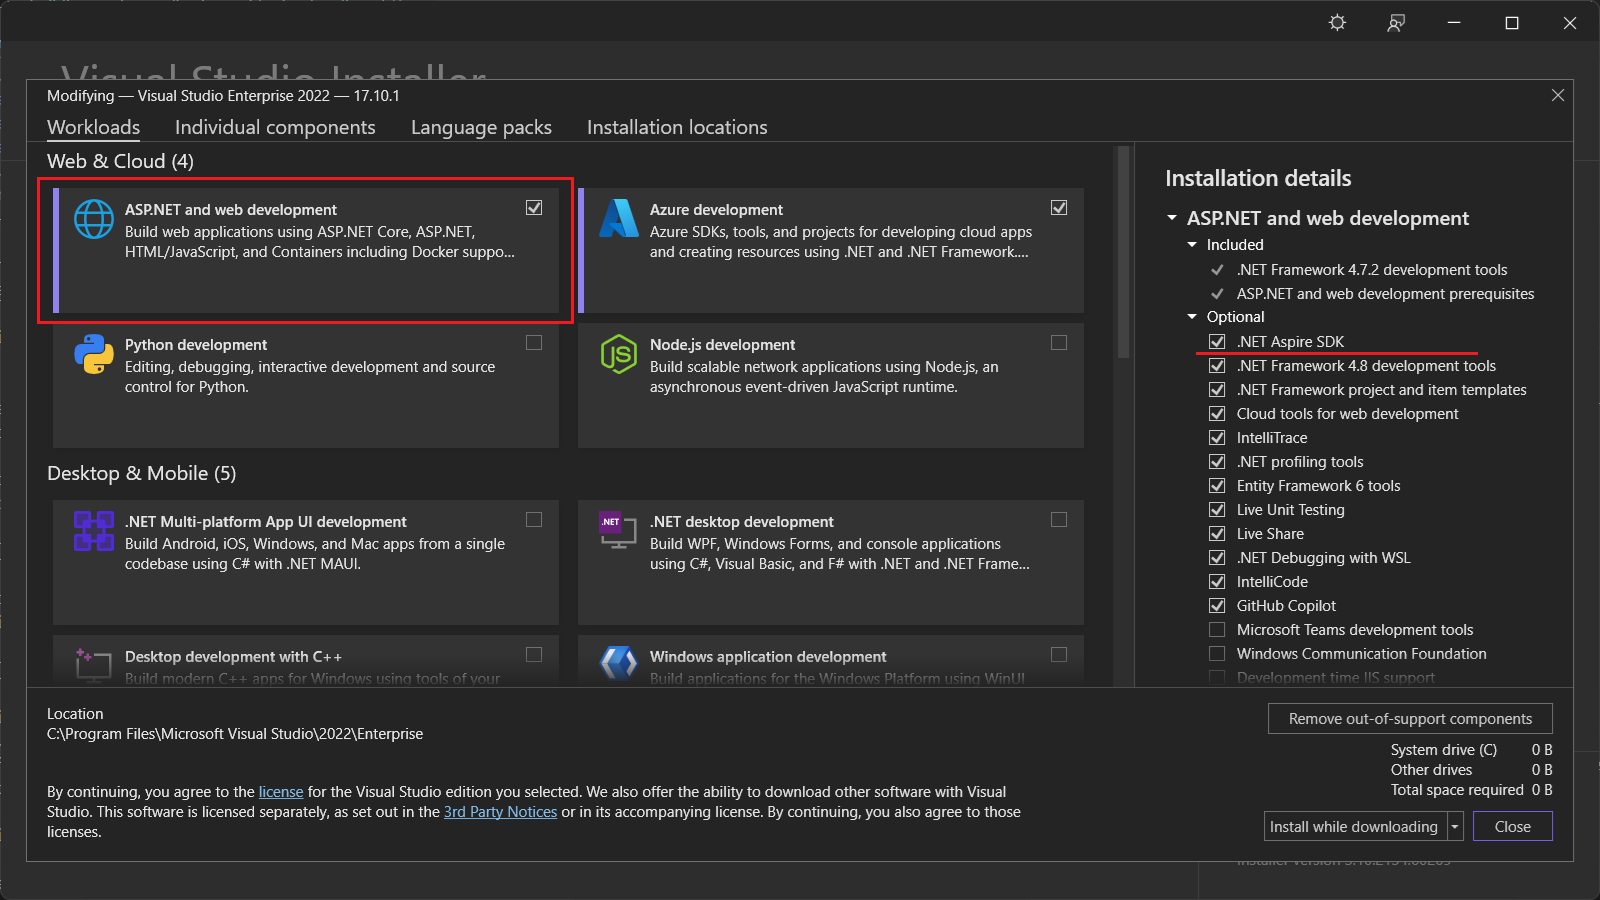
.NET Aspire SDK available under ASP.NET and web development workload.
Once we installed the .NET Aspire SDK, we can create .NET Aspire projects from New Project dialog.
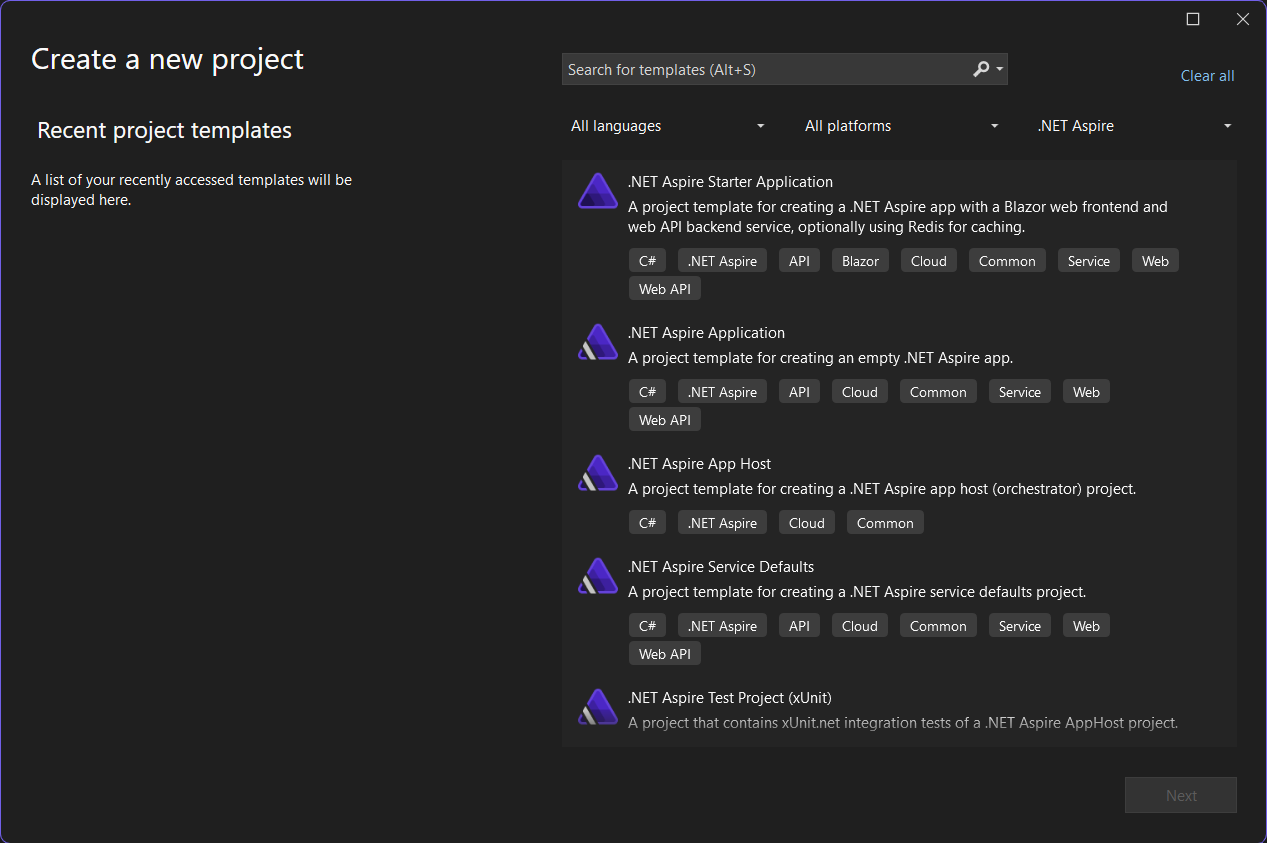
We can select .NET Aspire from the project types dropdown list.
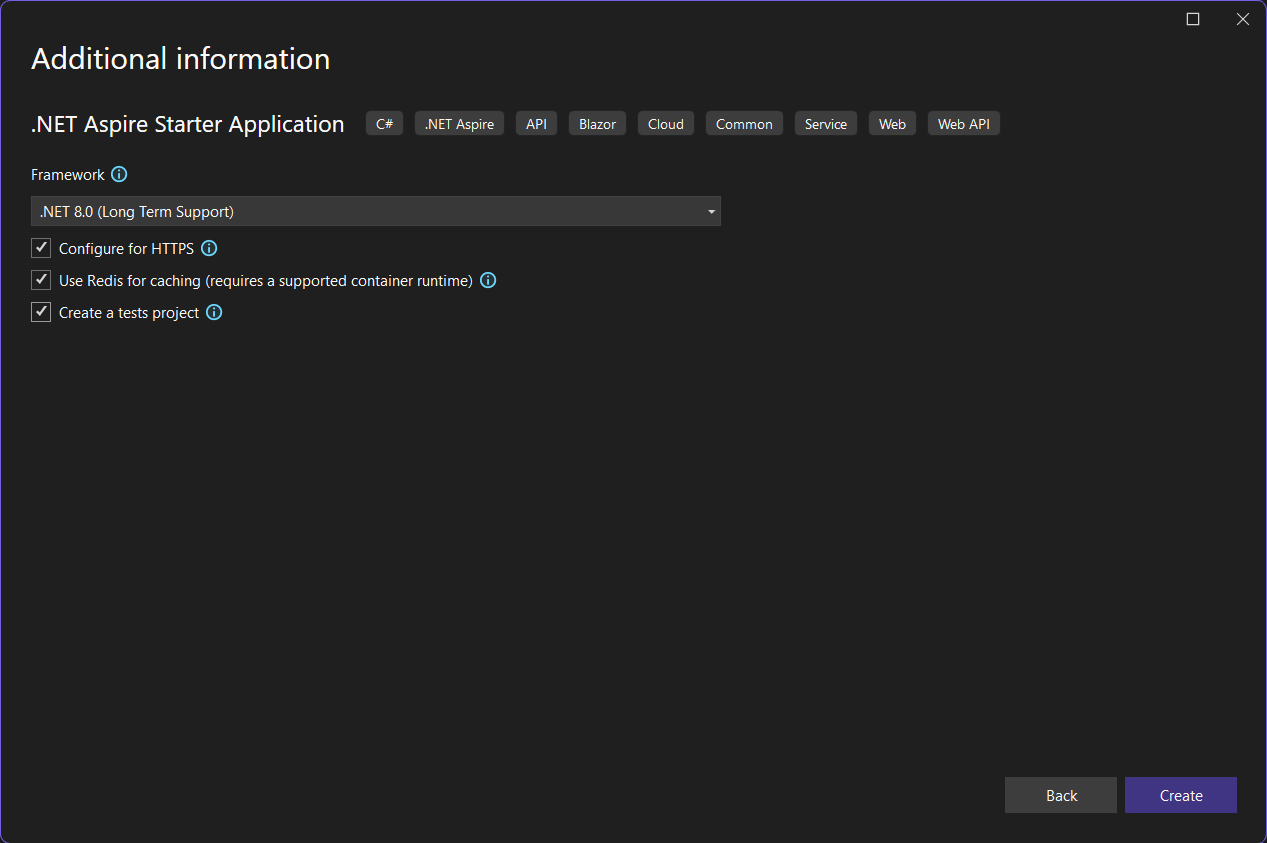
For the demo purposes, I am selecting the .NET Aspire Starter Application. In the template, there is a Blazor web for frontend, Redis for caching and ASP.NET Core Minimal API as backend. After selecting the project template, in the next screen, we can configure the name and location of the project. In the next screen, we can configure .NET Framework, Redis for caching and option to create tests project.
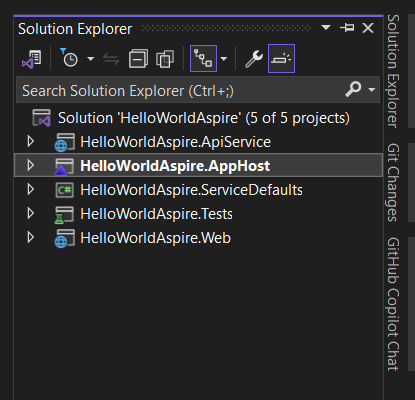
Once the project is created, we can see five projects, and the AppHost project as the startup project.
We can run the application which will launch the Aspire Dashboard - from there we can launch the web application, and the API application.
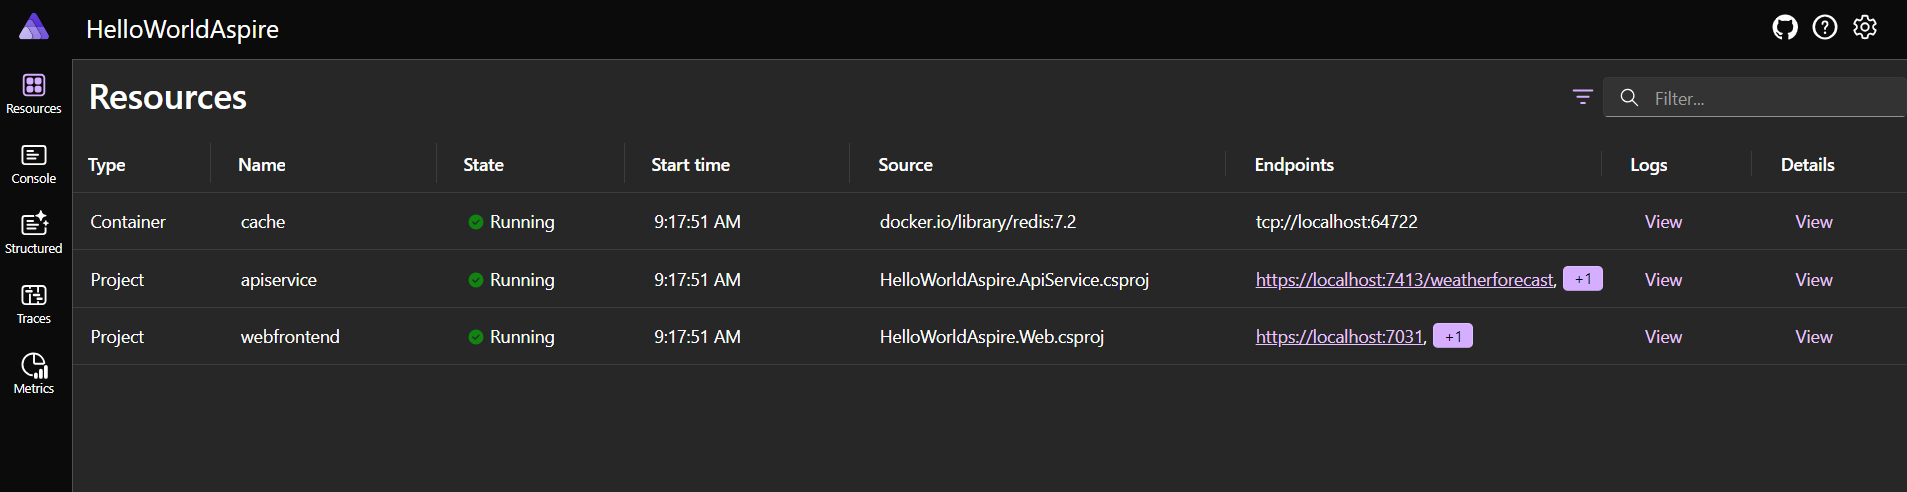
In the dashboard we can get the following details.
Resources: Lists basic information for all of the individual .NET projects in our .NET Aspire app, such as the app state, endpoint addresses, and the environment variables that were loaded in.
Console: Displays the console output from each of the projects in our app.
Structured: Displays structured logs in table format. These logs support basic filtering, free-form search, and log level filtering as well. We should see logs from the
apiserviceand thewebfrontend. We can expand the details of each log entry by selecting the View button on the right end of the row.Traces: Displays the traces for our application, which can track request paths through the apps. Locate a request for
/weatherand select View on the right side of the page. The dashboard should display the request in stages as it travels through the different parts of our app.Metrics: Displays various instruments and meters that are exposed and their corresponding dimensions for our app. Metrics conditionally expose filters based on their available dimensions.
Here is the code inside AppHost project.
var builder = DistributedApplication.CreateBuilder(args);

var cache = builder.AddRedis("cache");

var apiService = builder.AddProject<Projects.HelloWorldAspire_ApiService>("apiservice");

builder.AddProject<Projects.HelloWorldAspire_Web>("webfrontend")
    .WithExternalHttpEndpoints()
    .WithReference(cache)
    .WithReference(apiService);

builder.Build().Run();
We will implement caching in the API Service. To do this, first we need to add the Aspire.StackExchange.Redis.DistributedCaching nuget package to the API service. Next we need to configure distributed cache using the following code.
builder.AddRedisDistributedCache("cache");This code will inject IDistributedCache interface which can be consumed by the action methods. Here is the implementation.
app.MapGet("/weatherforecast", (IDistributedCache distributedCache) =>
{
    var cachedForecast = distributedCache.GetString("weatherforecast");
    if (cachedForecast != null)
    {
        return JsonSerializer.Deserialize<WeatherForecast[]>(cachedForecast);
    }

    var forecast = Enumerable.Range(1, 5).Select(index =>
        new WeatherForecast
        (
            DateOnly.FromDateTime(DateTime.Now.AddDays(index)),
            Random.Shared.Next(-20, 55),
            summaries[Random.Shared.Next(summaries.Length)]
        ))
        .ToArray();
    distributedCache.SetString("weatherforecast", JsonSerializer.Serialize(forecast),
        new DistributedCacheEntryOptions
        {
            AbsoluteExpirationRelativeToNow = TimeSpan.FromSeconds(10)
        });

    return forecast;
});
We also need to modify the AppHost project to include the cache support for API as well, like this.
var builder = DistributedApplication.CreateBuilder(args);

var cache = builder.AddRedis("cache");

var apiService = builder.AddProject<Projects.HelloWorldAspire_ApiService>("apiservice")
    .WithReference(cache);

builder.AddProject<Projects.HelloWorldAspire_Web>("webfrontend")
    .WithExternalHttpEndpoints()
    .WithReference(cache)
    .WithReference(apiService);

builder.Build().Run();
Now we have implemented caching in API service. Next we can modify the Tests project and verify we can get responses from the weatherforecast endpoint.
[Fact]
public async Task GetWeatherForecastsEndpointReturnsOkStatusCode()
{
    // Arrange
    var appHost = await DistributedApplicationTestingBuilder.CreateAsync<Projects.HelloWorldAspire_AppHost>();
    await using var app = await appHost.BuildAsync();
    await app.StartAsync();

    // Act
    var httpClient = app.CreateHttpClient("apiservice");
    var response = await httpClient.GetAsync("/weatherforecast");

    // Assert
    Assert.Equal(HttpStatusCode.OK, response.StatusCode);
}
Next run the tests and verify it is both the tests are running and passed successfully.
This way we can start building applications using .NET Aspire SDK. .NET Aspire help us to configure open telemetry and service discovery without writing any application code.
Happy Programming
If you find my content helpful, consider supporting my work. Your support helps me continue creating valuable resources for the community.

Found this useful? Share it with your network!
Copyright © 2026 Anuraj. Blog content licensed under the Creative Commons CC BY 2.5 | Unless otherwise stated or granted, code samples licensed under the MIT license. This is a personal blog. The opinions expressed here represent my own and not those of my employer. Powered by Jekyll. Hosted with ❤ by GitHub