Creating Containers in .NET 7 with the .NET CLI
November 20, 2022 by Anuraj
AspNetCore Docker Container Azure
This post is about the new feature in .NET 7 - creating a container using dotnet CLI. In .NET 7.0 there is a feature which helps to publish docker container from dotnet CLI. We will also explore how to deploy the image to Azure Container Registry. And finally we will explore about enabling CI / CD with GitHub Actions.
First we need to create a dotnet project - I am creating Web API project. Next we need to add the Microsoft.NET.Build.Containers nuget package. We can do that using dotnet add package Microsoft.NET.Build.Containers --version 0.2.7 command. We may need to remove the app.UseHttpsRedirection(); code.
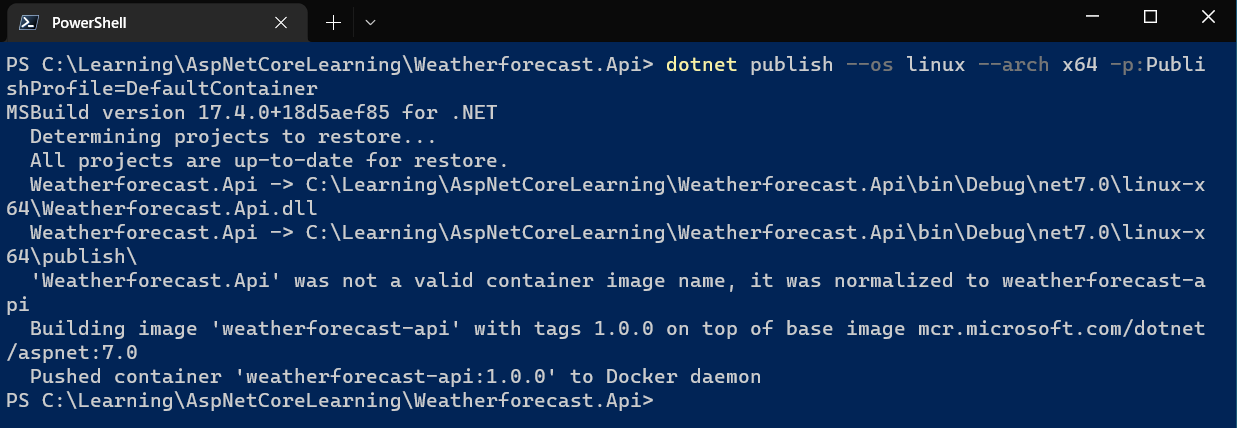
Now we are ready to publish the Docker image. We need to run the dotnet publish command with --os linux --arch x64 -p:PublishProfile=DefaultContainer parameters.

Next we can run the container image with docker run command - docker run -it --rm -p 8080:80 weatherforecast-api:1.0.0. Now we can verify it using CURL command - curl http://localhost:8080/weatherforecast.
When we publish it is showing a warning - 'Weatherforecast.Api' was not a valid container image name, it was normalized to weatherforecast-api. It is because the project name contains a dot. We are able to customize the name and tag. We can add container properties in the PropertyGroup element in the project file. Here is an example.
<PropertyGroup>
  <TargetFramework>net7.0</TargetFramework>
  <Nullable>enable</Nullable>
  <ImplicitUsings>enable</ImplicitUsings>
  <ContainerImageName>weatherforecast-api</ContainerImageName>
  <ContainerImageTag>1.2.3</ContainerImageTag>
</PropertyGroup>

//code omitted for brevity
Now when we publish it again. It will use the docker image.

We can find more details about the customizing the docker image here - Containerize a .NET app with dotnet publish
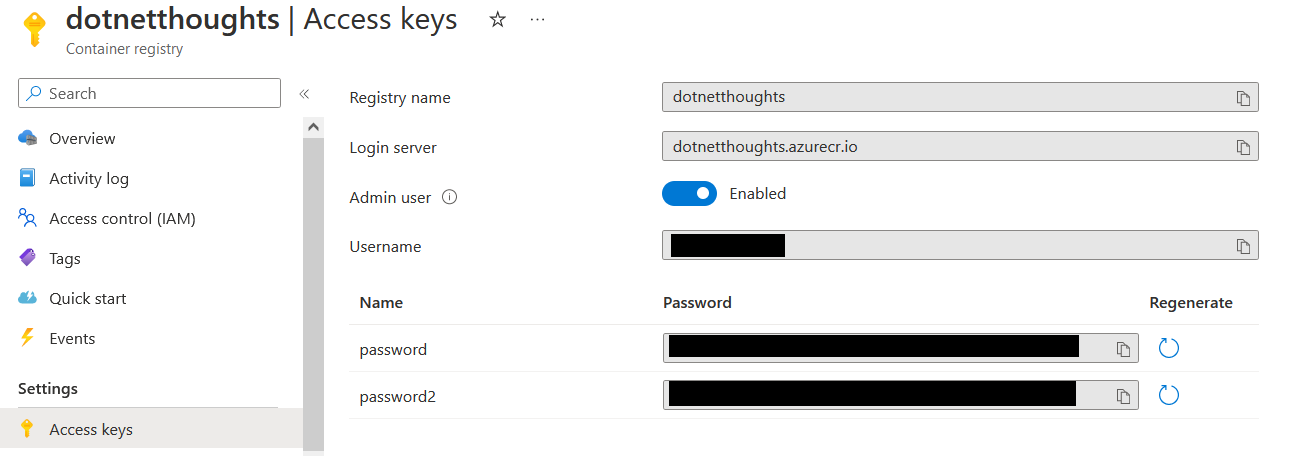
Publishing to container registries. We can published the created image to container registries by including the registry name in the project file. Currently this feature will not work with all the registries. For this post I am using Azure Container Registry. To do this, first we need to login using the command az acr login -n <REGISTRY> -u <USERNAME> -p =<PASSWORD>. To support this, we need to enable Admin user user feature.

Next modify the project file ContainerImageName with registry name something like - <ContainerImageName>dotnetthoughts.azurecr.io/weatherforecast-api</ContainerImageName>. And include ContainerRegistry element like this - <ContainerRegistry>dotnetthoughts.azurecr.io</ContainerRegistry>. Here is the updated project file.
<PropertyGroup>
  <TargetFramework>net7.0</TargetFramework>
  <Nullable>enable</Nullable>
  <ImplicitUsings>enable</ImplicitUsings>
  <ContainerImageName>dotnetthoughts.azurecr.io/weatherforecast-api</ContainerImageName>
  <ContainerImageTag>1.2.3</ContainerImageTag>
  <ContainerRegistry>dotnetthoughts.azurecr.io</ContainerRegistry>
</PropertyGroup>

//code omitted for brevity
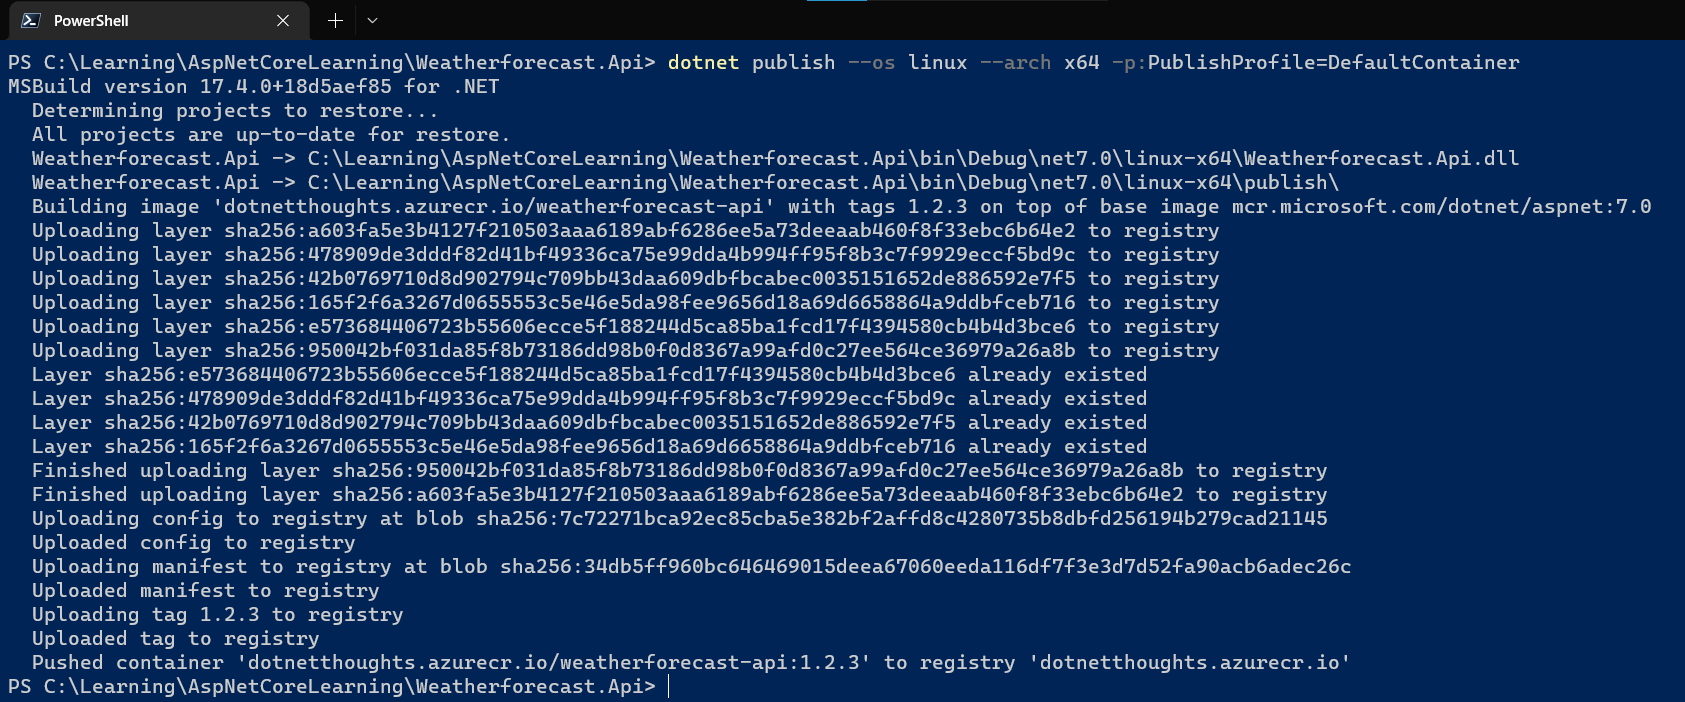
Now we are ready to publish the docker container image to Azure Container Registry. We can execute the command again and which will publish the image to Azure container registry instead of your dev machine.

And once it is finished, we will be able to see the image under repositories in Azure Container Registry.

We can enable continuous integration / continuous deployment with Github Actions. Here is the YAML file.
name: .NET
on:
  push:
    branches: [ "main" ]
  pull_request:
    branches: [ "main" ]
jobs:
  build:
    runs-on: windows-latest
    steps:
    - uses: actions/checkout@v3
    - name: Setting up build version
      run: |
        $dateInfo = Get-Date -Format "yyyy.MM.dd"
        $version = (-join($($dateInfo),"-",$($Env:GITHUB_RUN_NUMBER)))
        echo "BUILD_VERSION=$version" | Out-File -FilePath $Env:GITHUB_ENV -Encoding utf8 -Append
    - name: Setup .NET
      uses: actions/setup-dotnet@v3
      with:
        dotnet-version: 7.0.x
    - name: Restore dependencies
      run: dotnet restore
    - name: Azure Container Registry Login
      uses: Azure/docker-login@v1
      with:
        username: ${{ secrets.ACR_USERNAME }}
        password: ${{ secrets.ACR_PASSWORD }}
        login-server: ${{ secrets.ACR_REGISTRY_URL }}
    - name: Publish
      run: dotnet publish --os linux --arch x64 --configuration Release -p:PublishProfile=DefaultContainer
The Setting up build version task will help to tag the docker image. You can find the source code here
This way we can configure dotnet application to build docker images. It will work without Docker running on the machine - if you’re publishing it to an external registry. In this blog post I am explained, create a docker image from an ASP.NET Core project, deploy to Azure Container Registry and enabling CI / CD using Github Actions.
Happy Programming.
Found this useful? Share it with your network!
Copyright © 2026 Anuraj. Blog content licensed under the Creative Commons CC BY 2.5 | Unless otherwise stated or granted, code samples licensed under the MIT license. This is a personal blog. The opinions expressed here represent my own and not those of my employer. Powered by Jekyll. Hosted with ❤ by GitHub
