Creating JSON Web Tokens using dotnet user-jwts tool
November 21, 2022 by Anuraj
AspNetCore DotNetCore DotNet
This post is about creating JSON Web Tokens in development with dotnet user-jwts CLI tool. This tool introduced last year - recently I saw some demo using this tool and it was awesome. So I explored it and started using it in projects. The dotnet user-jwts command line tool can create and manage app specific local JSON Web Tokens (JWTs).
I created a Minimal API with dotnet CLI using the command - dotnet new webapi -o Weatherforecast --use-minimal-apis. Then I added the reference of Microsoft.AspNetCore.Authentication.JwtBearer nuget package and wrote code to make it secure, like this.
var builder = WebApplication.CreateBuilder(args);
builder.Services.AddAuthorization();
builder.Services.AddAuthentication("Bearer").AddJwtBearer();
builder.Services.AddEndpointsApiExplorer();
builder.Services.AddSwaggerGen();
var app = builder.Build();
app.UseAuthorization();
if (app.Environment.IsDevelopment())
{
app.UseSwagger();
app.UseSwaggerUI();
}
//code omitted for brevity
app.MapGet("/weatherforecast", () =>
{
var forecast = Enumerable.Range(1, 5).Select(index =>
new WeatherForecast
(
DateOnly.FromDateTime(DateTime.Now.AddDays(index)),
Random.Shared.Next(-20, 55),
summaries[Random.Shared.Next(summaries.Length)]
))
.ToArray();
return forecast;
})
.RequireAuthorization()
.WithName("GetWeatherForecast")
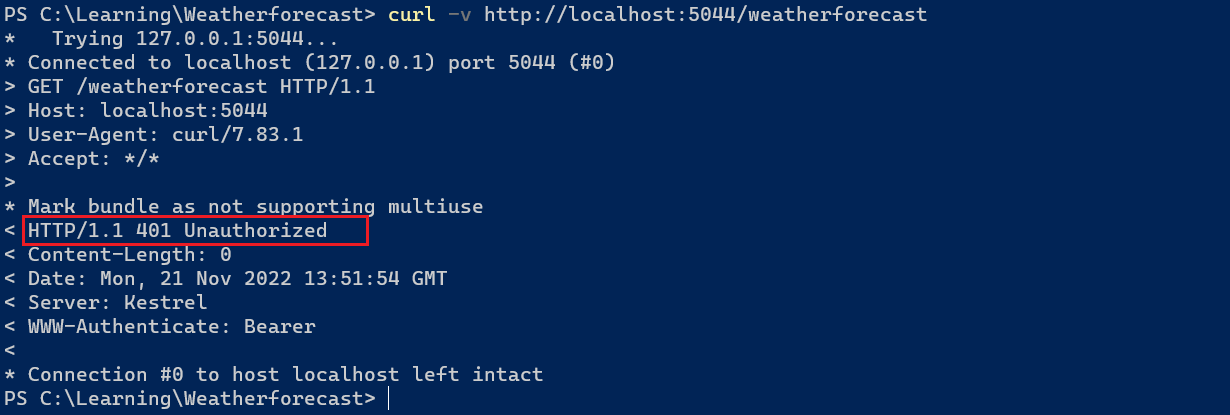
.WithOpenApi();I added the Authentication and Authorization middleware and added the RequireAuthorization() default policy to the endpoint. Now if we run the application and browse the /weatherforecast endpoint we will get a 401 - Not authorized error.
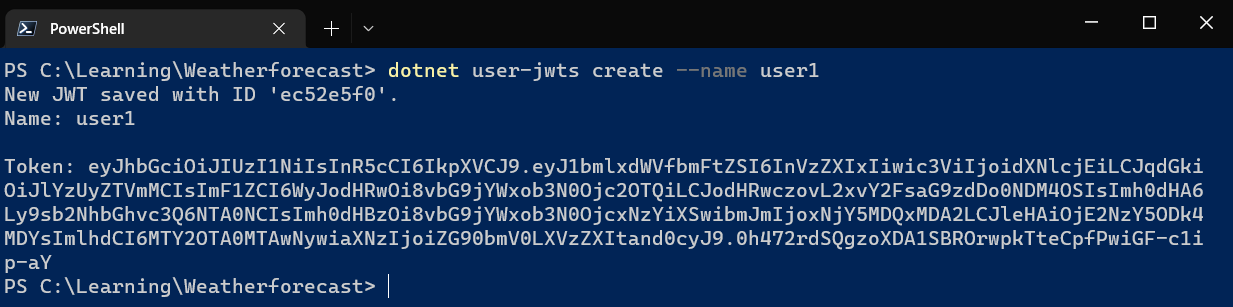
Next we will create the token using the dotnet user-jwts command. We need to execute the command in the project root folder, like this - dotnet user-jwts create --name user1. It will generate the token like this.
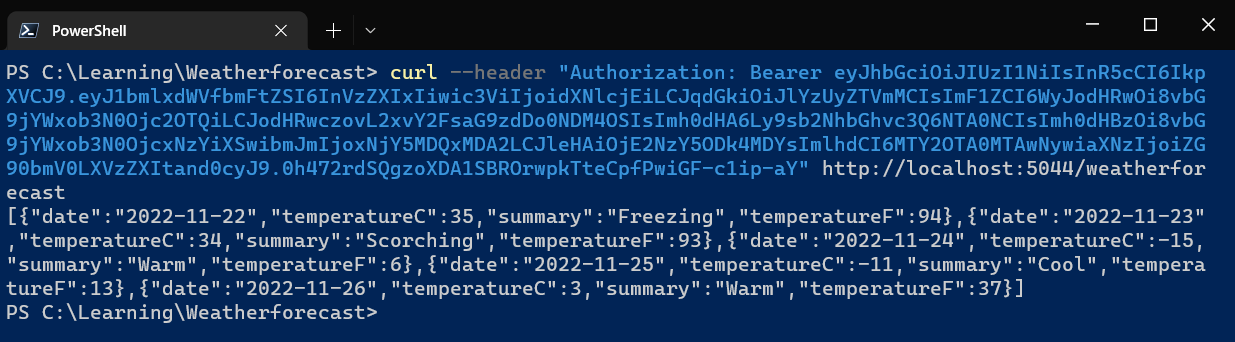
And we can use this token to access the Web API endpoint. Here is the CURL command - curl --header "Authorization: Bearer <TOKEN>" http://localhost:5044/weatherforecast.
We can use the dotnet user-jwts command to include claims and scopes as well. We can include code the to access the user details using the ClaimsPrincipal object like this.
app.MapGet("/weatherforecast", (ClaimsPrincipal user) =>
{
    app.Logger.LogInformation("User: {user}", user.Identity!.Name);
    var forecast = Enumerable.Range(1, 5).Select(index =>
        new WeatherForecast
        (
            DateOnly.FromDateTime(DateTime.Now.AddDays(index)),
            Random.Shared.Next(-20, 55),
            summaries[Random.Shared.Next(summaries.Length)]
        ))
        .ToArray();
    return forecast;
})
.RequireAuthorization()
.WithName("GetWeatherForecast")
.WithOpenApi();
Since we added the name when we created the token we are able to access the name using user.Identity!.Name. We can create other claims like this - ` dotnet user-jwts create –claim Username=user1 –claim Email=user1@example.com –name user1. And we can include different scopes as well. Here I am modifying the code to check for the scope - WeatherForecast:read`, like this.
app.MapGet("/weatherforecast", (ClaimsPrincipal user) =>
{
app.Logger.LogInformation("User: {user}", user.Identity!.Name);
var forecast = Enumerable.Range(1, 5).Select(index =>
new WeatherForecast
(
DateOnly.FromDateTime(DateTime.Now.AddDays(index)),
Random.Shared.Next(-20, 55),
summaries[Random.Shared.Next(summaries.Length)]
))
.ToArray();
return forecast;
})
.RequireAuthorization(p => p.RequireClaim("scope", "WeatherForecast:read"))
.WithName("GetWeatherForecast")
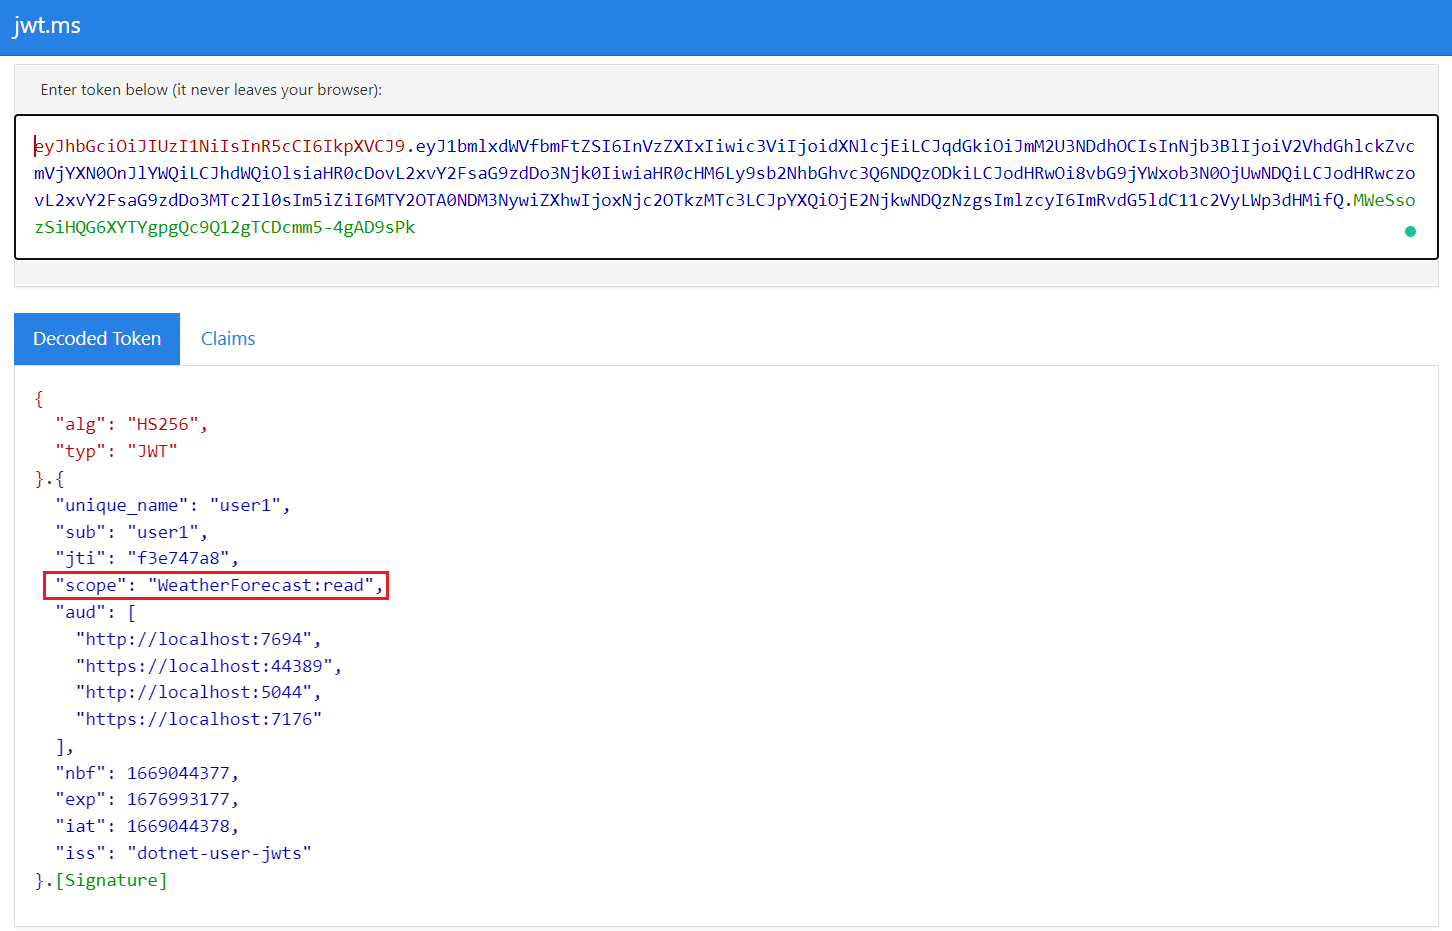
.WithOpenApi();And here is the command to generate token with scope - dotnet user-jwts create --name user1 --scope "WeatherForecast:read".
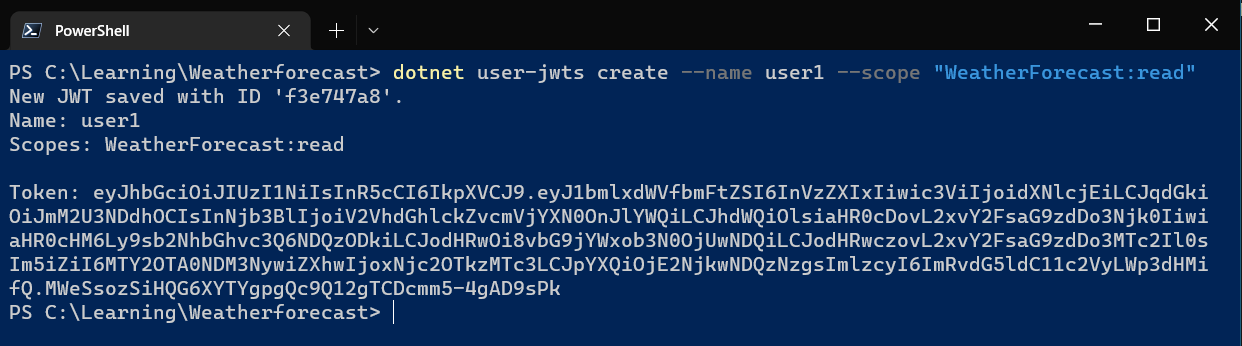
This will create the token with the scopes - we can get the details including scopes when we view the token in the JWT Viewer like jwt.ms.
We can find more details about the tool from Microsoft Learn - Manage JSON Web Tokens in development with dotnet user-jwts
This tool will help you to create and manage Json Web Tokens with different claims and different scopes in the development machine.
Happy Programming.
If you find my content helpful, consider supporting my work. Your support helps me continue creating valuable resources for the community.

Found this useful? Share it with your network!
Copyright © 2026 Anuraj. Blog content licensed under the Creative Commons CC BY 2.5 | Unless otherwise stated or granted, code samples licensed under the MIT license. This is a personal blog. The opinions expressed here represent my own and not those of my employer. Powered by Jekyll. Hosted with ❤ by GitHub