How to configure CSP Headers for Static Website Hosted in Azure Blob Storage
December 08, 2020 by Anuraj
Azure Security
This post is about configuring CSP Header for Static Website Hosted in Azure Blob Storage. If you’re running a Single Page application, hosting it from Azure Blob service it easy and cost effective. Long back I wrote a blog post on how to do this - Simple Static Websites using Azure Blob service. One of the challenge in this approach is configuring security headers. If you check your application with tools like securityheaders.com, you will be getting a very low score, like F.
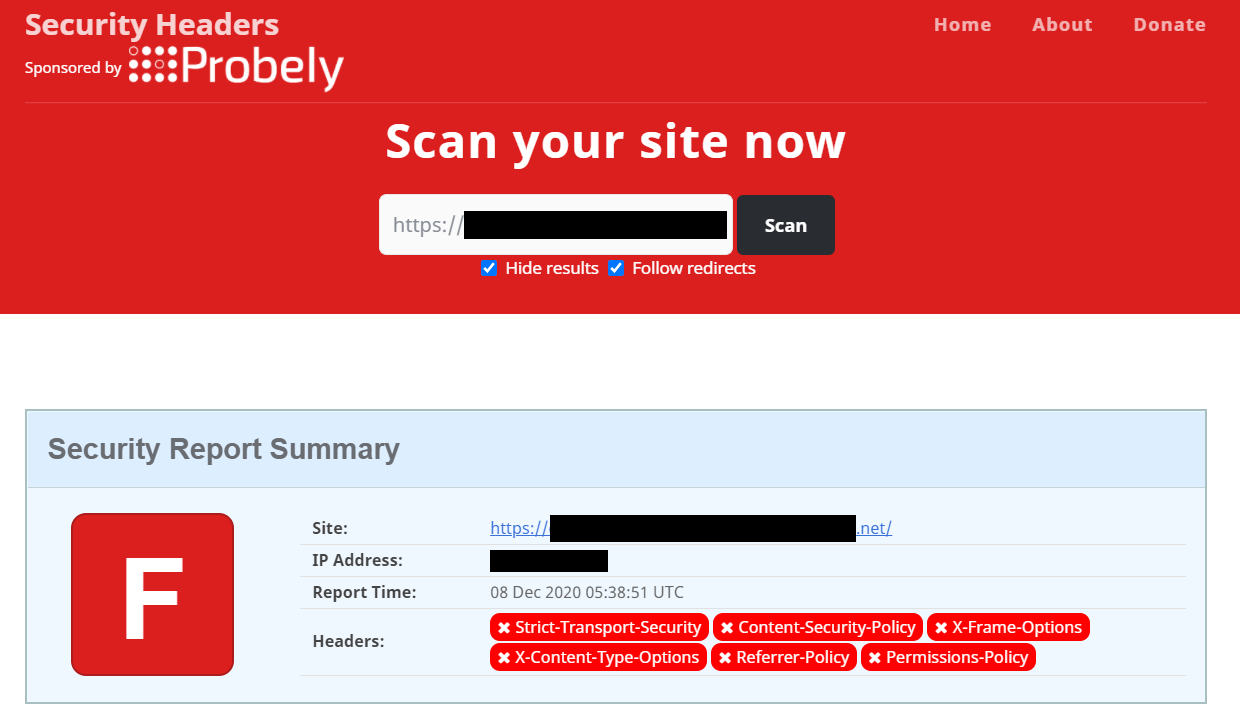
In this post I will be explaining how to improve this score and get an A+ with the help of Azure CDN. So first I created a storage account and I configured it to host a static web app, you can find more details on how to do this from this post. Once it is provisioned and running, I am associating an Azure CDN to this storage account. We can do this from the Azure CDN menu of the storage account.
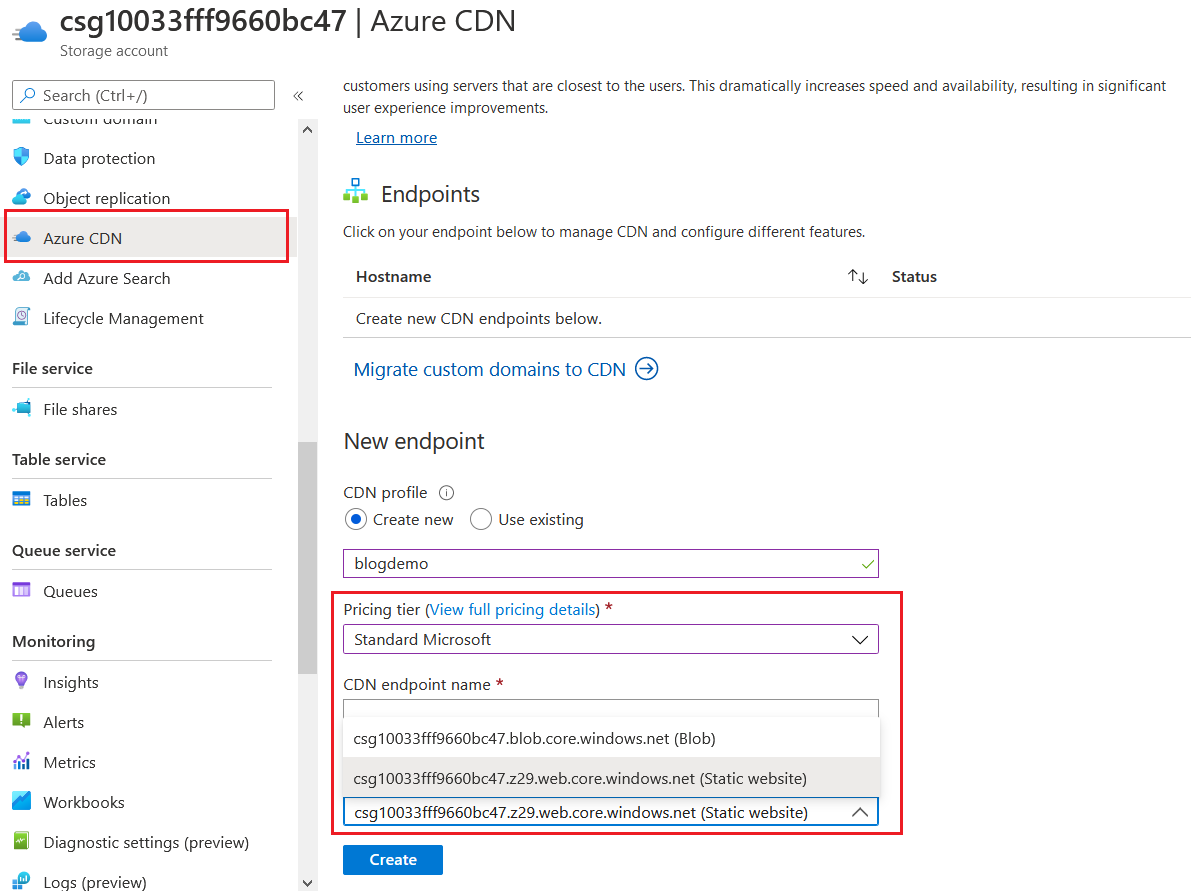
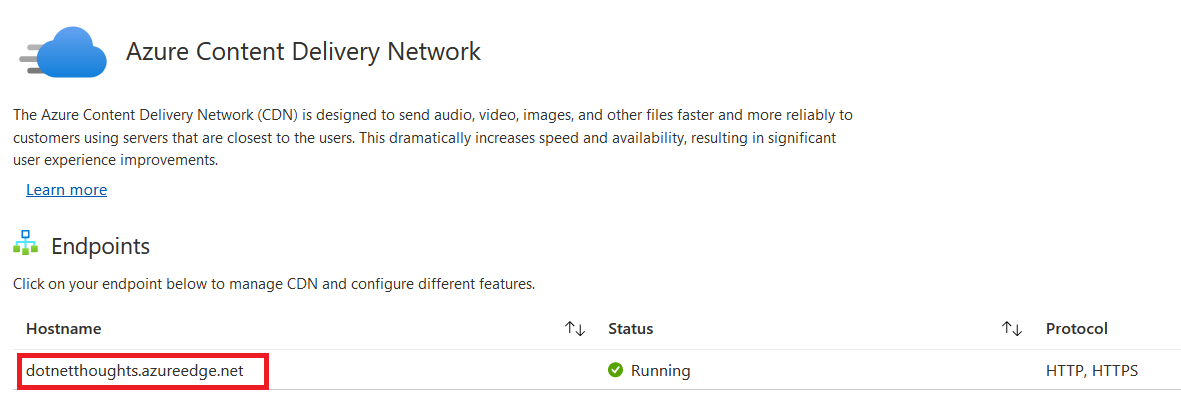
You need to choose the pricing tier as Standard Microsoft. And Origin hostname as your storage account URL with the Static Website associated. Click on the Create button, it might take some time to provision the CDN. Once the provisioning is completed, click on the hostname to open Azure CDN details.
On the Azure CDN, select the Rule Engine menu, it will display something like this.
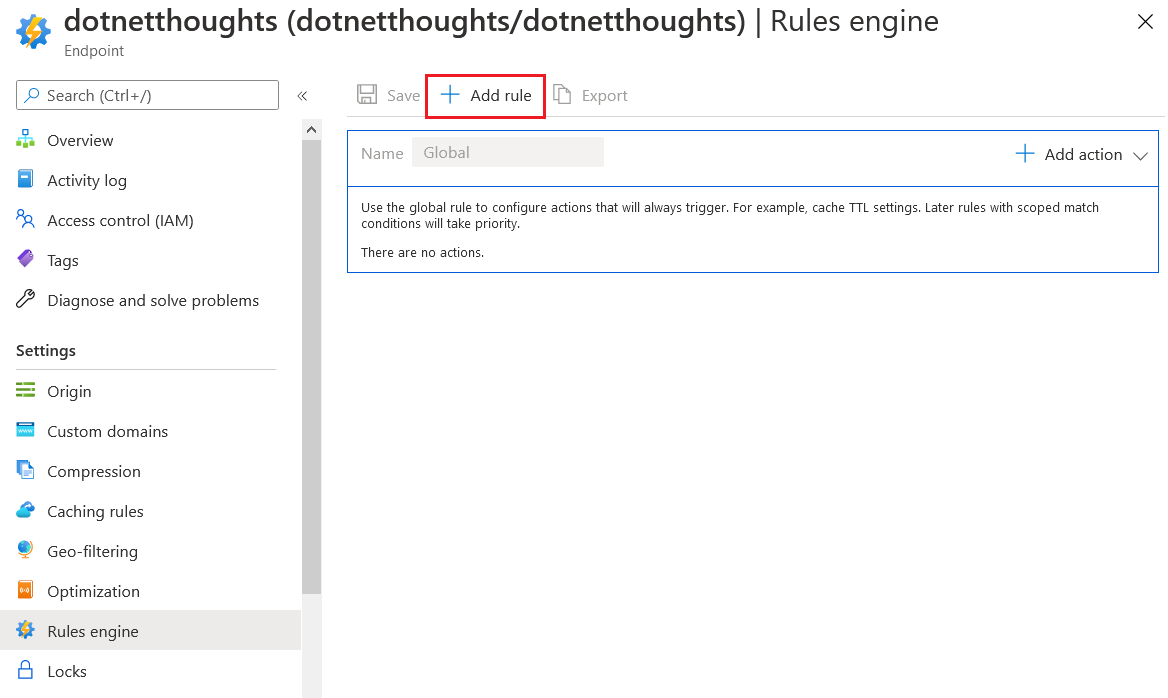
Click on the Add URL option, which will display a configuration section like the following.

Provide a name, click on the Add Condition, and choose Request URL option, this will show a condition section on the bottom, select Any operator - so this URL will be applied to all the incoming URLs. If you’re using the Global you can directly add actions, you don’t require any conditions. There is a limit of 5 actions, so if you need to add more than 5 actions you need to follow this method. Next you need to click on the Add Action, and select Modify Response Header. Similar to condition this will add one more section, in the section, choose Action as Append, set X-Frame-Options as HTTP Header name, and set SAMEORIGIN as the Http header value.
You need to configure following values.
These are the configuration values I am using in my application - it can change based on your application requirements. Please look into the results from securityheaders.com and configure it based on your application requirements.
| Action | HTTP header name | HTTP header value |
|---|---|---|
| Append | X-Frame-Options | SAMEORIGIN |
| Append | X-Content-Type-Options | nosniff |
| Append | Content-Security-Policy | default-src https: data: |
| Append | Strict-Transport-Security | max-age=31536000; includeSubDomains |
| Append | X-Xss-Protection | 1; mode=block |
| Append | Referrer-Policy | strict-origin |
| Append | Permissions-Policy | accelerometer=(); camera=(); geolocation=(); gyroscope=(); magnetometer=(); microphone=(); payment=(); usb=() |
And here is my Azure CDN Rule engine with the completed configuration.
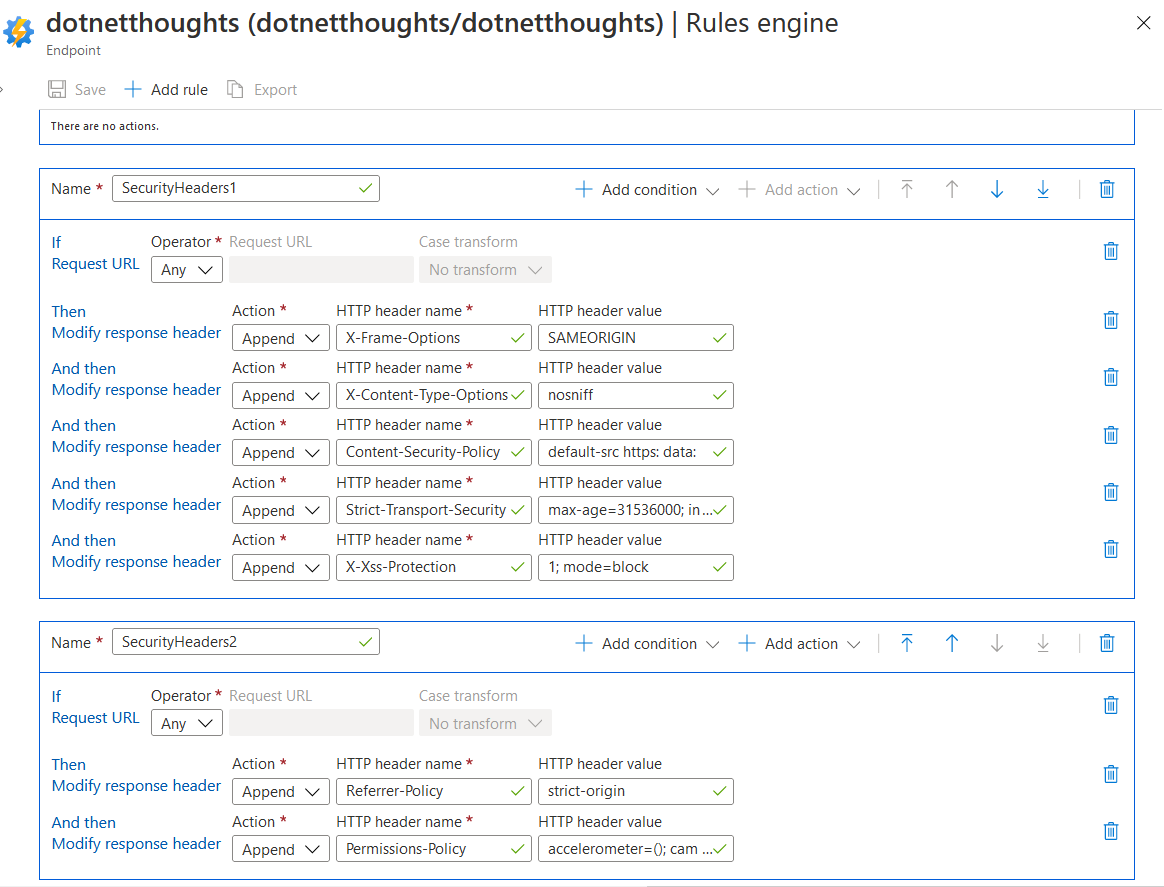
Now we have completed the configuration, lets run the URL again in securityheaders.com and will check the results.
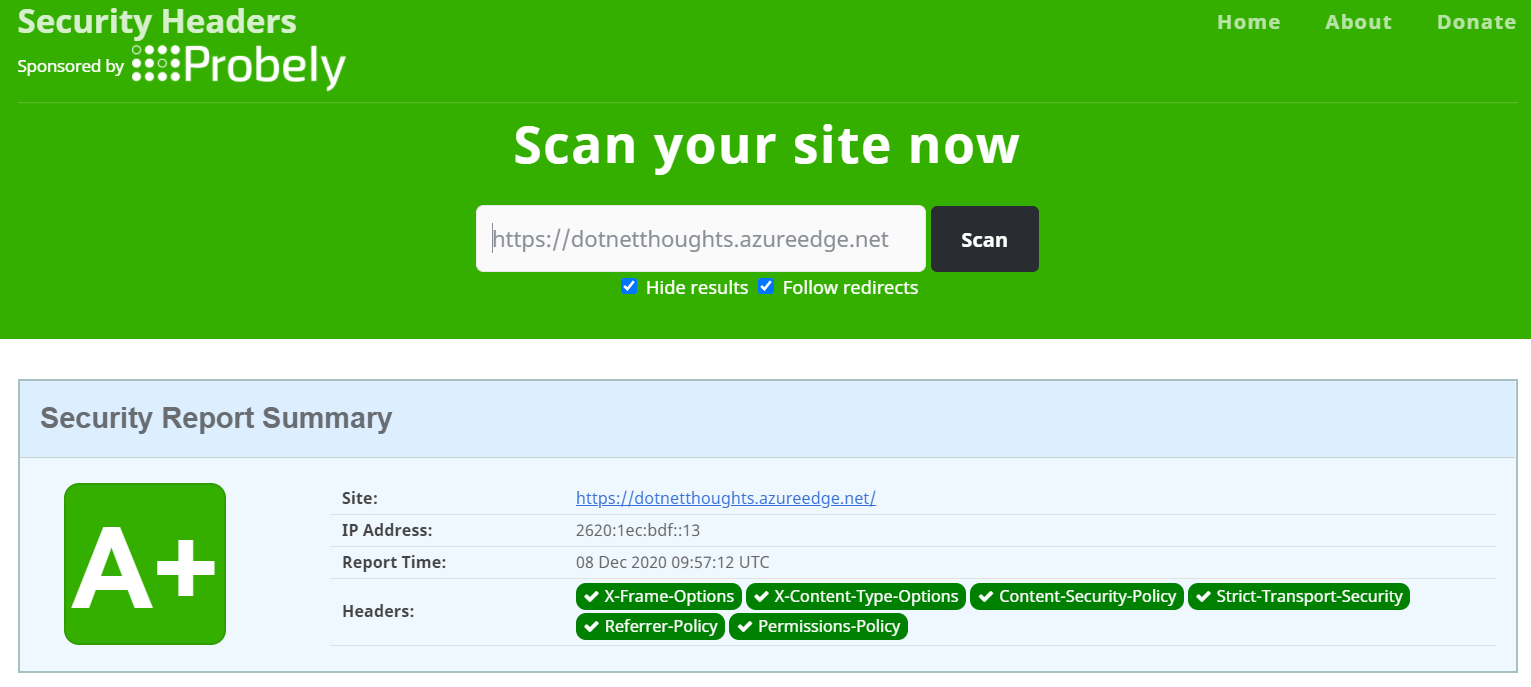
And we got an A+ as the result. Some security tools will show a warning if the response returns a Server header. We can remove that by adding one more action. In the action choose Delete instead of Append and in the HTTP header name option provide the Server as the value. Now if you check the server response header won’t be there. This way you can make you application more secure without web.config or any other server side technologies. We can use Azure Function proxies to achieve the same results.
Happy Programming :)
Found this useful? Share it with your network!
Copyright © 2026 Anuraj. Blog content licensed under the Creative Commons CC BY 2.5 | Unless otherwise stated or granted, code samples licensed under the MIT license. This is a personal blog. The opinions expressed here represent my own and not those of my employer. Powered by Jekyll. Hosted with ❤ by GitHub
