Developing Azure Functions with GitHub Codespaces DevContainers
July 22, 2021 by Anuraj
Azure Serverless GitHub Codespaces
This article will discuss about developing Azure Functions with GitHub Codespaces - DevContainers feature. Codespaces sets up a cloud-hosted, containerized, and customizable VS Code environment. Recently I wrote a blog post on Developing and Deploying Azure Functions with GitHub Codespaces. I got a response on my Twitter by Anthony Chu.
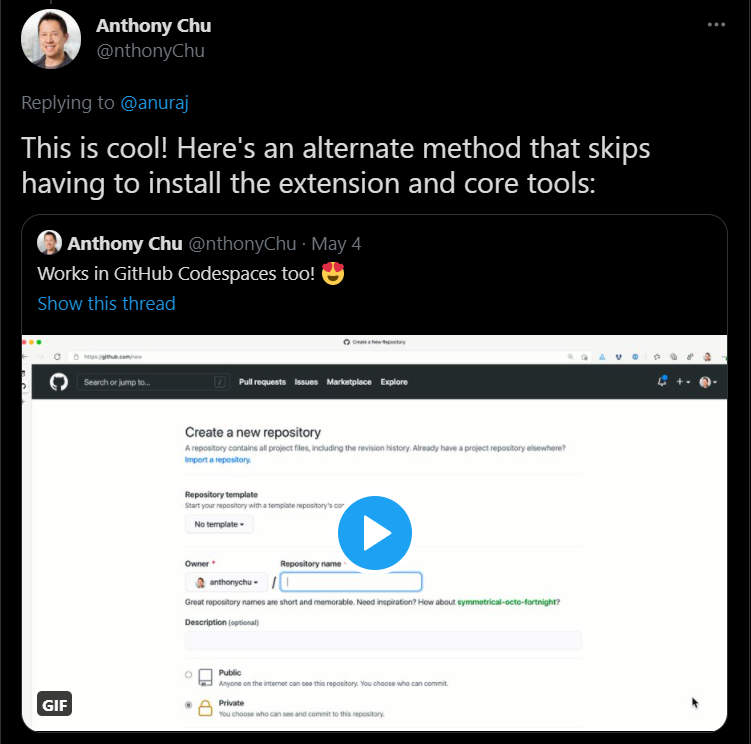
So instead of installing the Azure Function Core tools we can add a Dev Container first to the Codespaces and then continue creating the function. A Dev Container is used by the VS Code Remote Containers extension and works by creating a Docker container to do your development in.
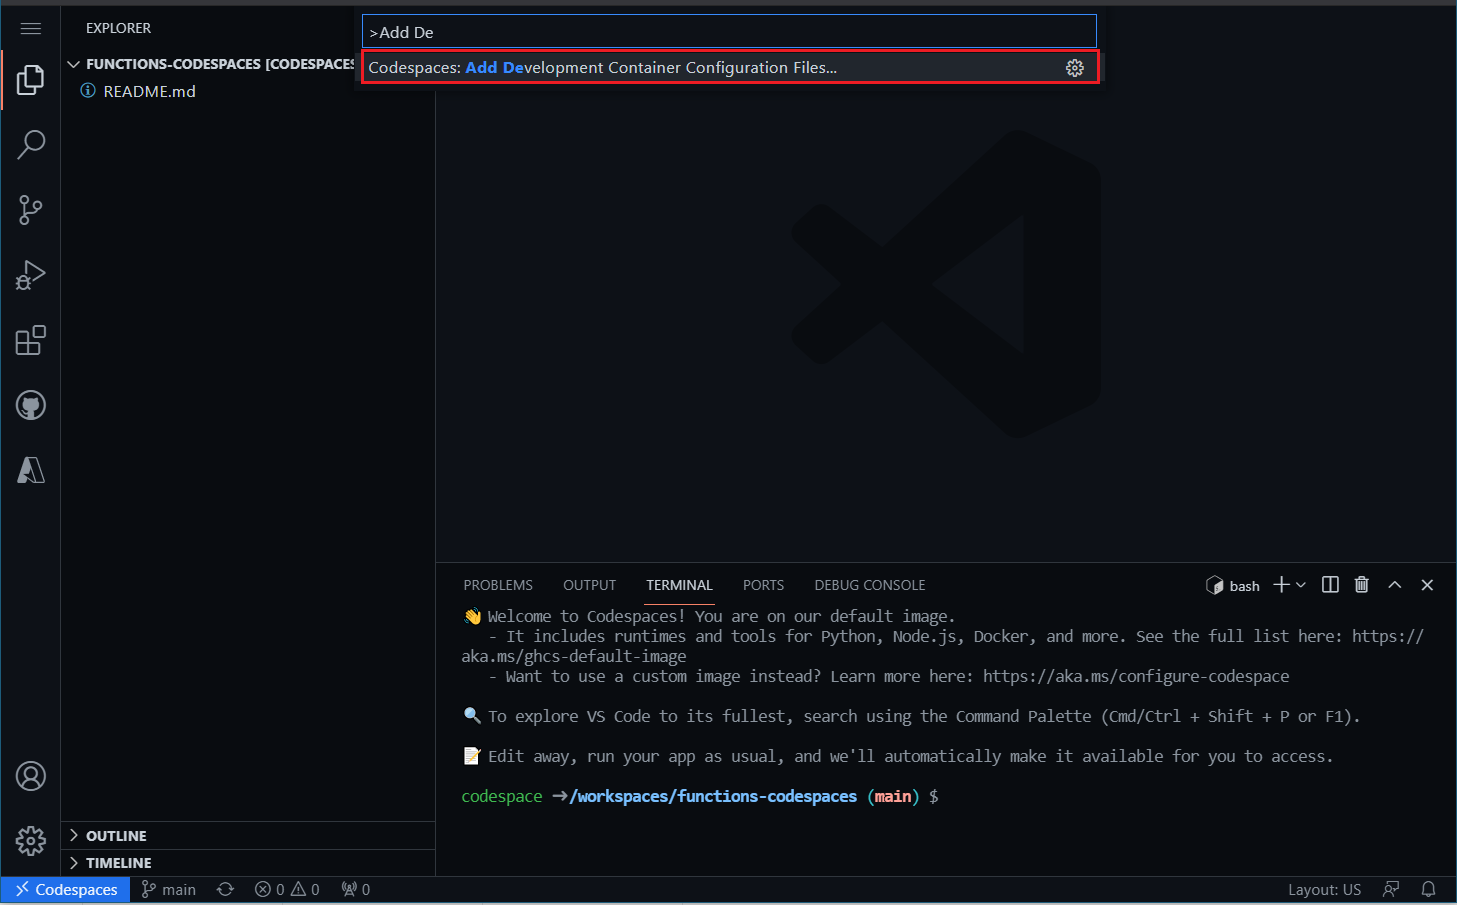
So first you need to create a repository and codespaces for the repository. Then on the VS Code window, choose open the command pallette and choose Codespaces: Add Development Container Configuration Files... option.
You can find more details about Dev Containers from GitHub
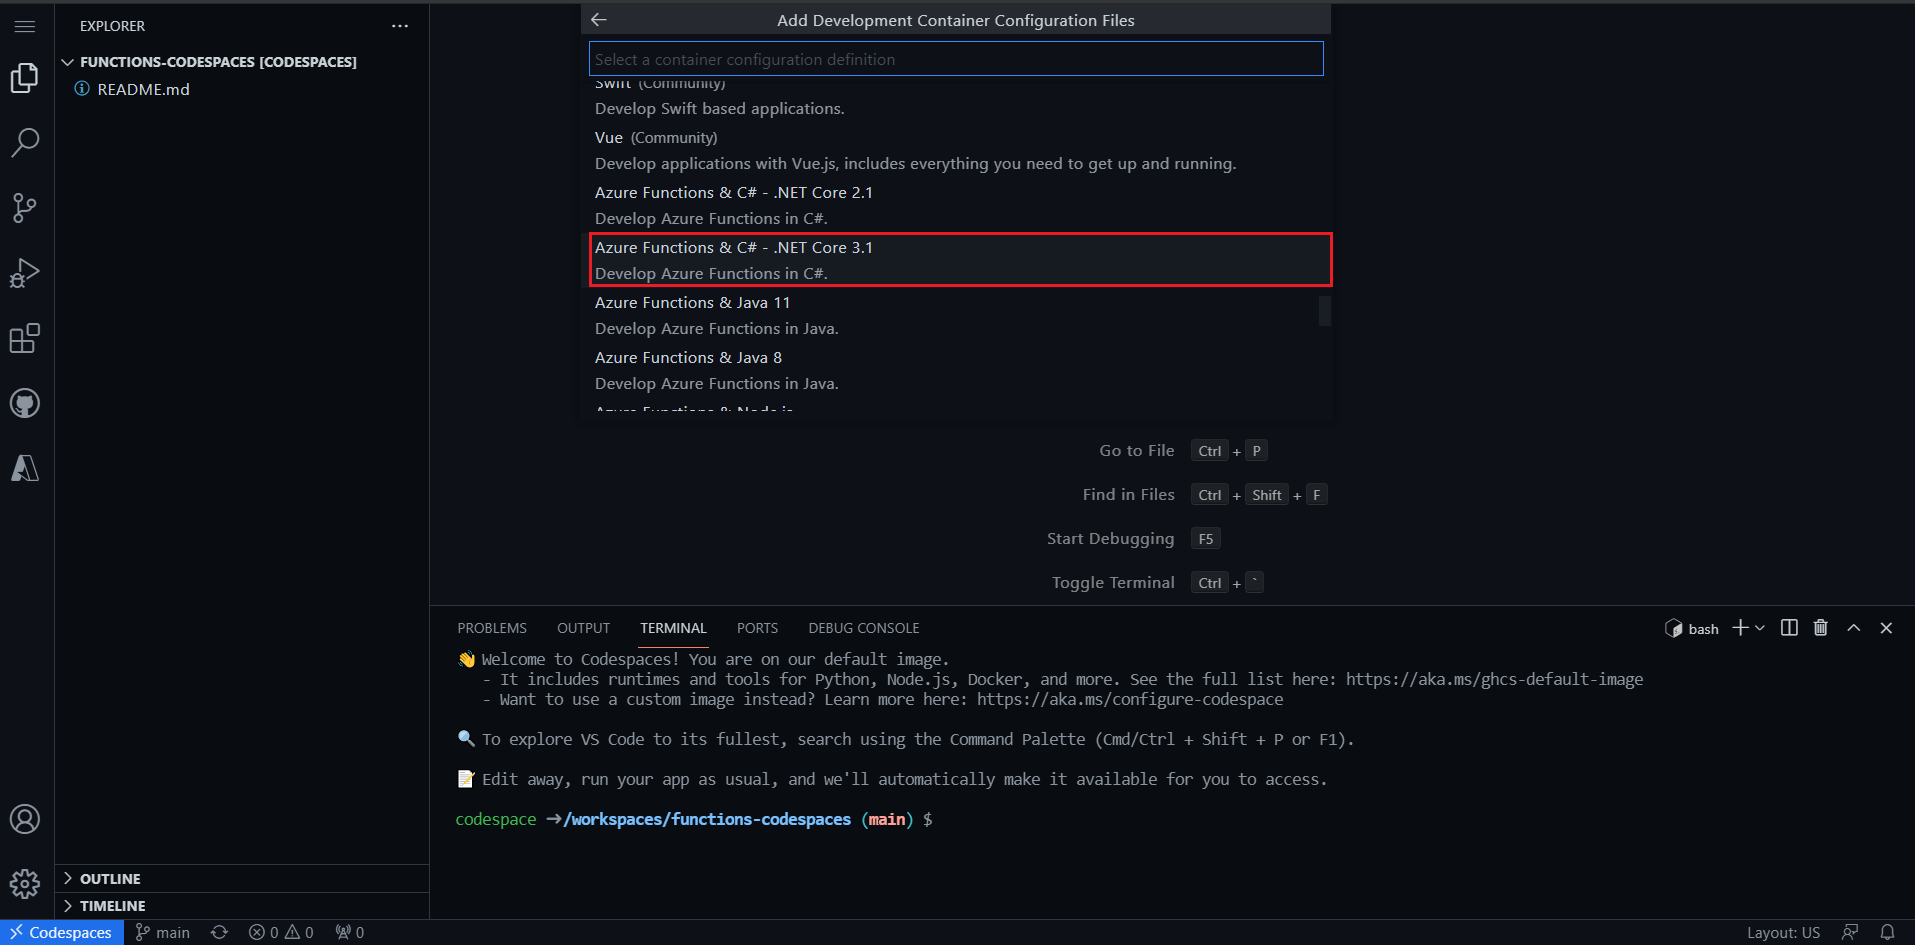
From the list you need to choose the environment you like to develop in this case I am building an Azure Function using C#. You need to go down and click on Show All definitions and Select Azure Functions & C# - .Net Core 3.1 from the list.
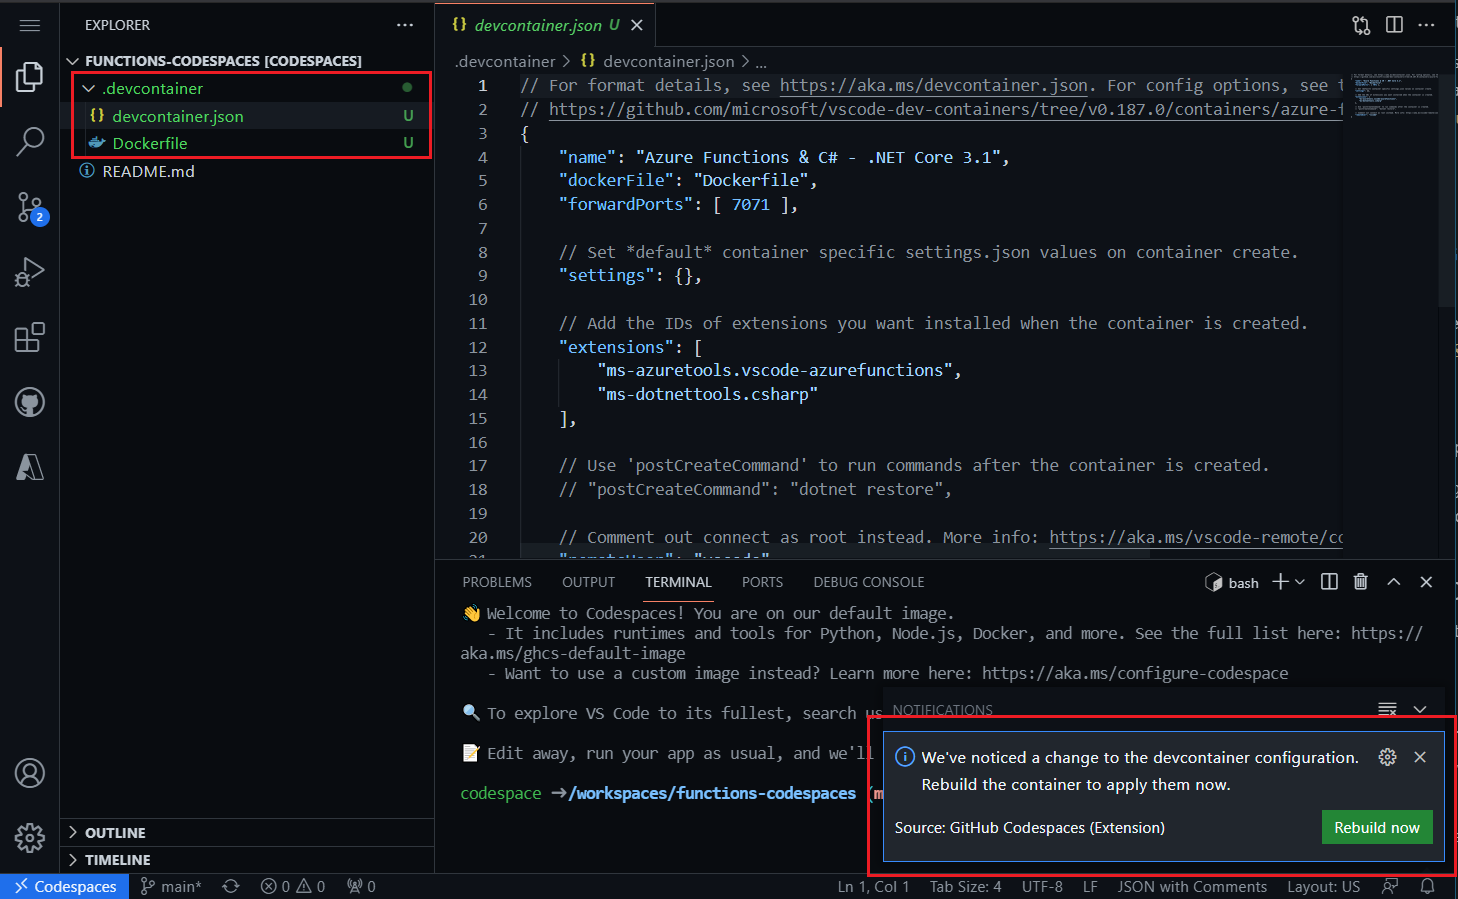
This action will add one directory - .devcontainer and two files inside it - .devcontainer.json and Dockerfile. And once you add these files, VS Code will show a prompt to Rebuild the container to apply the Dev Container configuration.
Once you click on Rebuild now button, VS Code will show a confirmation prompt saying the action will restart the codespace. You can click on Rebuild button to continue.
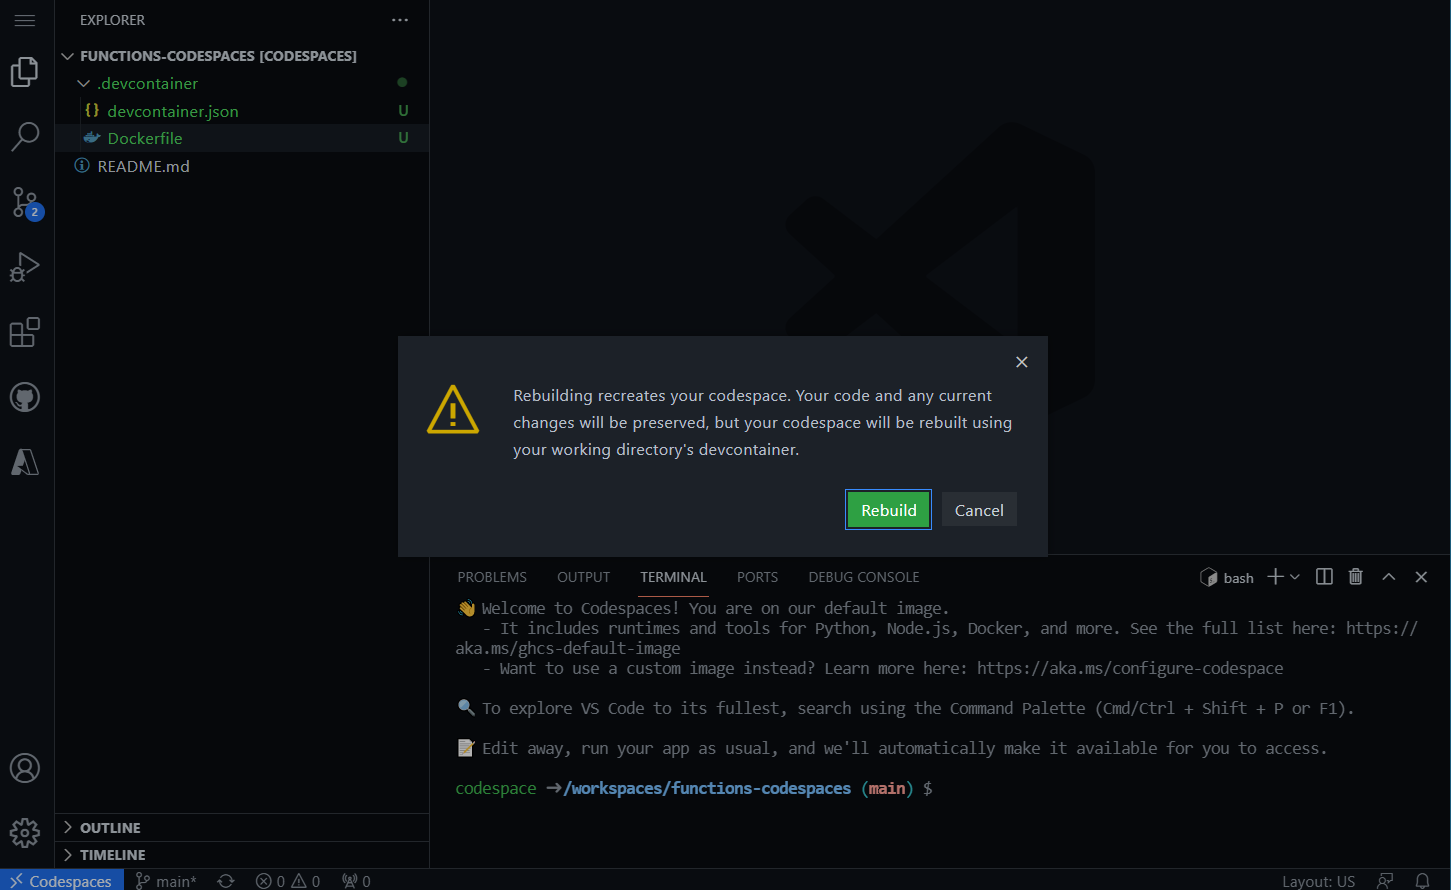
This action will restart the codespace and apply the changes. This might take few seconds. And once it is done, you can create a new Azure Function using the command pallette.
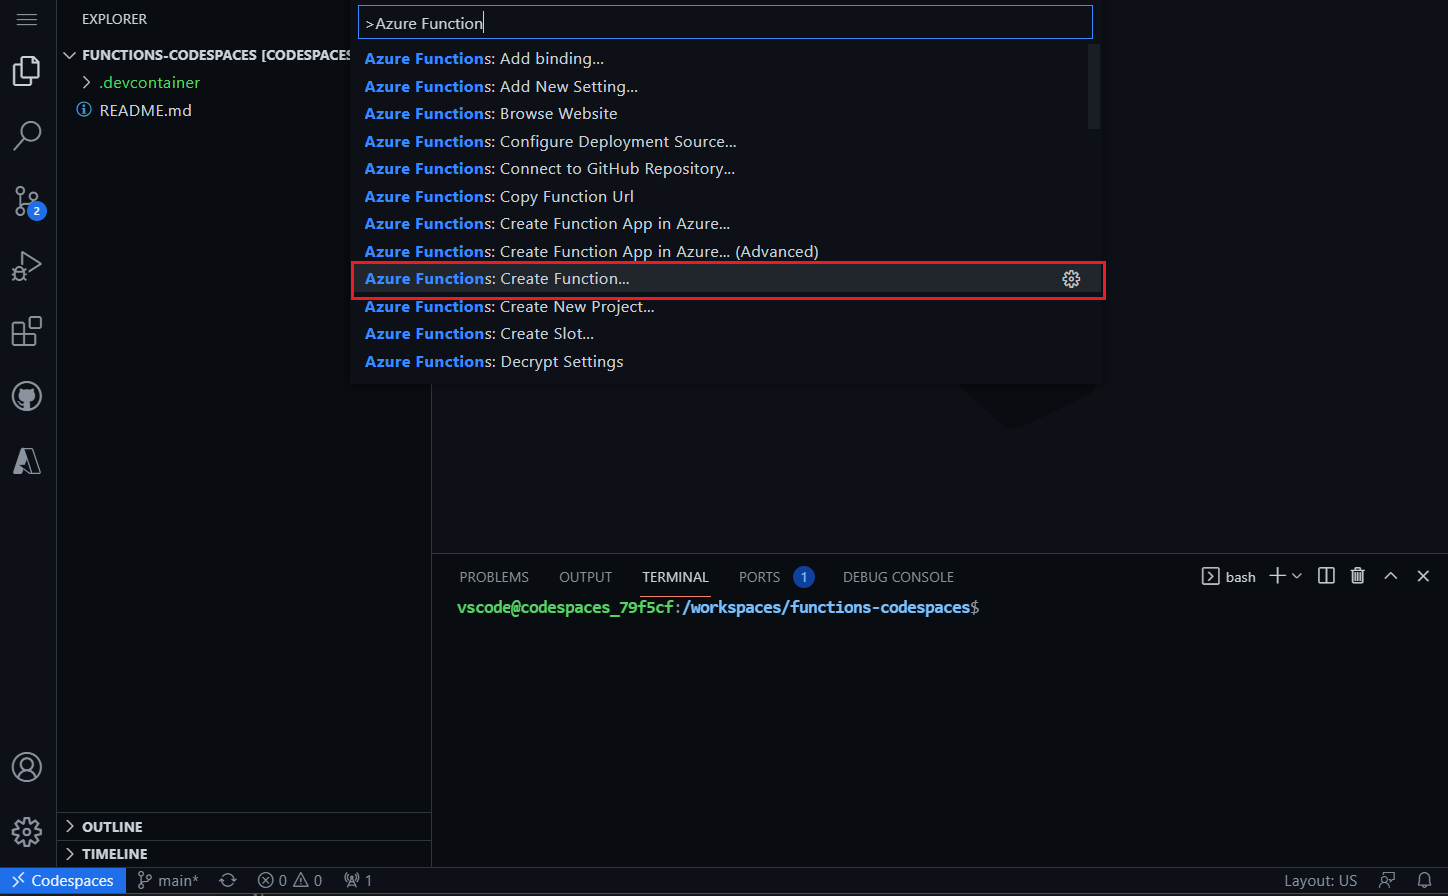
Codespace will show a confirmation to create new project and you can click on Yes. This will bring you to the Azure Function creation prompt and you can choose the Language first - C# in this demo. Next we need to choose the .NET Core version. .NET Core 3 LTS and .NET 5 is available - for this demo I am choosing .NET Core 3 LTS. Next select the trigger of Azure Function - HttpTrigger. Next you need to provide the name for the function and project. And finally the Function Authentication level - anonymous.
Once it is completed, a function with Http Trigger will be created. And your development environment is up and running - the environment is same as your VS Code development environment. With the help of port forwarding feature, you can debug and test your function - all with the help of your browser.
Few days back there was a Tweet from Nat Friedman - Inviting startups to move their development from local development to Codespaces. Checkout if you’re interested.
Happy Programming :)
Copyright © 2025 Anuraj. Blog content licensed under the Creative Commons CC BY 2.5 | Unless otherwise stated or granted, code samples licensed under the MIT license. This is a personal blog. The opinions expressed here represent my own and not those of my employer. Powered by Jekyll. Hosted with ❤ by GitHub