How to secure Azure Functions with Azure Active Directory B2C
April 16, 2022 by Anuraj
Azure Functions Serverless
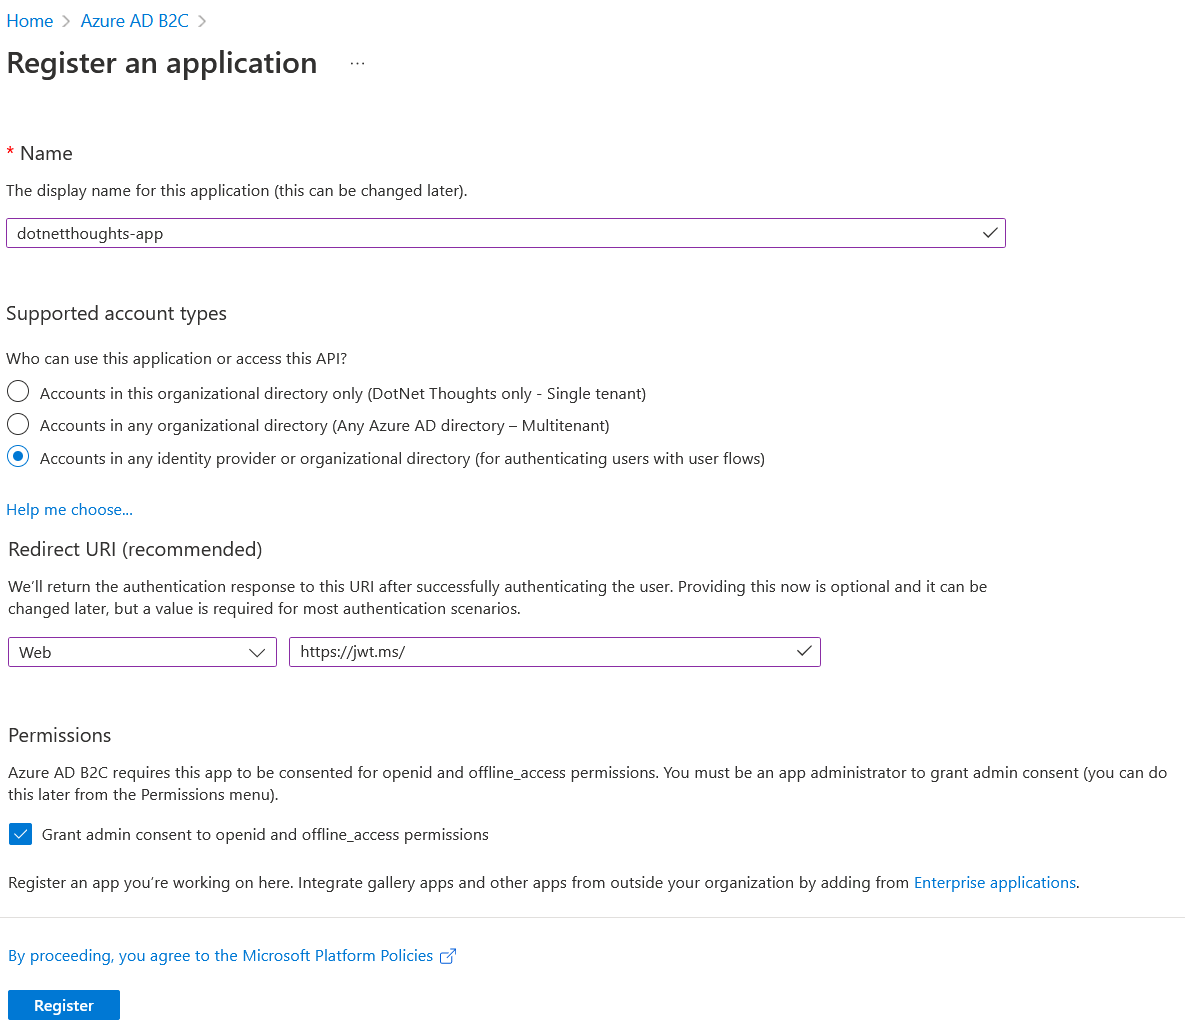
This post is about securing Azure Functions with Azure Active Directory B2C. First we need to create an application in Azure B2C. We can do this opening Azure B2C tenant and click on the Applications menu. Next click on the New Registration button. And in the screen provide name, select the Account type as Accounts in any identity provider or organizational directory (for authenticating users with user flows), configure the redirect URL as https://jwt.ms/ - it is because I will be getting the token from this website and using the token I am accessing the azure function, keep the check on Grant admin consent to openid and offline_access permissions option under permissions.
Once it is done, we need to configure authentication token types for the app and create a secret for the app. Select the Authentication menu, in the screen under Implicit grant and hybrid flows set the Access Tokens and ID Tokens options. And save the changes.

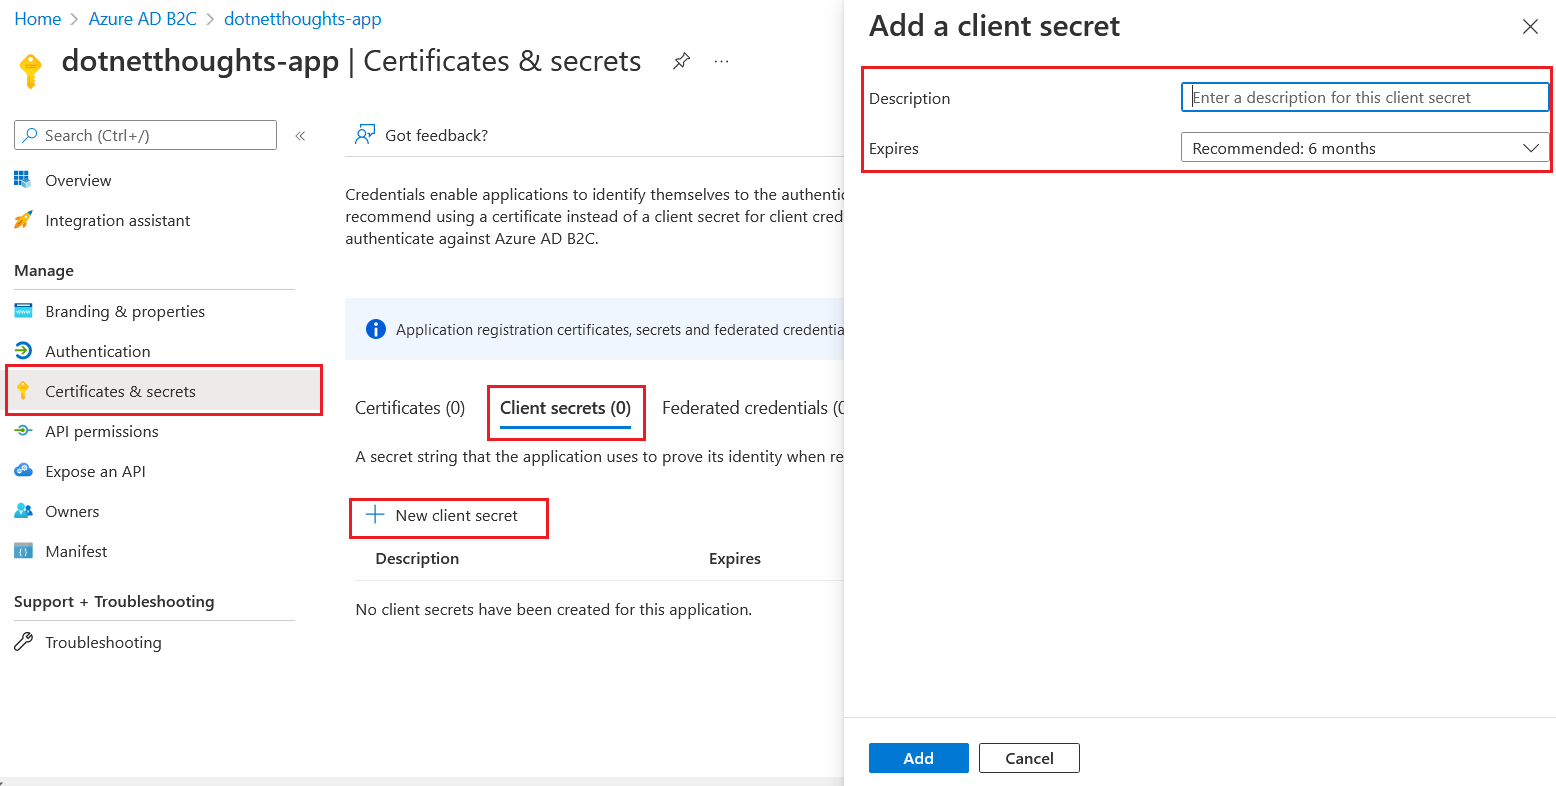
To create the secrets, click on the Certificates & Secrets menu and then click on Client Secrets menu. To create secret click on New client secret button. From the screen set a name and expiration period for the secret.
Once we created it. We need to copy the value - Azure portal will not display it again. I already configured user flows in the B2C tenant. If you’re not configured it, I recommend creating and configuring them.
Next create an Azure Function - I am choosing .NET 6.0 as the platform for creating the Function. And I am using Azure Portal to develop it. And I am using HTTP Triggered functions.
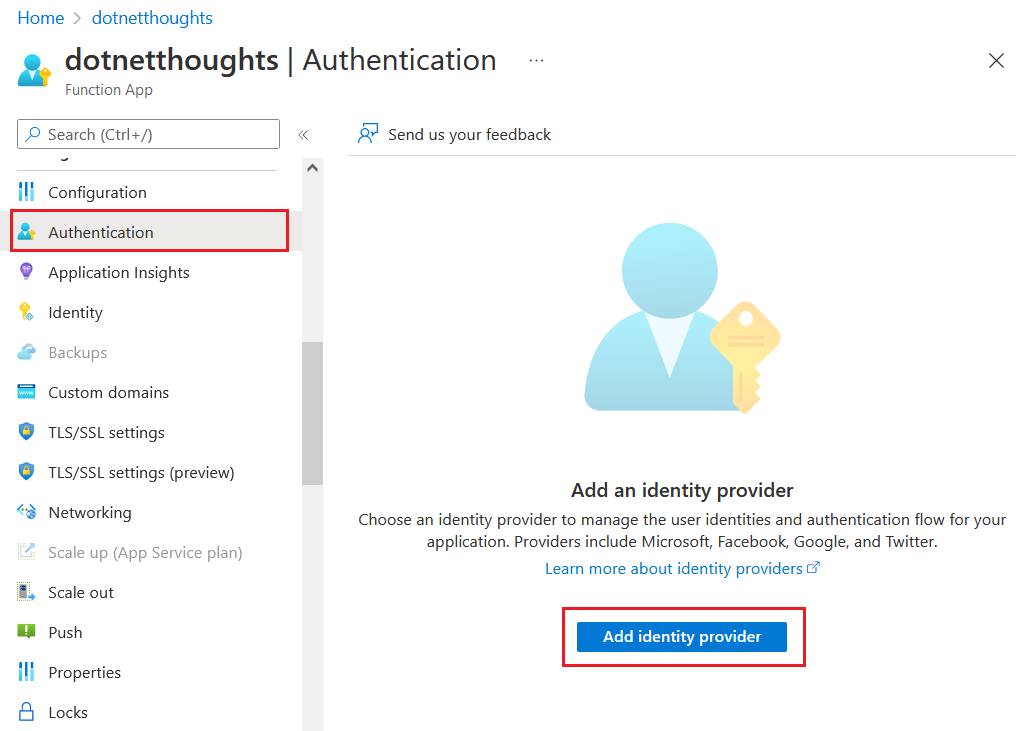
Once the Function App is created, click on the Authentication menu. And then click on the Add identity provider button.
In the Add an identity provider screen, choose OpenID Connect. And we need to configure a set of values. You can get the Document URL by clicking on the Endpoints button on the App Overview and look for the value Azure AD B2C OpenID Connect metadata document it will be something like this - https://demo.b2clogin.com/demo.onmicrosoft.com/<policy-name>/v2.0/.well-known/openid-configuration. We need to configure it with your policy name - in my case it is B2C_1_Signup_And_SignIn. Next we need to configure the Client Id and Client Secret.
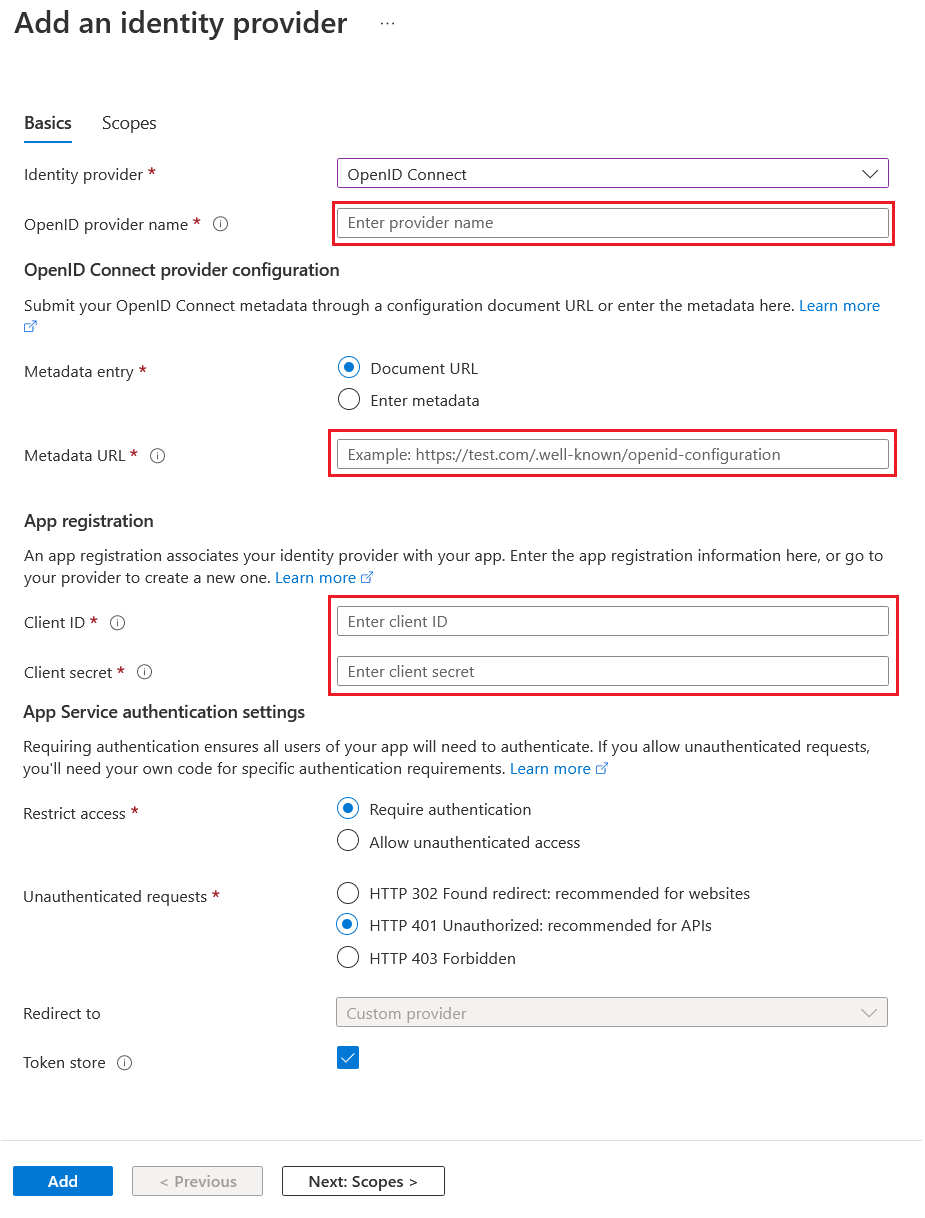
Finally we need to Unauthenticated requests setting to second option HTTP 401 Unauthorized: recommended for APIs since we are working with Azure Functions. And click on the Add button - we can ignore the scopes option now. Once we added it, we will be able to see a screen like this.
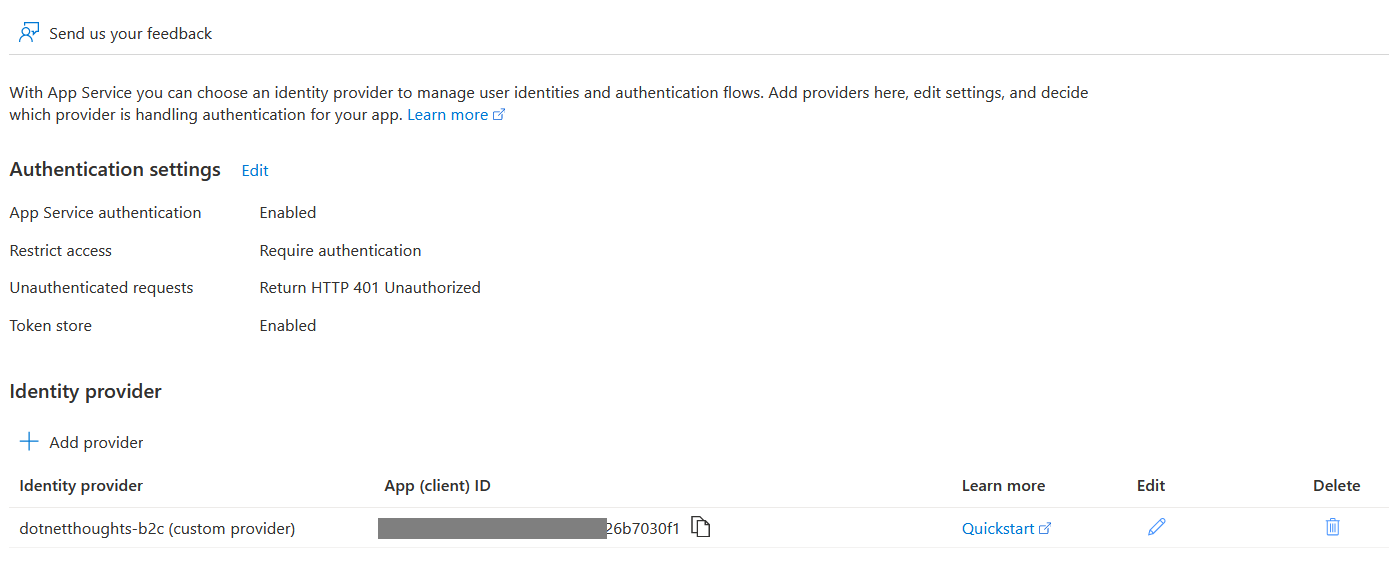
Next let us invoke the Azure Function using Postman. Since I am providing any token - I should get a 401 error by invoking the function from Postman.

To get a token click on the Azure B2C - User Flows. Select the B2C_1_Signup_And_SignIn user flow we already created. From the screen choose the Run user flow option and select the app and make sure the Reply URL is the one we configured in the earlier step.
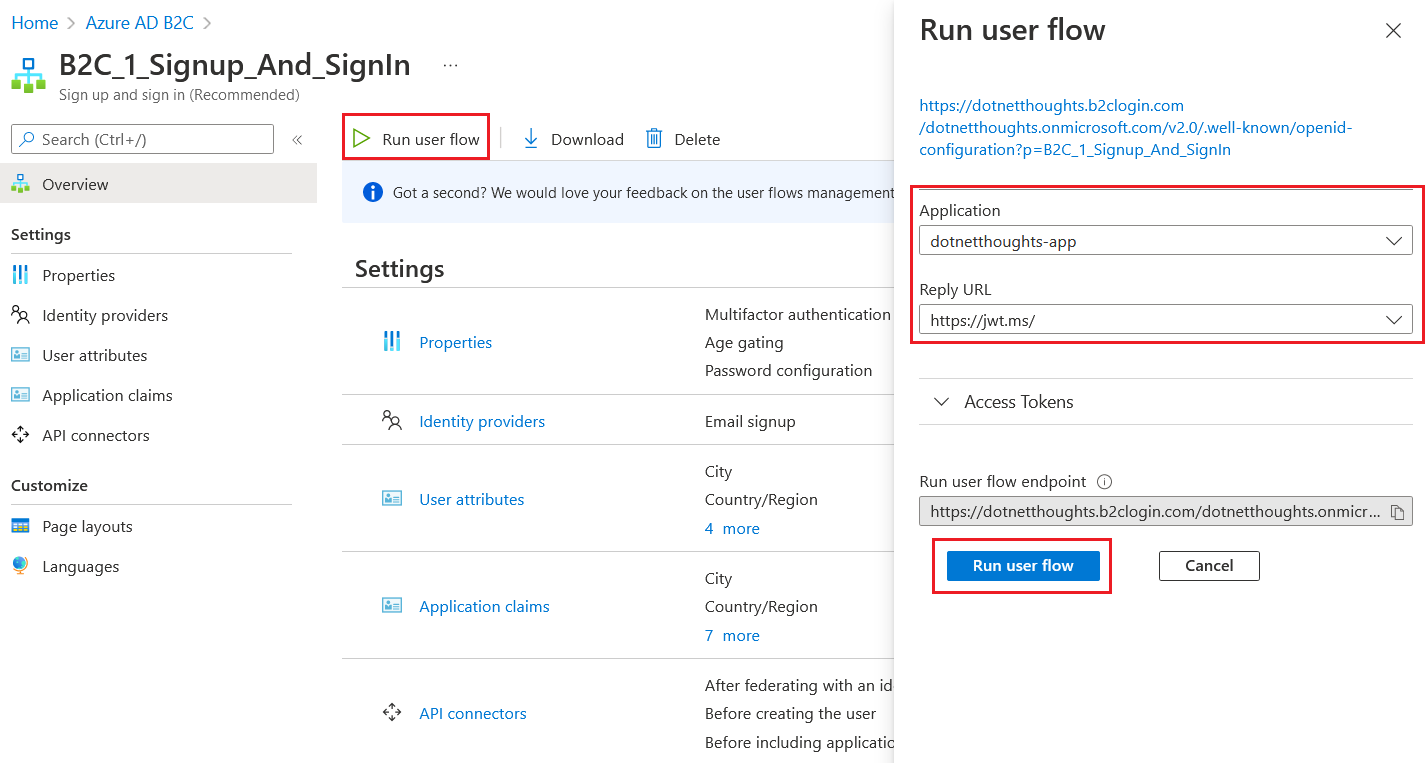
Clicking on Run user flow button will open up a new tab, with a login screen. Since I already completed the registration - I am logging in with the user name and password. Once the login is successful, Azure B2C will redirect us to the https://jwt.ms page which is configured as the reply URL. In this page we will get Token.
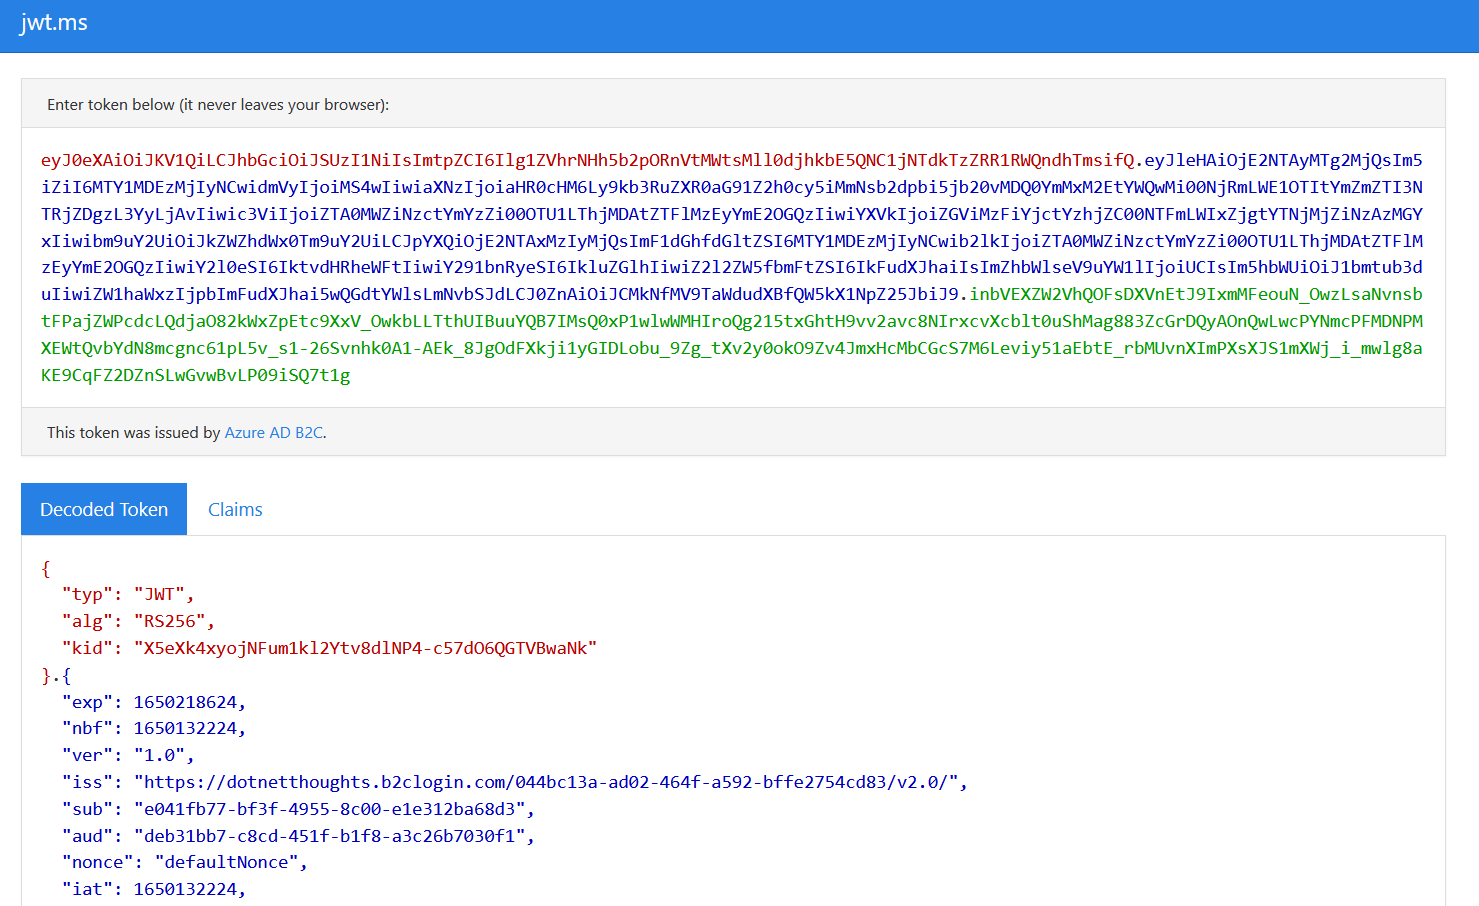
Copy the entire token and use it as Authorization header with Bearer term in postman and invoke the function again.
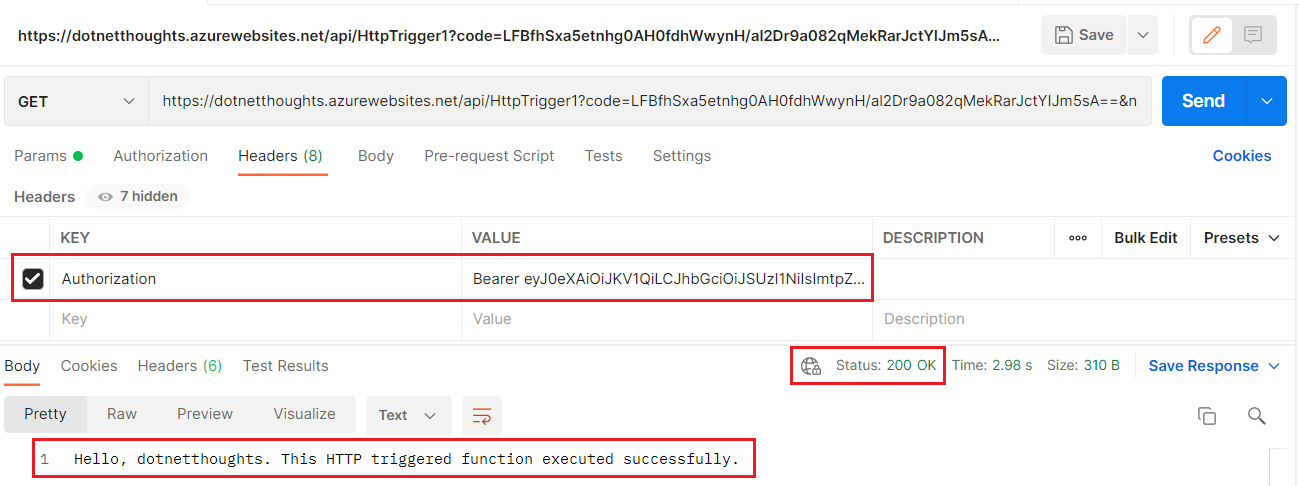
Now the function validated the token and execute the Function. We can access the user details inside the function using the req.HttpContext.User object. Here is the code for enumerating all the claims.
using System.Security.Claims;

ClaimsPrincipal claimIdentity = req.HttpContext.User;

log.LogInformation("User ID: " + claimIdentity.Identity.Name);

log.LogInformation("Claim Type : Claim Value");

foreach (Claim claim in claimIdentity.Claims)
{
    log.LogInformation(claim.Type + " : " + claim.Value + "\n");
}
Happy Programming :)
Found this useful? Share it with your network!
Copyright © 2026 Anuraj. Blog content licensed under the Creative Commons CC BY 2.5 | Unless otherwise stated or granted, code samples licensed under the MIT license. This is a personal blog. The opinions expressed here represent my own and not those of my employer. Powered by Jekyll. Hosted with ❤ by GitHub
