Page Remote Validation in ASP.NET Core Identity
April 01, 2021 by Anuraj
PageRemote RazorPages AspNetCoreIdentity
This article will discuss about implementing Page Remote validation in ASP.NET Core Identity. ASP.NET Core Identity is a membership system that adds login functionality to ASP.NET Core apps. As you might know, in ASP.NET Core when you’re using ASP.NET Core Identity - it is coming as a Razor Class Library. One of the issue is if a user is trying to register with an already existing email address - he or she need to complete the form and submit to view the validation error message. This is not a good experience for the user. In ASP.NET Core MVC there is an attribute - Remote - available to run validation in such scenarios. In Razor Page remote validation attribute is not available. Instead there a Page Remote attribute. In this article you will learn how to implement Page Remote attribute for an ASP.NET Core identity project.
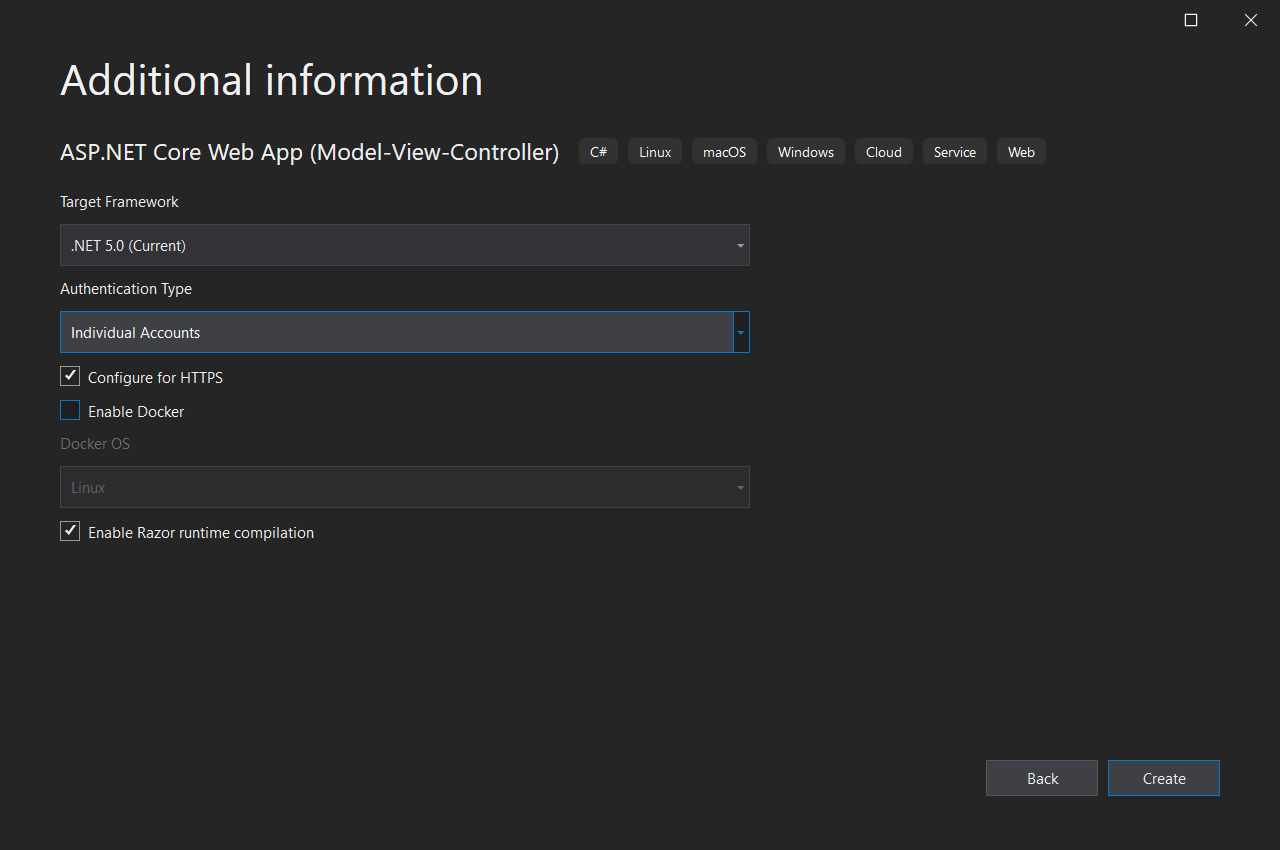
So first you need to create an ASP.NET Core MVC project with Authentication Type - Individual Accounts.
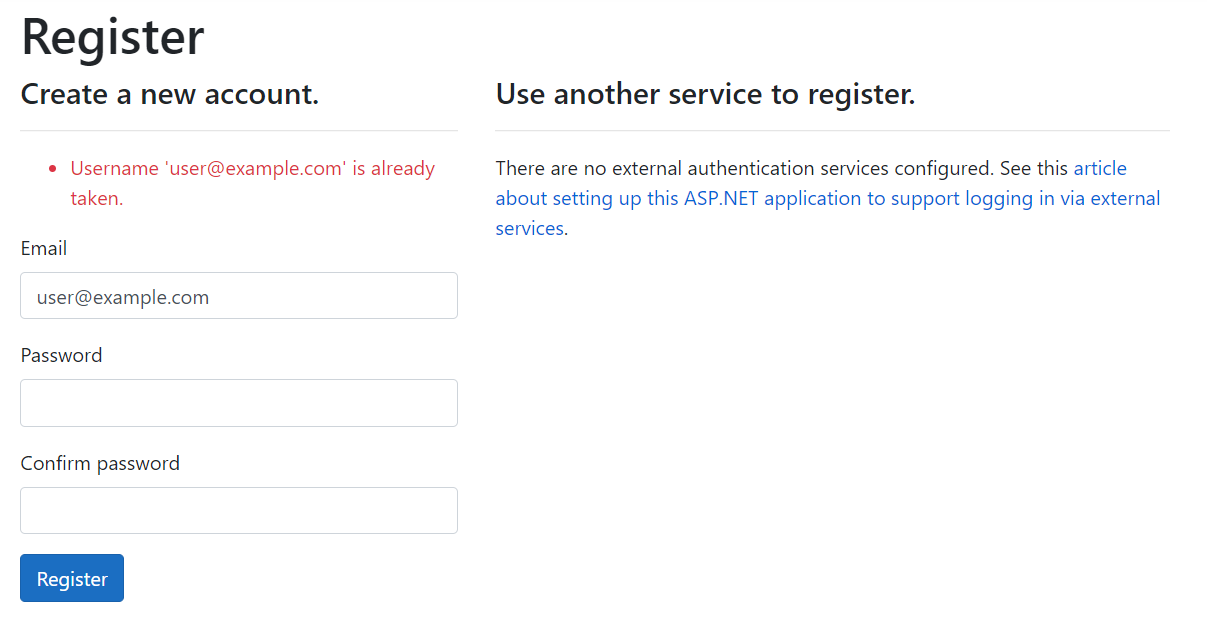
Once it is created, you can register one user with an email like this - user@example.com. You might need to run migrations as well. And once you confirm the account, try to create another account with same email address - it will show error message like this - but only after you submit the page.
As identity is a separate class library, you need to scaffold the Registration Page and customize it. To scaffold the Register page, right click on the project and select Add menu, and click on New Scaffolded Item. From the Add New Scaffolded Item dialog choose Identity and click on Add button. This process will install some packages to the project. Once it is added, Visual Studio will display an Add Identity dialog.
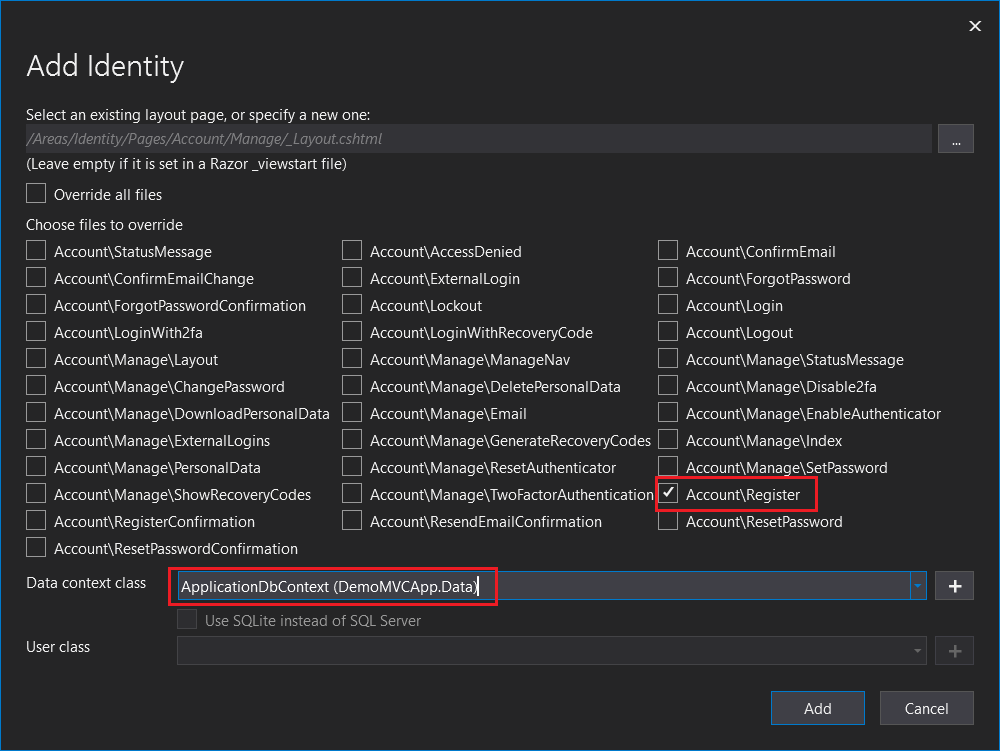
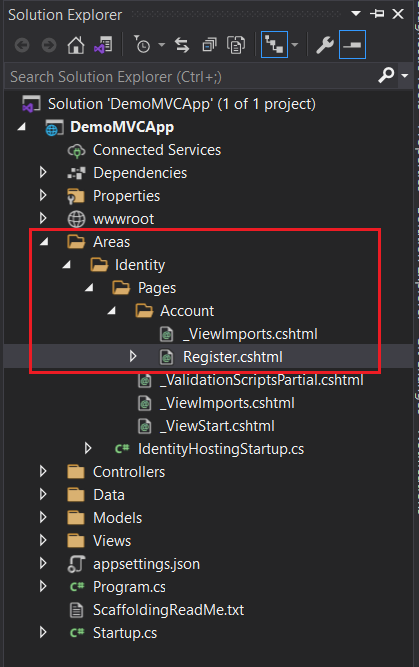
From this dialog, choose the Account\Register file and select the Data context class. After selecting both these options, click on Add button. This will scaffold the Register.cshtml page under Areas/Identity/Pages/Account folder.
Open the Register.cshtml.cs file. And add following code to the email property
[PageRemote(
    ErrorMessage = "Email address already exists",
    HttpMethod = "post",
    PageHandler = "CheckEmail"
)]
Next you need to implement the CheckEmail method, which will verify the email provided in the textbox is already exists in the database or not. Here is the implementation of CheckEmail method.
public JsonResult OnPostCheckEmail()
{
    var user = _userManager.FindByEmailAsync(Input.Email).Result;
    var valid = user == null;
    return new JsonResult(valid);
}
When a user enters email address and move out of the textbox, Razor Page will execute the PageHandler method configured in the PageRemote attribute. In the OnPostCheckEmail method implementation using UserManager object - finding the user with the email address. And if found returns false otherwise true. Based on the response from this method the Page Remote attribute will show the error message in UI. Now let’s run the application and check whether it is working properly or not.
Once again try to register with same email address, but nothing happens. ASP.NET Core didn’t display any error messages. Since you have configured everything correctly the app should display an error message. Let us debug the problem. First put a break point on the OnPostCheckEmail method and run again. Nothing happened and Visual Studio didn’t hit the break point as well. So the request is not reaching the Razor Page backend code. Next check the developer console, you will be able to see a HTTP 400 error. It is because the request missing the Anti forgery token - which is expected when you’re sending a POST request. You can include it in the attribute with AdditionalFields parameter, like this.
[PageRemote(
    ErrorMessage = "Username already exists",
    HttpMethod = "post",
    PageHandler = "CheckUsername",
    AdditionalFields = "__RequestVerificationToken"
)]
Let us run the application again and verify it. But still it is not working - you will get the same error in the browser developer console. Because the value of the __RequestVerificationToken field is empty.
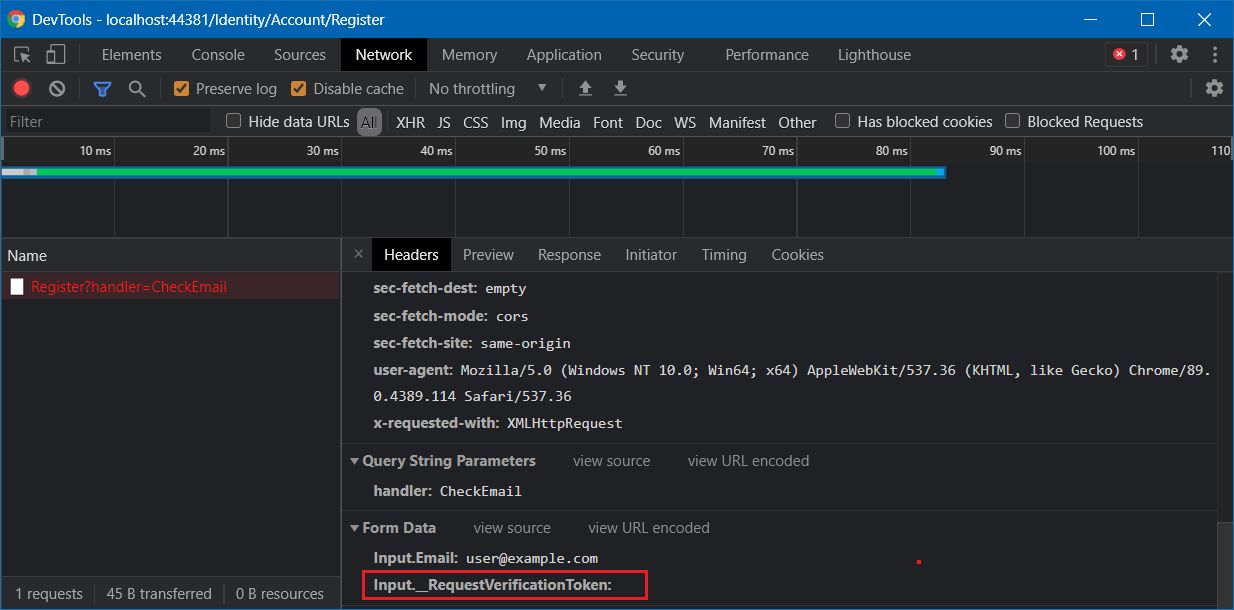
If you look into the source of the Page, unlike other elements - the Input. prefix is not added for the __RequestVerificationToken hidden field. There are two solutions for this problem.
Using an extra property in the code behind.
You can fix this issue using a new property in the Register.cshtml.cs page instead of using the InputModel.Email property. And in the OnPostAsync method, assign the value of this property to InputModel.Email, here is the implementation.
In the Register.cshtml.cs page add the following code.
[Required]
[EmailAddress]
[Display(Name = "Email")]
[PageRemote(
    ErrorMessage = "Email address already exists",
    HttpMethod = "post",
    PageHandler = "CheckEmail",
    AdditionalFields = "__RequestVerificationToken"
)]
[BindProperty]
public string EmailInput { get; set; }

public JsonResult OnPostCheckEmail()
{
    var user = _userManager.FindByEmailAsync(EmailInput).Result;
    var valid = user == null;
    return new JsonResult(valid);
}

public async Task<IActionResult> OnPostAsync(string returnUrl = null)
{
    returnUrl ??= Url.Content("~/");
    ExternalLogins = (await _signInManager.GetExternalAuthenticationSchemesAsync()).ToList();
    if (ModelState.IsValid)
    {
        Input.Email = EmailInput;
        //Rest of the code removed for brevity.
    }

    // If we got this far, something failed, redisplay form
    return Page();
}
And remove all the attributes from the Email property in the InputModel class. And you need to modify some code in the Register.cshtml file as well, like this.
<div class="form-group">
    <label asp-for="EmailInput"></label>
    <input asp-for="EmailInput" class="form-control" />
    <span asp-validation-for="EmailInput" class="text-danger"></span>
</div>
Now you can run the application and you will be able to see the error message when user put the same email address in the Input box.
By modifying the Anti forgery form field name.
In the above method, you need to modify few places. And if you need to apply Page Remote for multiple properties it is error prone as well. Here is an alternate method. In this method instead of modifying the Page property, you can modify the Anti forgery form field name. So the Razor Page runtime can recognize it along with other properties in the InputModel class.
To do this open the IdentityHostingStartup.cs file under the Areas/Identity folder. In this file configure the FormFieldName of the Antiforgery middleware like this.
public class IdentityHostingStartup : IHostingStartup
{
    public void Configure(IWebHostBuilder builder)
    {
        builder.ConfigureServices((context, services) =>
        {
            services.AddAntiforgery(options =>
            {
                options.FormFieldName = "Input.__RequestVerificationToken";
            });
        });
    }
}
Now let’s run the application again and verify you’re able to see the error message when you try to use the same email address.
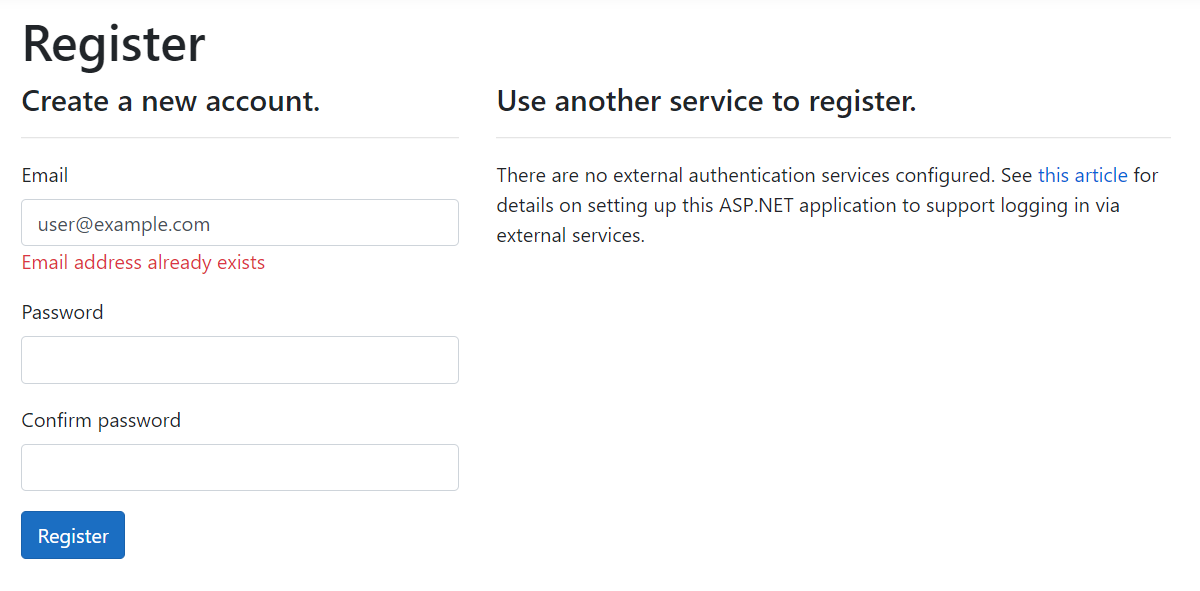
I felt the second approach is more flexible and easy. Since most of the scaffolded Pages are using the model class as InputModel it will work with almost all the HTTP Post scenarios. It has a side effect - this configuration is applied for our ASP.NET Core main project as well. But that won’t cause any issues. Which method you prefer to implement and why? Let me know through the comments.
Happy Programming :)
Found this useful? Share it with your network!
Copyright © 2026 Anuraj. Blog content licensed under the Creative Commons CC BY 2.5 | Unless otherwise stated or granted, code samples licensed under the MIT license. This is a personal blog. The opinions expressed here represent my own and not those of my employer. Powered by Jekyll. Hosted with ❤ by GitHub
