Working with Foundry local and Microsoft Extensions AI
April 25, 2026 by Anuraj
AI Microsoft Foundry dotnet
In this blog post, we will explore how to work with Foundry local and Microsoft Extensions AI. In this post we will be implementing a conversational .NET console chat app using an OpenAI and foundry local.
Running the foundry service
First we need to run the foundry service if it is not running, we can do this with the command.
foundry service start
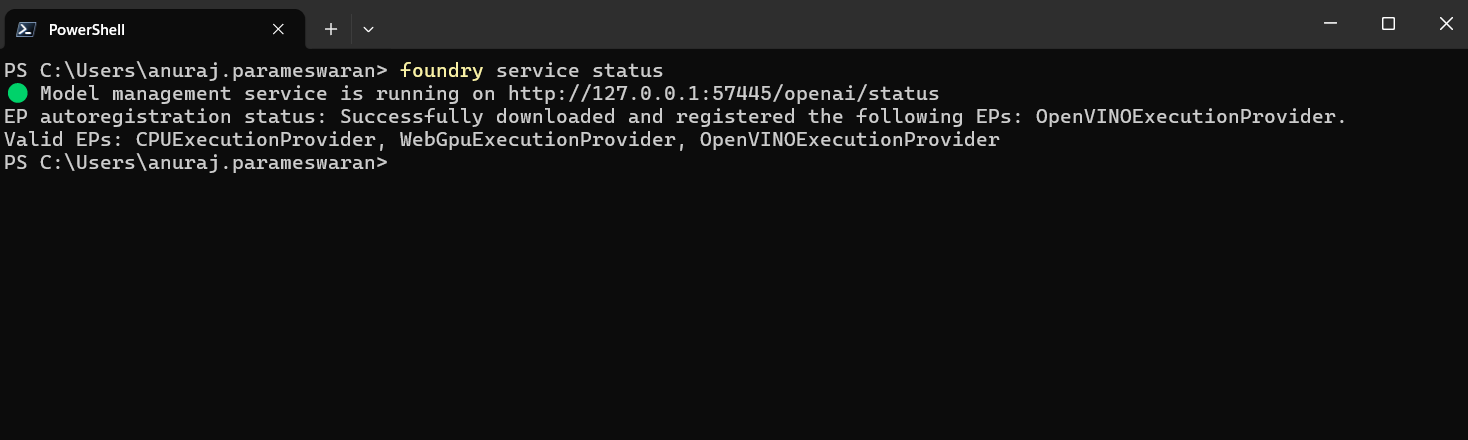
We can check the service status using the command.
foundry service status
This will display the status and foundry service endpoint which we will be using the code. Here is the screenshot - the port number will be dynamic.
Create the App
Complete the following steps to create a .NET console app to connect to an AI model.
- Run the command
dotnet new console --name Console.Chat- this will create a Console application in a directly Console.Chat. - Next go to the directory using
cd Console.Chatcommand. - Install the required nuget packages.
dotnet package add Microsoft.Extensions.AI
dotnet package add Microsoft.Extensions.AI.OpenAI
Since the foundry local is free - there is no specific configuration required.
Add the app code
This app uses the Microsoft.Extensions.AI package to send and receive requests to the AI model.
- In the
Program.csfile, add the following code to connect and authenticate to the AI model.
var key = "OPENAI_KEY";
//We should be using model Id - not alias
var model = "qwen2.5-0.5b-instruct-openvino-npu:4";
var clientOptions = new OpenAIClientOptions
{
    //The port number will be changing.
    Endpoint = new Uri("http://127.0.0.1:57445/v1")
};
var credential = new ApiKeyCredential(key);
var chatClient = new OpenAIClient(credential, clientOptions)
    .GetChatClient(model).AsIChatClient();
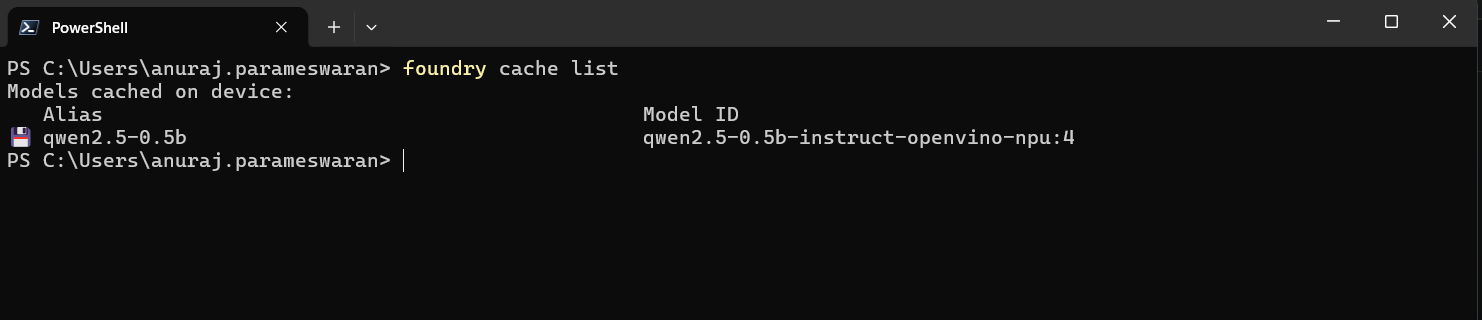
We don’t required a specific key and we should use the model Id - not model alias. We can get the model Id using foundry cache list command.
- Create a system prompt to provide the AI model with initial role context and instructions.
var chatHistory = new List<ChatMessage>
{
    new(ChatRole.System, @"You are a helpful assistant.
        Answer the user's question as best as you can.
        If you don't know the answer, say you don't know.")
};
- Create a conversational loop that accepts an input prompt from the user, sends the prompt to the model, and prints the response completion.
while (true)
{
    Console.WriteLine("You:");
    string? userPrompt = Console.ReadLine();
    chatHistory.Add(new ChatMessage(ChatRole.User, userPrompt));

    Console.WriteLine("Assistant:");
    string response = "";
    await foreach (ChatResponseUpdate item in
        chatClient.GetStreamingResponseAsync(chatHistory))
    {
        Console.Write(item.Text);
        response += item.Text;
    }
    chatHistory.Add(new ChatMessage(ChatRole.Assistant, response));
    Console.WriteLine();
}
- Use the
dotnet runcommand to run the app.
The app prints out the completion response from the AI model. Send additional follow up prompts and ask other questions to experiment with the AI chat functionality.
Happy Programming
If you find my content helpful, consider supporting my work. Your support helps me continue creating valuable resources for the community.

Found this useful? Share it with your network!
Copyright © 2026 Anuraj. Blog content licensed under the Creative Commons CC BY 2.5 | Unless otherwise stated or granted, code samples licensed under the MIT license. This is a personal blog. The opinions expressed here represent my own and not those of my employer. Powered by Jekyll. Hosted with ❤ by GitHub